ALTR Risk Scanner
ALTR Risk Scanner helps organizations manage security risks in their Snowflake account by identifying columns that may contain Personally Identifiable Information (PII). For best results, run Snowflake’s native column classifications and wait three hours before using this app.
The following is a list of sensitive data types that can be identified with this scanner package:
| drivers_license | iban (International Bank Account Number) | |
| imei (International Mobile Equipment Identity) | ip_address | medicare_number |
| name | national_identifier | organization_identifier |
| passport | payment_card | phone_number |
| street_address | tax_identifier | url (website address) |
| vin (vehicle identification number) |
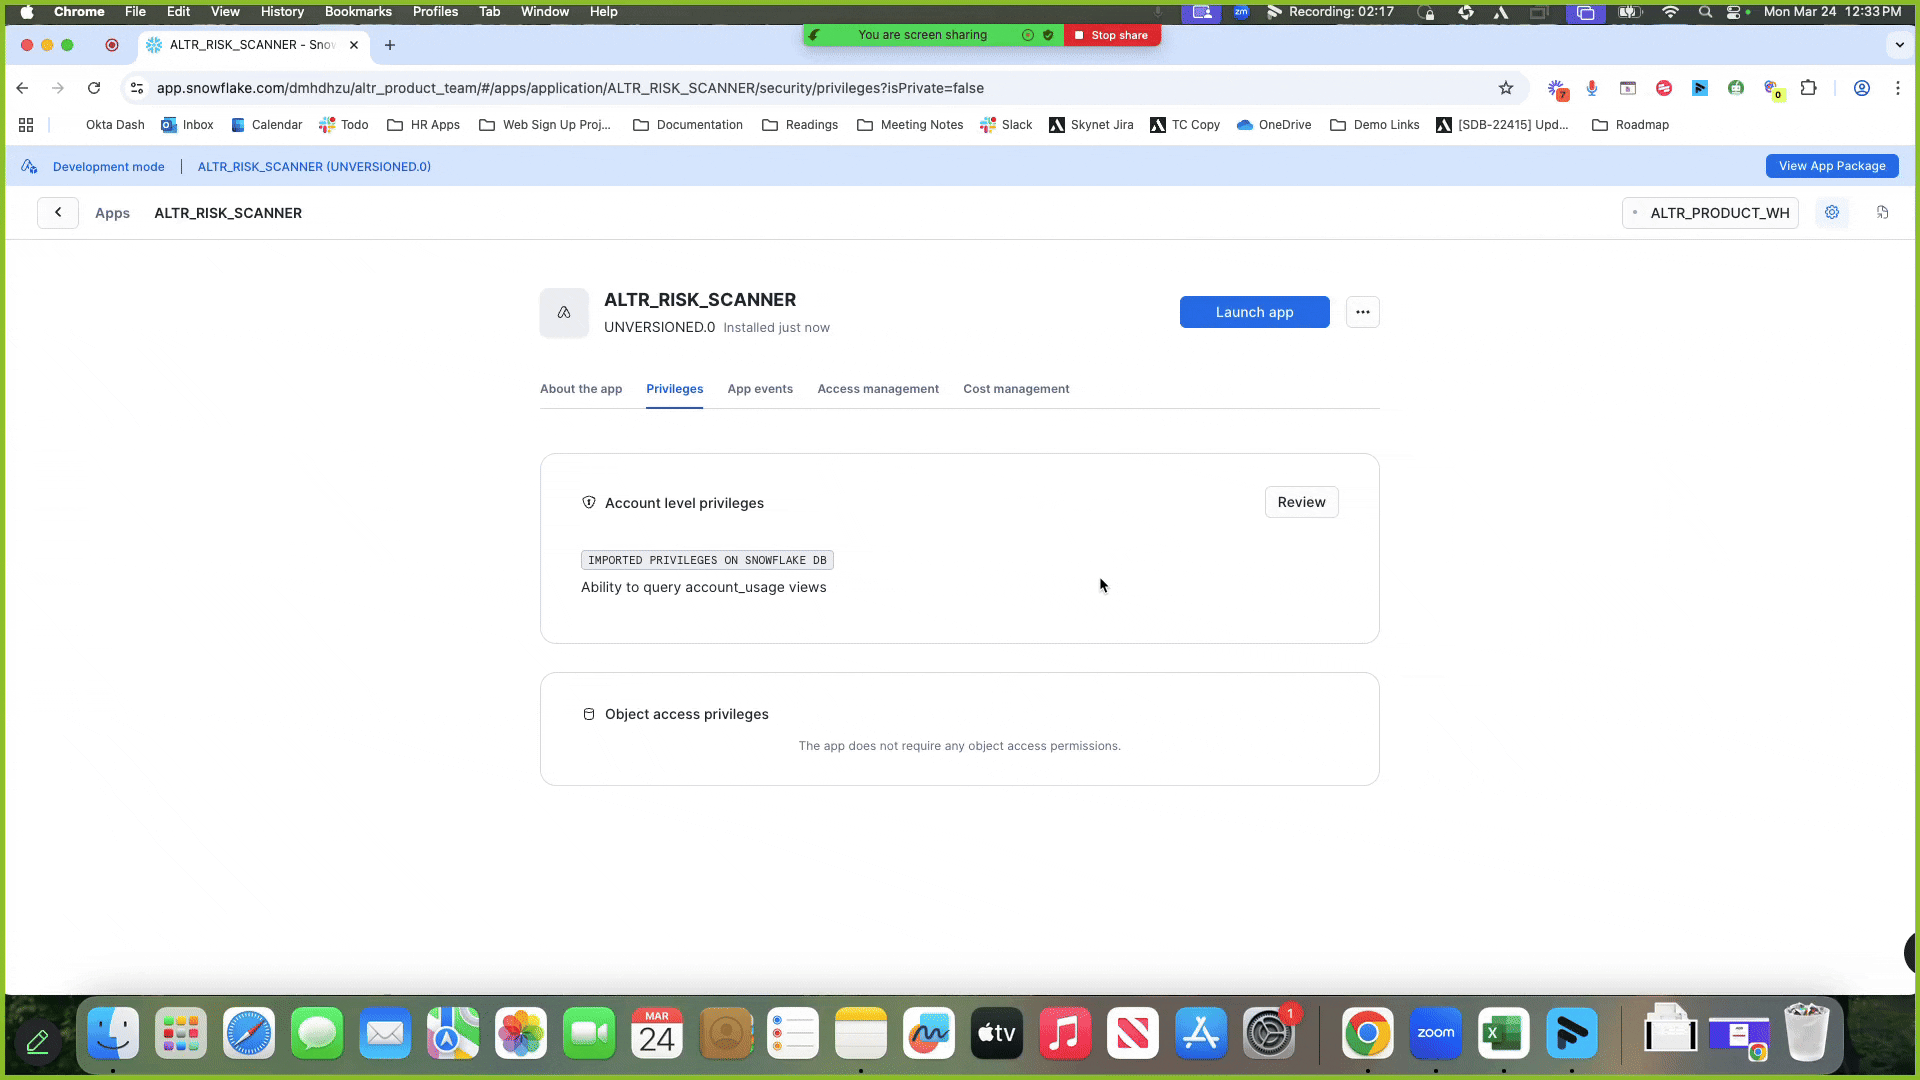
IMPORTED PRIVILEGES ON SNOWFLAKE DB is the privilege required to access the Trust Center in Snowflake and gives the ALTR Risk Scanner the following access:
- View all data on the Snowflake database
- SELECT for various views in the
ACCOUNT_USAGEschema, includingpolicy_references,tag_references,tables,columns,data_classification_latestandtable_dml_history.These views allow us to identify which data objects are not protected by access policies and which objects might contain personally identifiable information (PII) according to Snowflake data classifications. - View usage and costs information associated with the consumer account. The Risk Scanner does not read or record this information.
This topic includes the steps to use the ALTR Risk Scanner package, including how to
- Grant privileges and register the Trust Center plugin
- Enable and run the scanner package
- Review results
- Classify and protect sensitive data
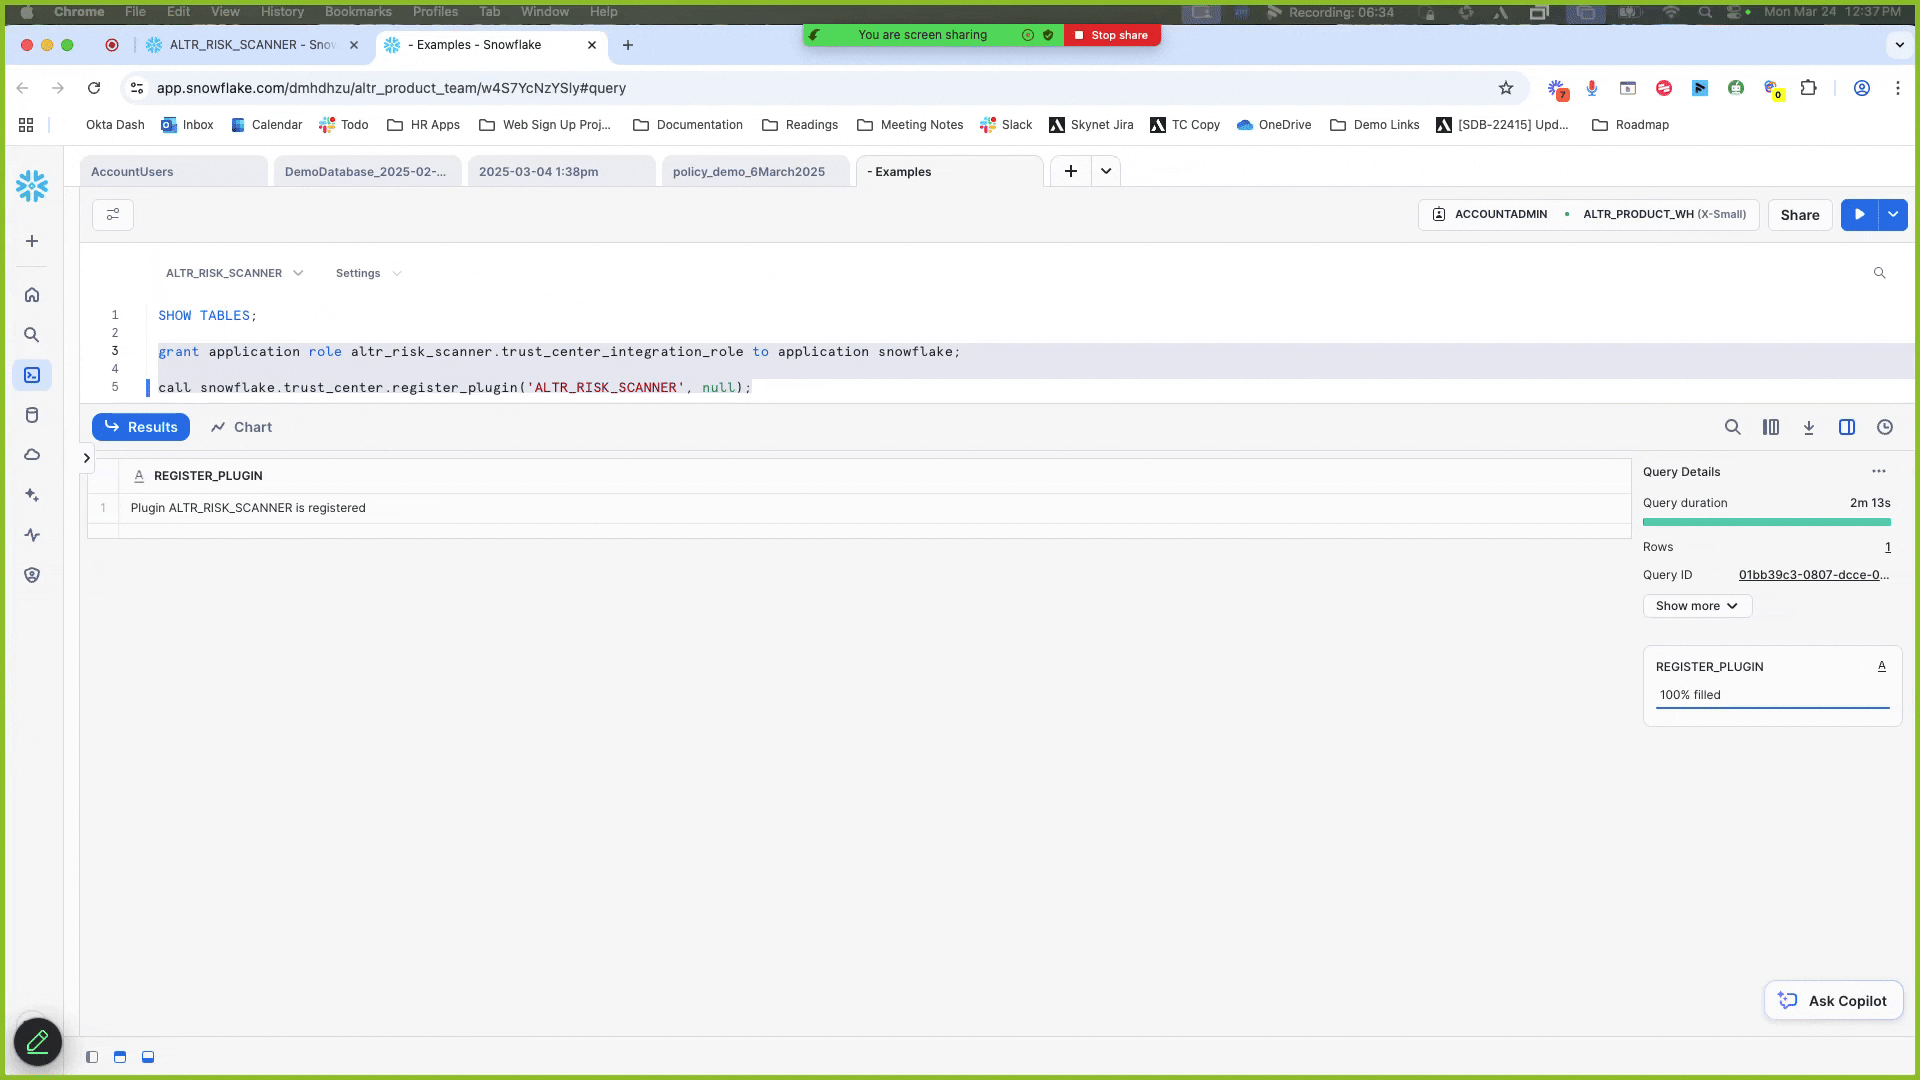
1. Grant Privileges and Register the Trust Center Plugin
Section titled “1. Grant Privileges and Register the Trust Center Plugin”Grant the scanner package the “application” role with the IMPORTED PRIVILEGES ON SNOWFLAKE DB privilege to access the Trust Center in Snowflake.
To grant privileges and register the Trust Center plugin:
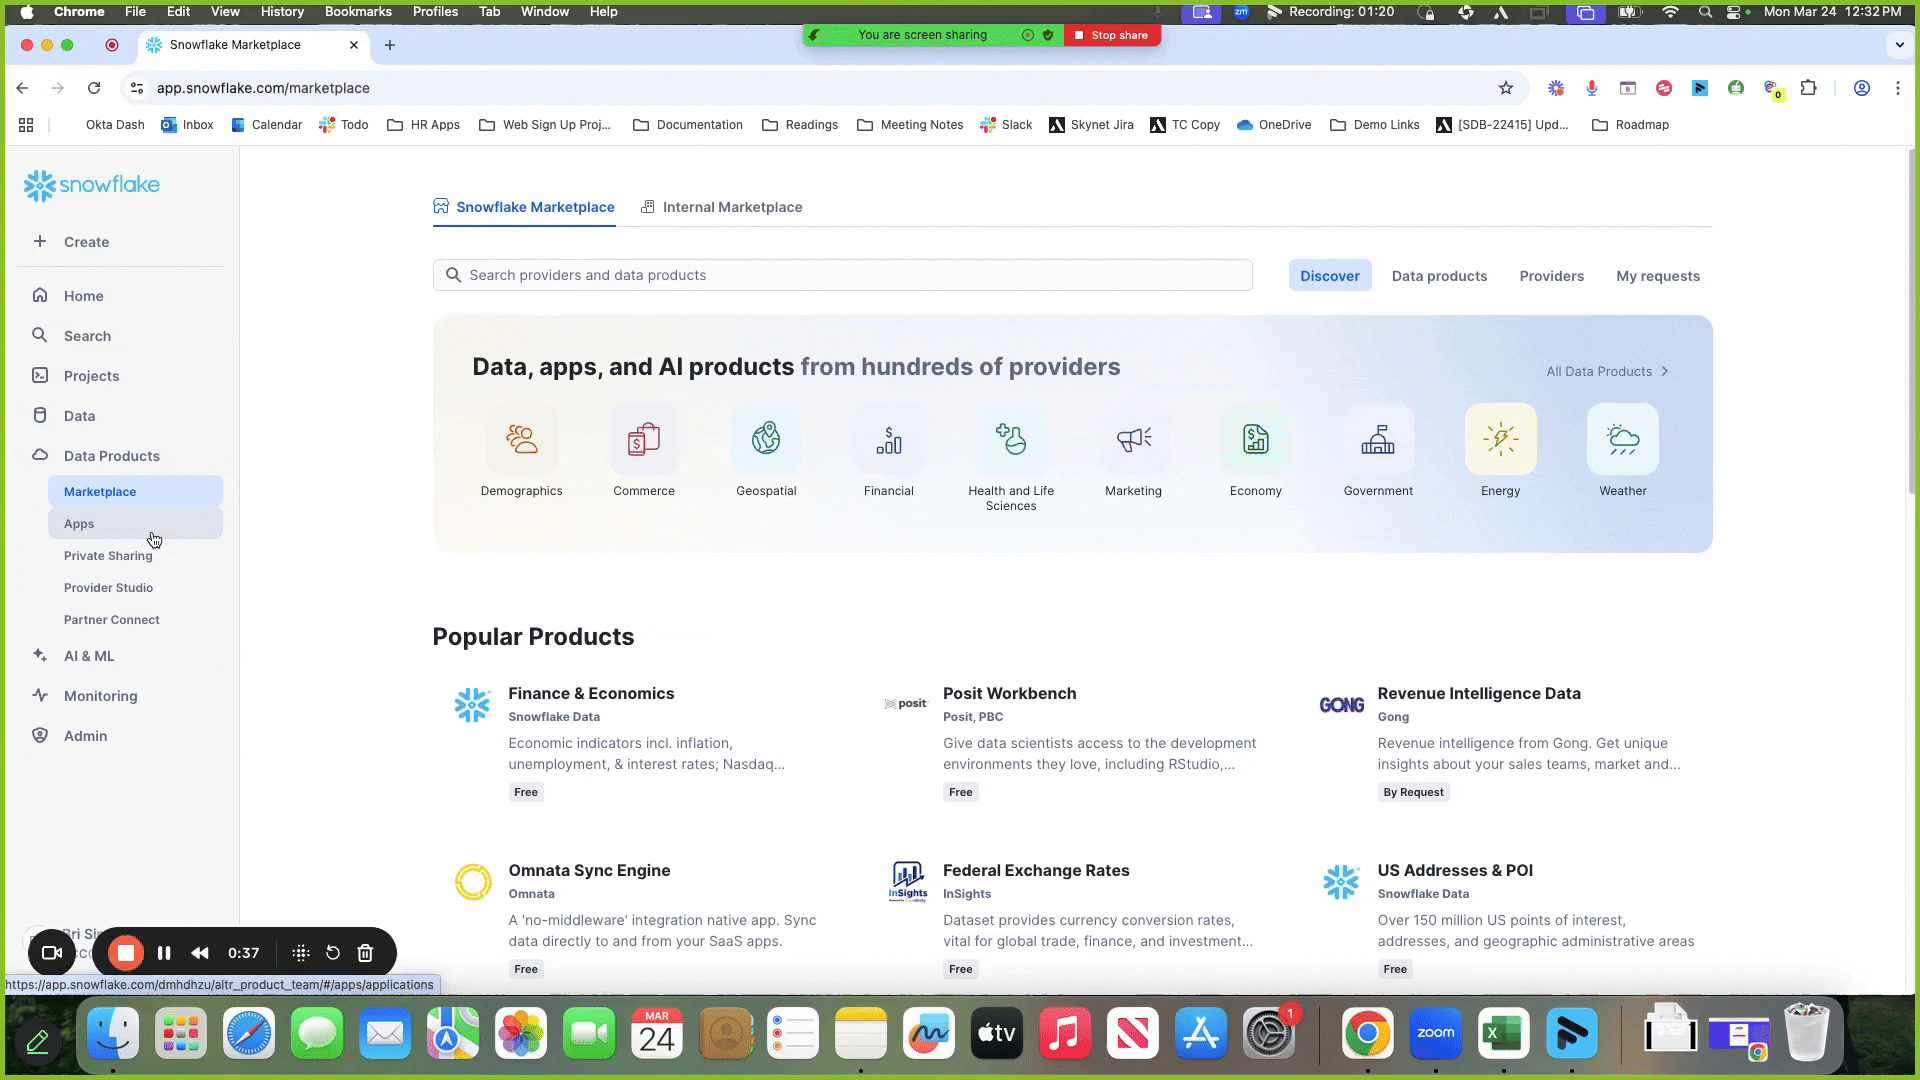
- Install the Risk Scanner from the Trust Center marketplace.
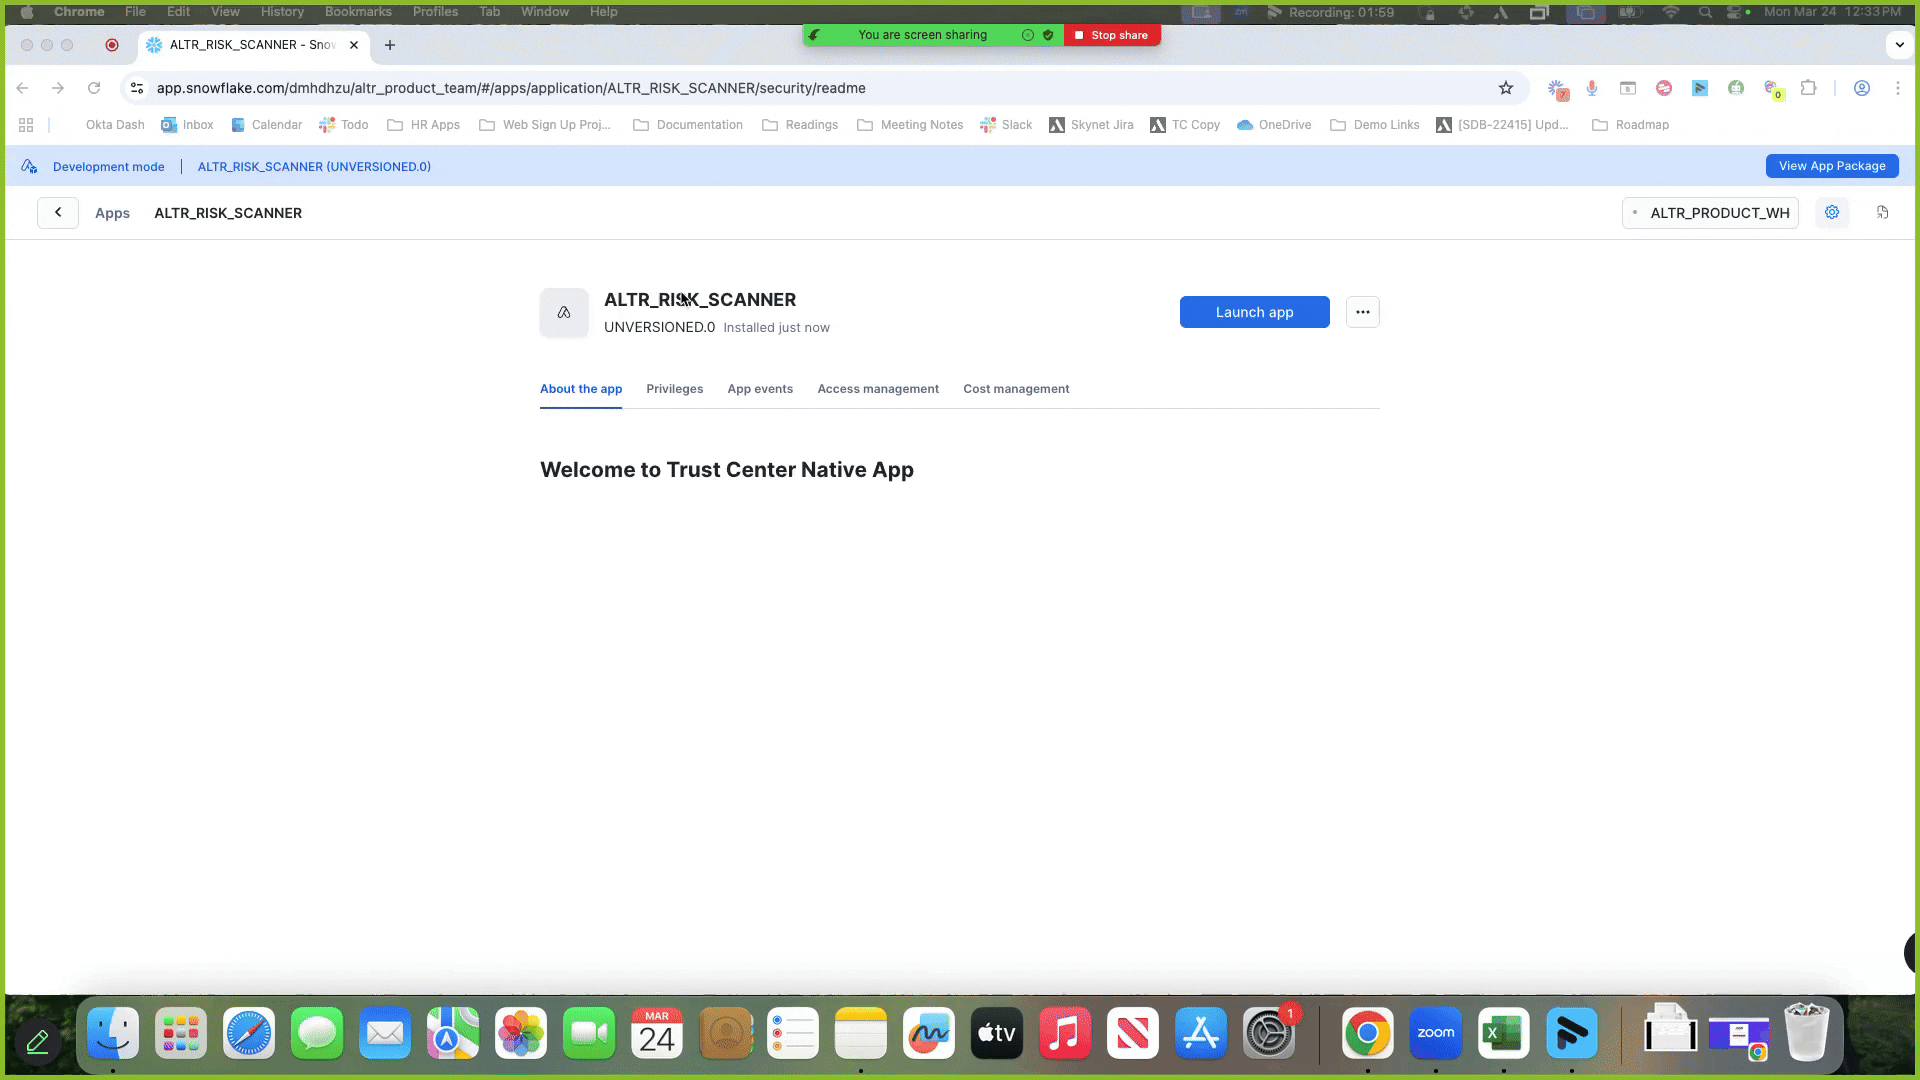
- Select Data ProductsApps in the Navigation menu.
- Select ALTR_RISK_SCANNER under Installed Apps .
- Click the Privileges tab to view the access required for the scanner package.
- Click Review ; a modal displays asking for the ability to query the account usage views in your Snowflake account.
- Turn on the Granted switch to grant
IMPORTED PRIVILEGES ON SNOWFLAKE DB. - Click Update Privileges .
- Refresh the page and make sure you see the word “Granted” in green to indicate that the privileges were updated.
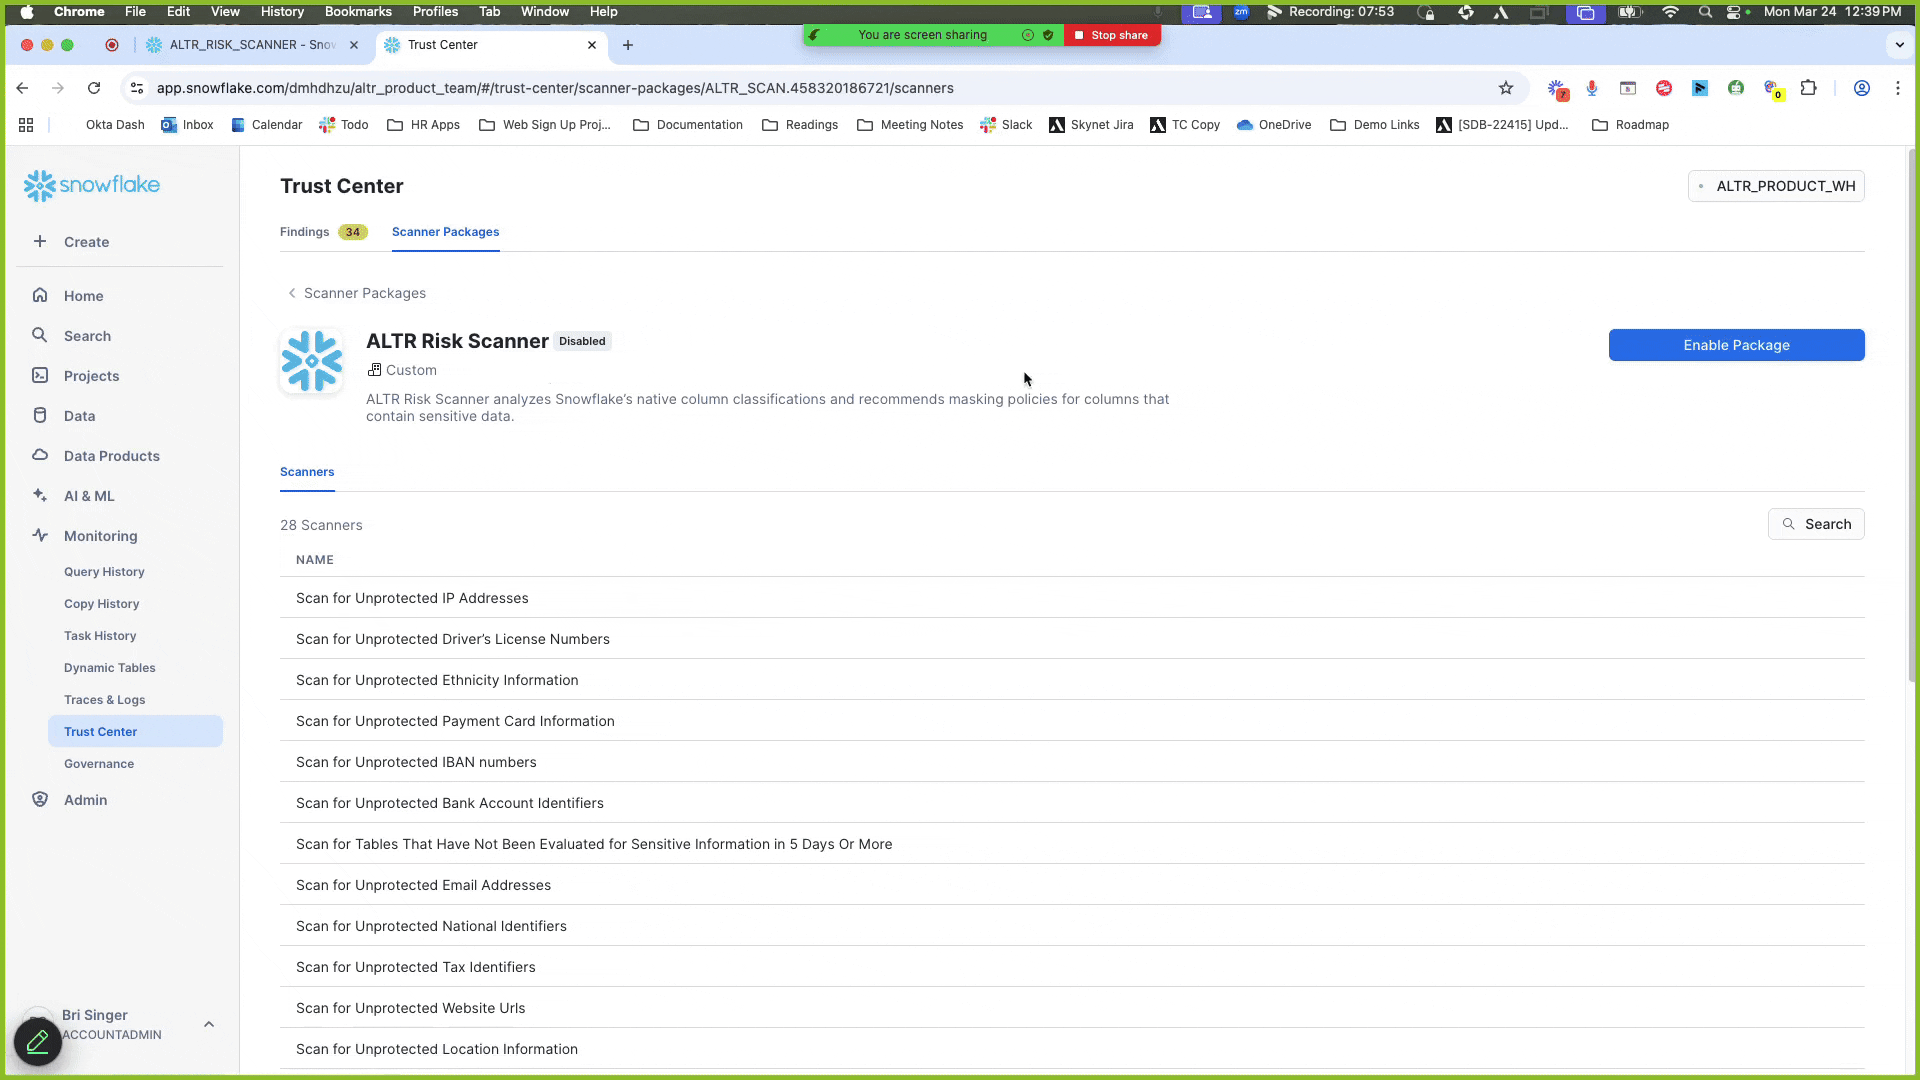
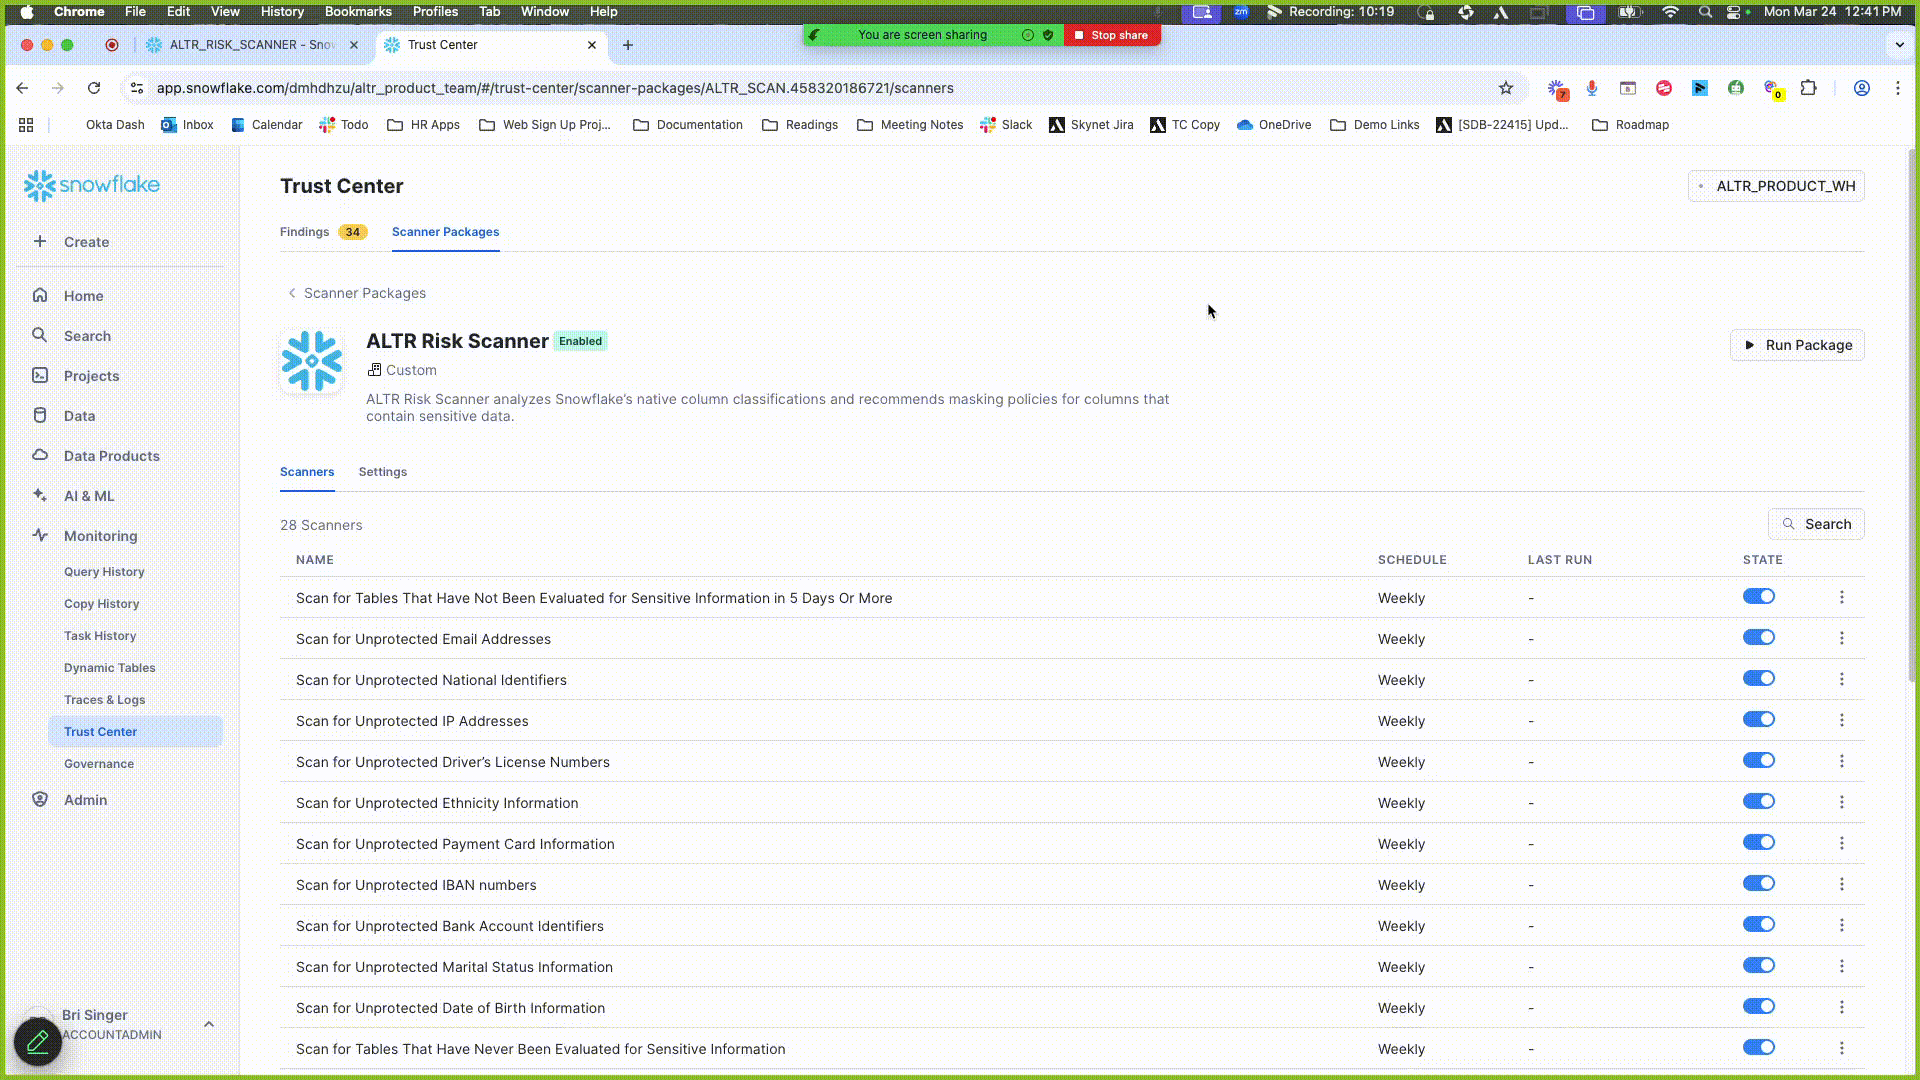
2. Enable and Run the Scanner Package
Section titled “2. Enable and Run the Scanner Package”Enable the ALTR Risk Scanner and set the frequency of how often it runs; the scanner package runs immediately once it is enabled and the frequency is set. Currently, there is not a way to run the scanner package without selecting a frequency. If you only want the package to run one time, set a frequency and disable it later.
Additionally, you can manually run the scanner package any time by clicking the Run Package button. Note that it can take up to 3 hours for new classifications to be recognized by the Scanner package.
To enable the scanner package and set the frequency of how often it runs:
- Select MonitoringTrust Center in the Navigation menu.
- Click the Scanner Packages tab.
- Click the newly installed package called ALTR Risk Scanner .
- Click Enable Package ; the Enable Scanner Package modal displays to allow you to set when the scanner package runs.
- Set a frequency.
- Click Continue . The scan automatically starts to run. It may take a few minutes to complete.
- Once the Enable Scanner Package modal closes, refresh the page.
3. Review Results
Section titled “3. Review Results”To review results from the scanner package:
- Click the Findings tab.
- Click the Scanner Package filter and select ALTR Risk Scanner to only display results from this scanner.
- View the scanner results under the Violation header. Some violations are related to data entities that have not undergone classification. Use the sample code in the Remediation tab to run classifications on these.
- Click the Summary tab in the side panel to see a preview of the data objects in question.
- (Optionally) Click Open in Worksheet to view an SQL sheet that displays details on the results.

- Click a new result entry under Violations that contains the word “unprotected”; a side panel opens.
- Click the Remediation tab to find remediation details, including a link to ALTR documentation on how to create and manage masking policies. Learn more .
4. Classify and Protect Sensitive Data
Section titled “4. Classify and Protect Sensitive Data”Once at-risk columns are identified in your database, classify and protect your sensitive data.
To classify and protect your data:
- Run a Snowflake classification scan to classify sensitive data. Learn more .
- Create access policies to protect your sensitive data. Learn more.
ALTR Risk Scanner is a Snowflake Native App available within the Snowflake Trust Center. It helps organizations manage security risks by identifying columns that may contain Personally Identifiable Information (PII). Once ALTR Risk Scanner has identified the sensitive columns, users can either implement access policies in SQL or with a no-code interface such as ALTR.
Drawbacks of Implementing Access Policy Using SQL
Section titled “Drawbacks of Implementing Access Policy Using SQL”Many organizations attempt to implement column masking by writing and maintaining various worksheets in SQL. While this approach works, it has significant downsides that make it difficult to maintain.
- Masking policies live in separate SQL scripts across multiple databases, consuming an unnecessary amount of engineers’ time.
- Managing role-based access control (RBAC) with SQL policies becomes increasingly complex as organizations grow.
- Each new role requires manual SQL modifications, making it easy to introduce errors.
Example SQL Code for a New Masking Policy
Section titled “Example SQL Code for a New Masking Policy”CREATE MASKING POLICY mask_email_policy AS (val STRING)RETURNS STRING ->CASE WHEN CURRENT_ROLE() IN ('HR_ADMIN', 'SECURITY_TEAM') THEN val ELSE 'REDACTED'END;ALTER TABLE employees MODIFY COLUMN email SET MASKING POLICY mask_email_policy;Use ALTR’s No-Code Interface to Manage Access Policies
Section titled “Use ALTR’s No-Code Interface to Manage Access Policies”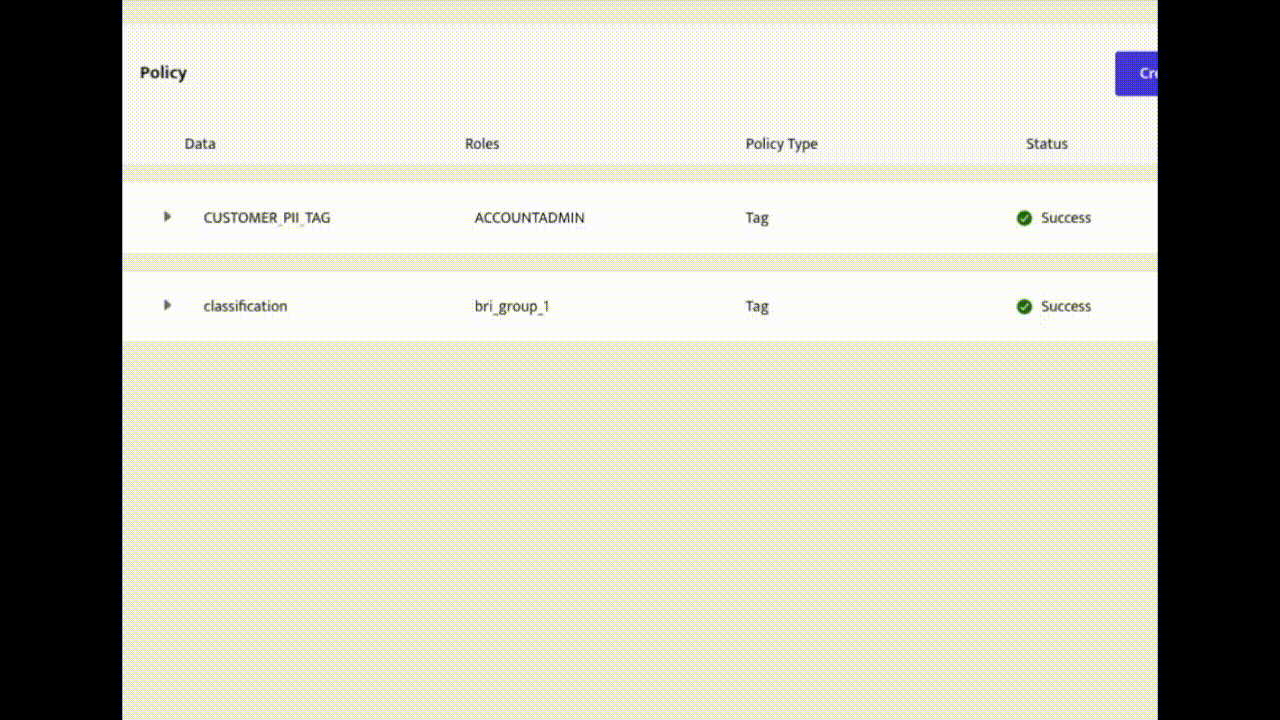
Create an Access Policy in ALTR
Section titled “Create an Access Policy in ALTR”ALTR allows security managers with no coding experience to set rules for who can access their company’s sensitive data. Learn more about how to create security policies.
Optional Next Steps
Section titled “Optional Next Steps”- Set up monitoring and alerts to get notified when certain users attempt to access secure data.
- Protect sensitive fields with tokenization and rotate keys without causing data outages.
- Search query logs for internal security audits using simple drop-down menus.
- Run the ALTR Risk Scanner periodically as your database grows to stay on top of security risks.
Get Started with ALTR
Section titled “Get Started with ALTR”Skip the complicated SQL worksheets and set security policies faster with ALTR. Contact the ALTR sales team to get started.