Configure Single Sign-On (SSO) for Microsoft Entra ID
Single Sign-On (SSO) enables ALTR administrators to sign into the ALTR platform without having to remember a separate username, password and two-factor authentication method. Follow the steps below to set up SSO with Entra ID.
When enabling SSO, make sure you have
- Administrator access to your identity provider
- An ALTR Enterprise account.
- Super Administrator access to your ALTR account. If you are unsure what your role is within ALTR, refer to Administrators for more information.
Instructions for Configuring SSO with Microsoft Entra ID
Section titled “Instructions for Configuring SSO with Microsoft Entra ID”Entra and ALTR are configured to match on UserPrincipalName and Username by default. However, SSO can be configured to match on another field, such as email. For help on customizing the identifier used in SSO, contact ALTR Support .
To configure SSO with Entra:
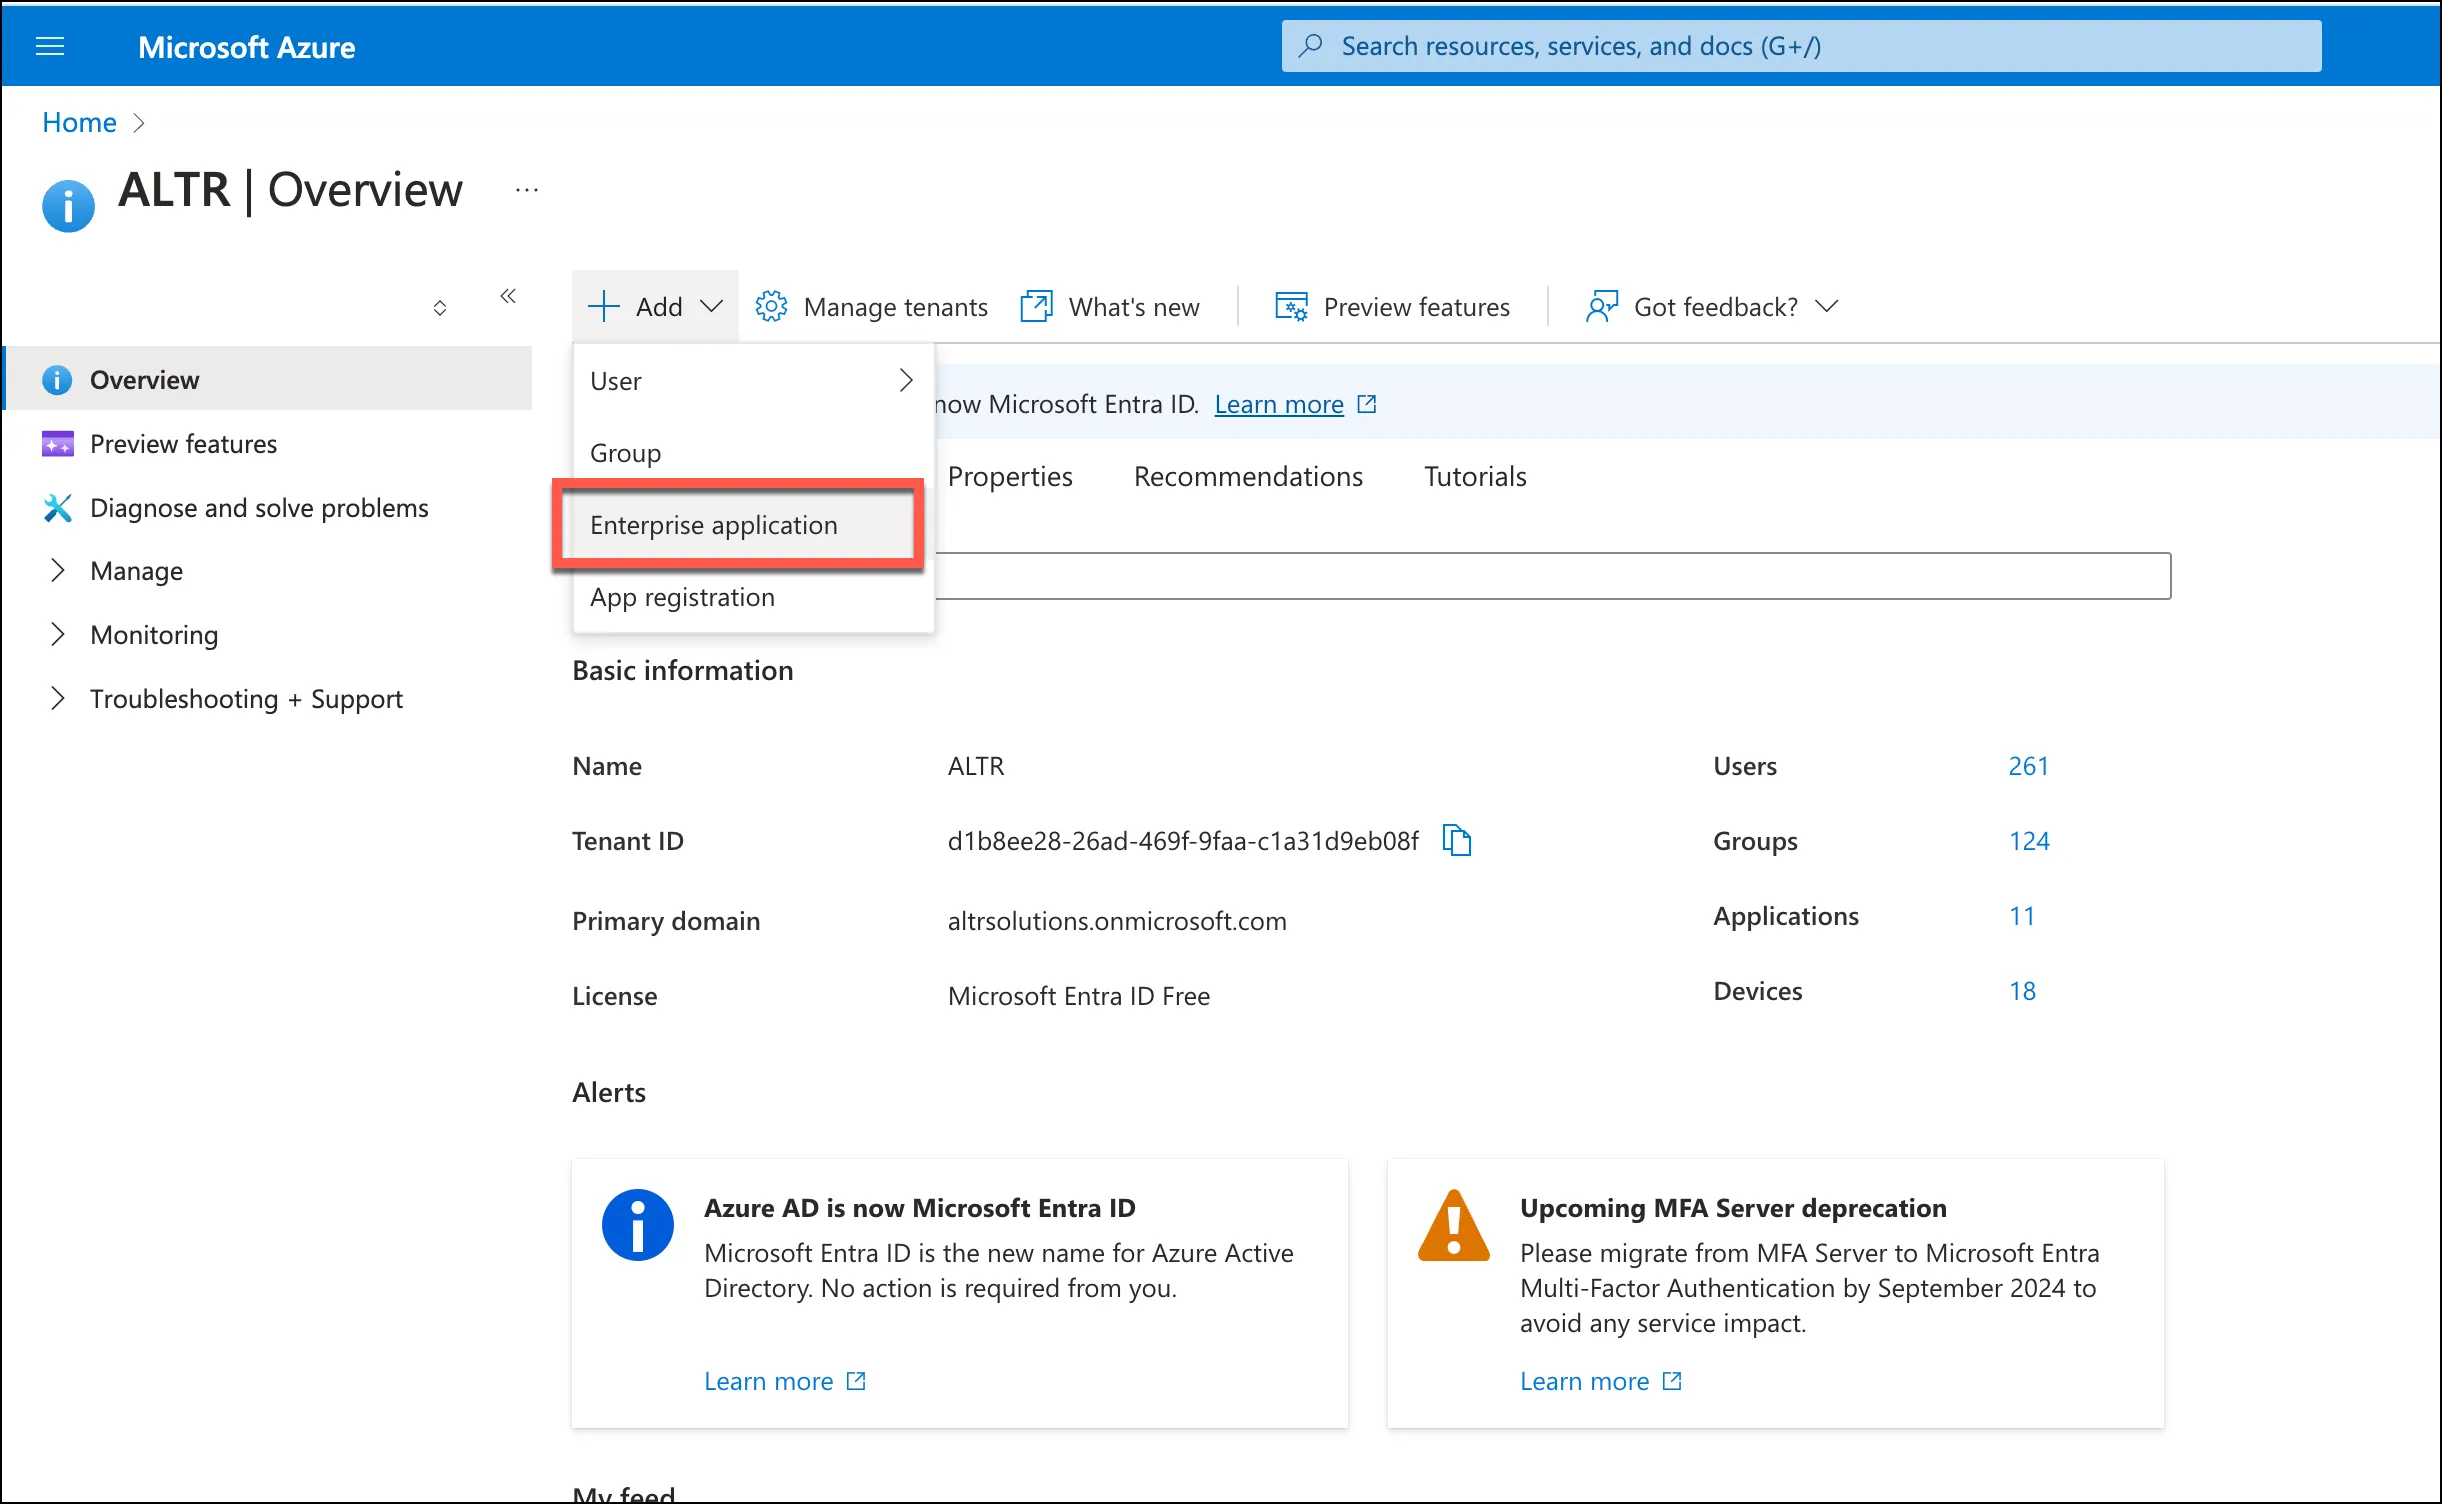
- Sign into Entra as an Administrator.
- Select AddEnterprise application to create a new Entra Enterprise Application.
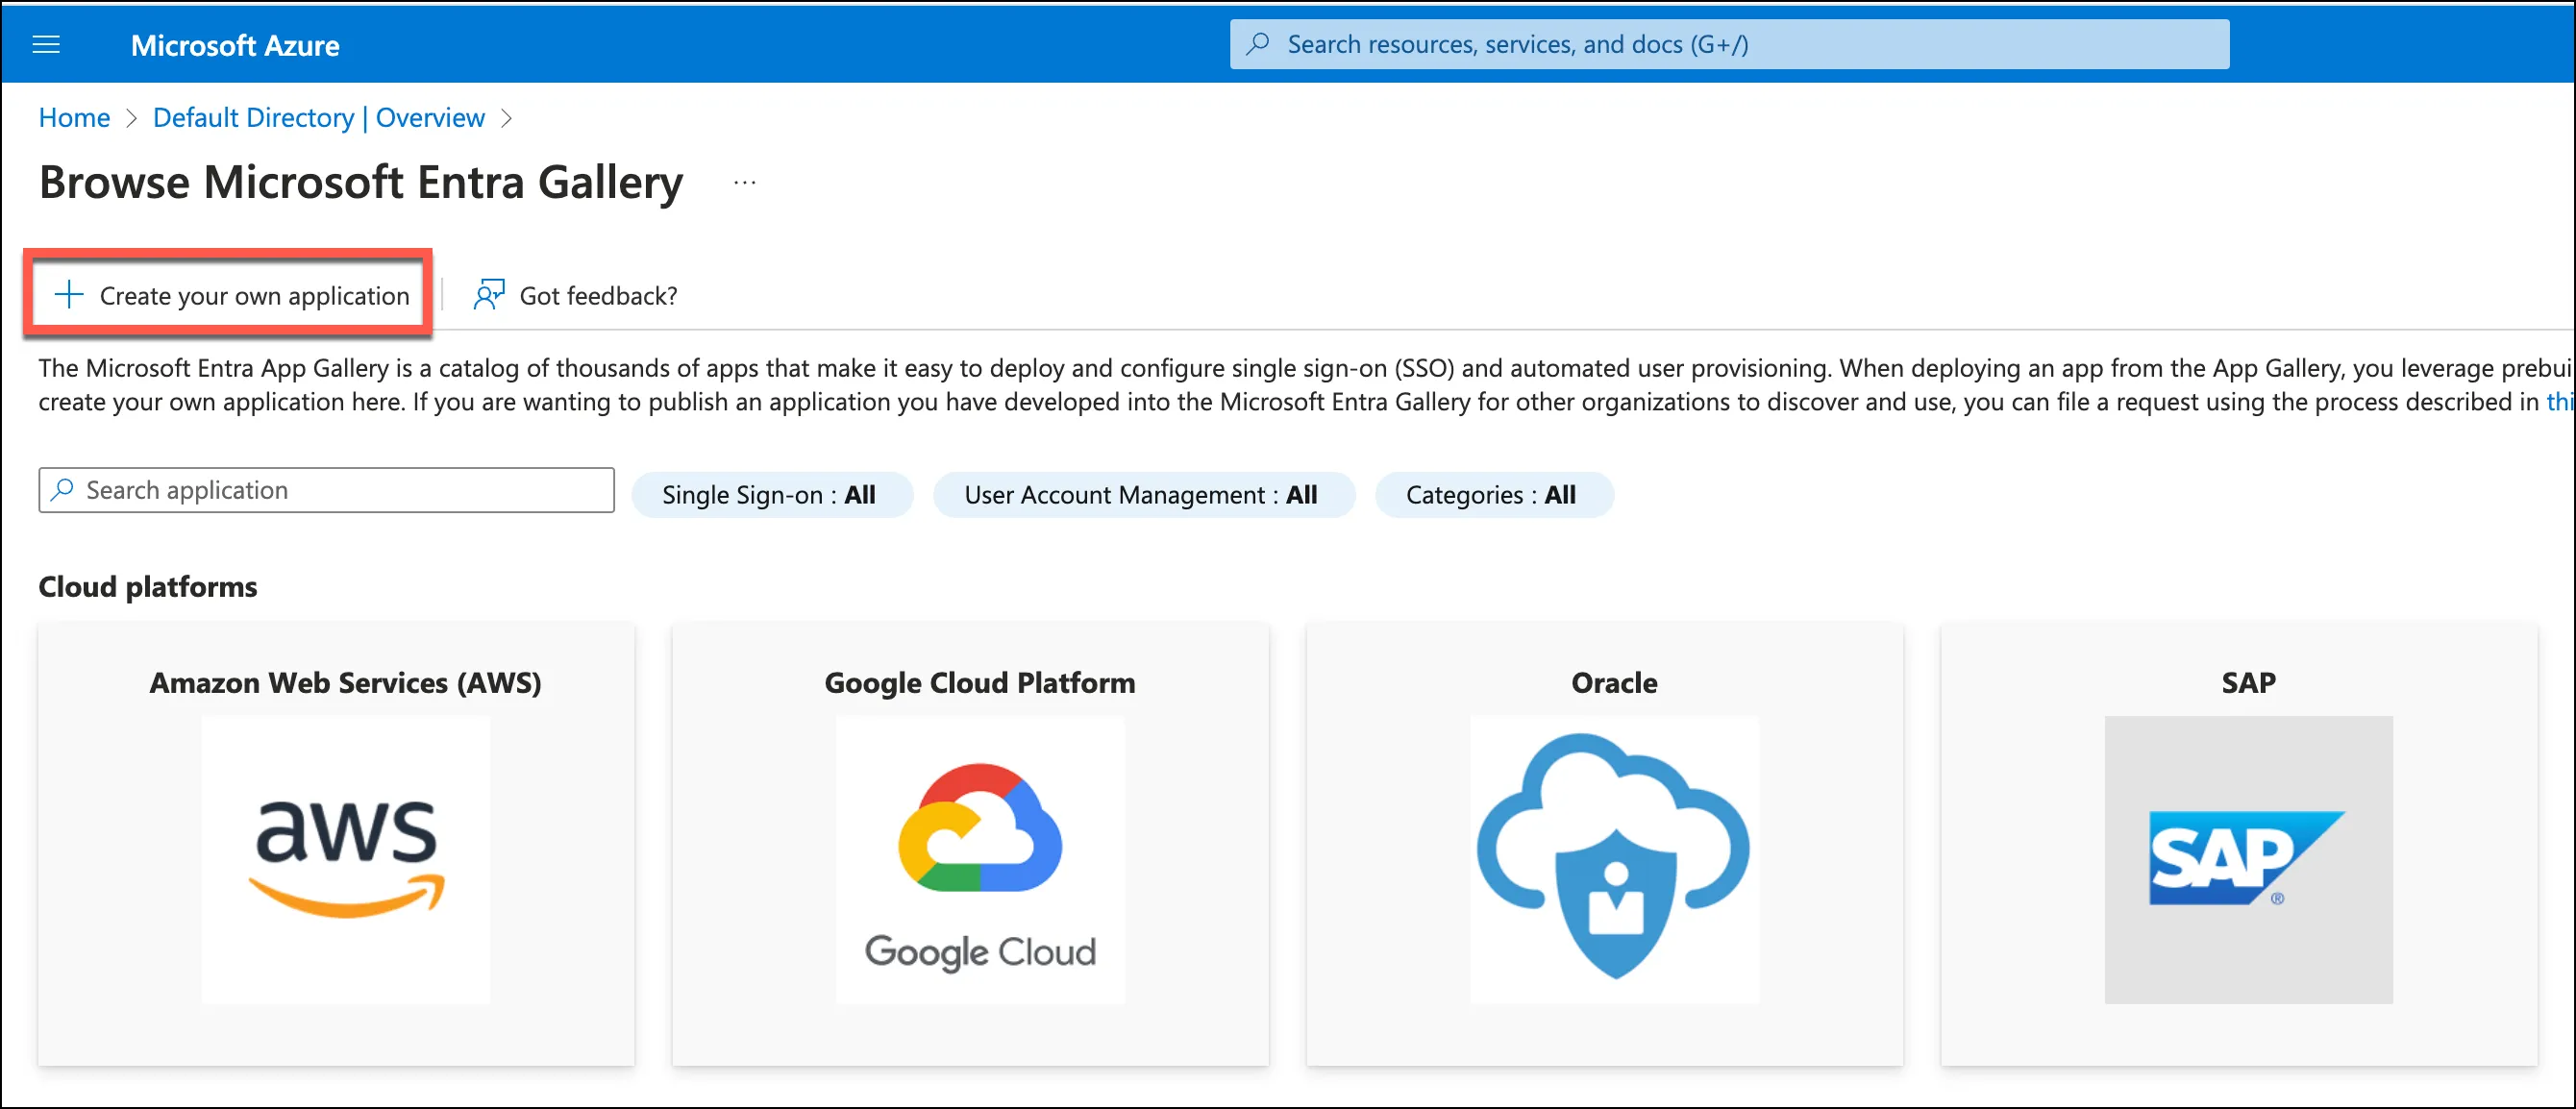
- Click Create your own application . Assign a name to your application (e.g., “ALTR”) and select the Non-Gallery application option
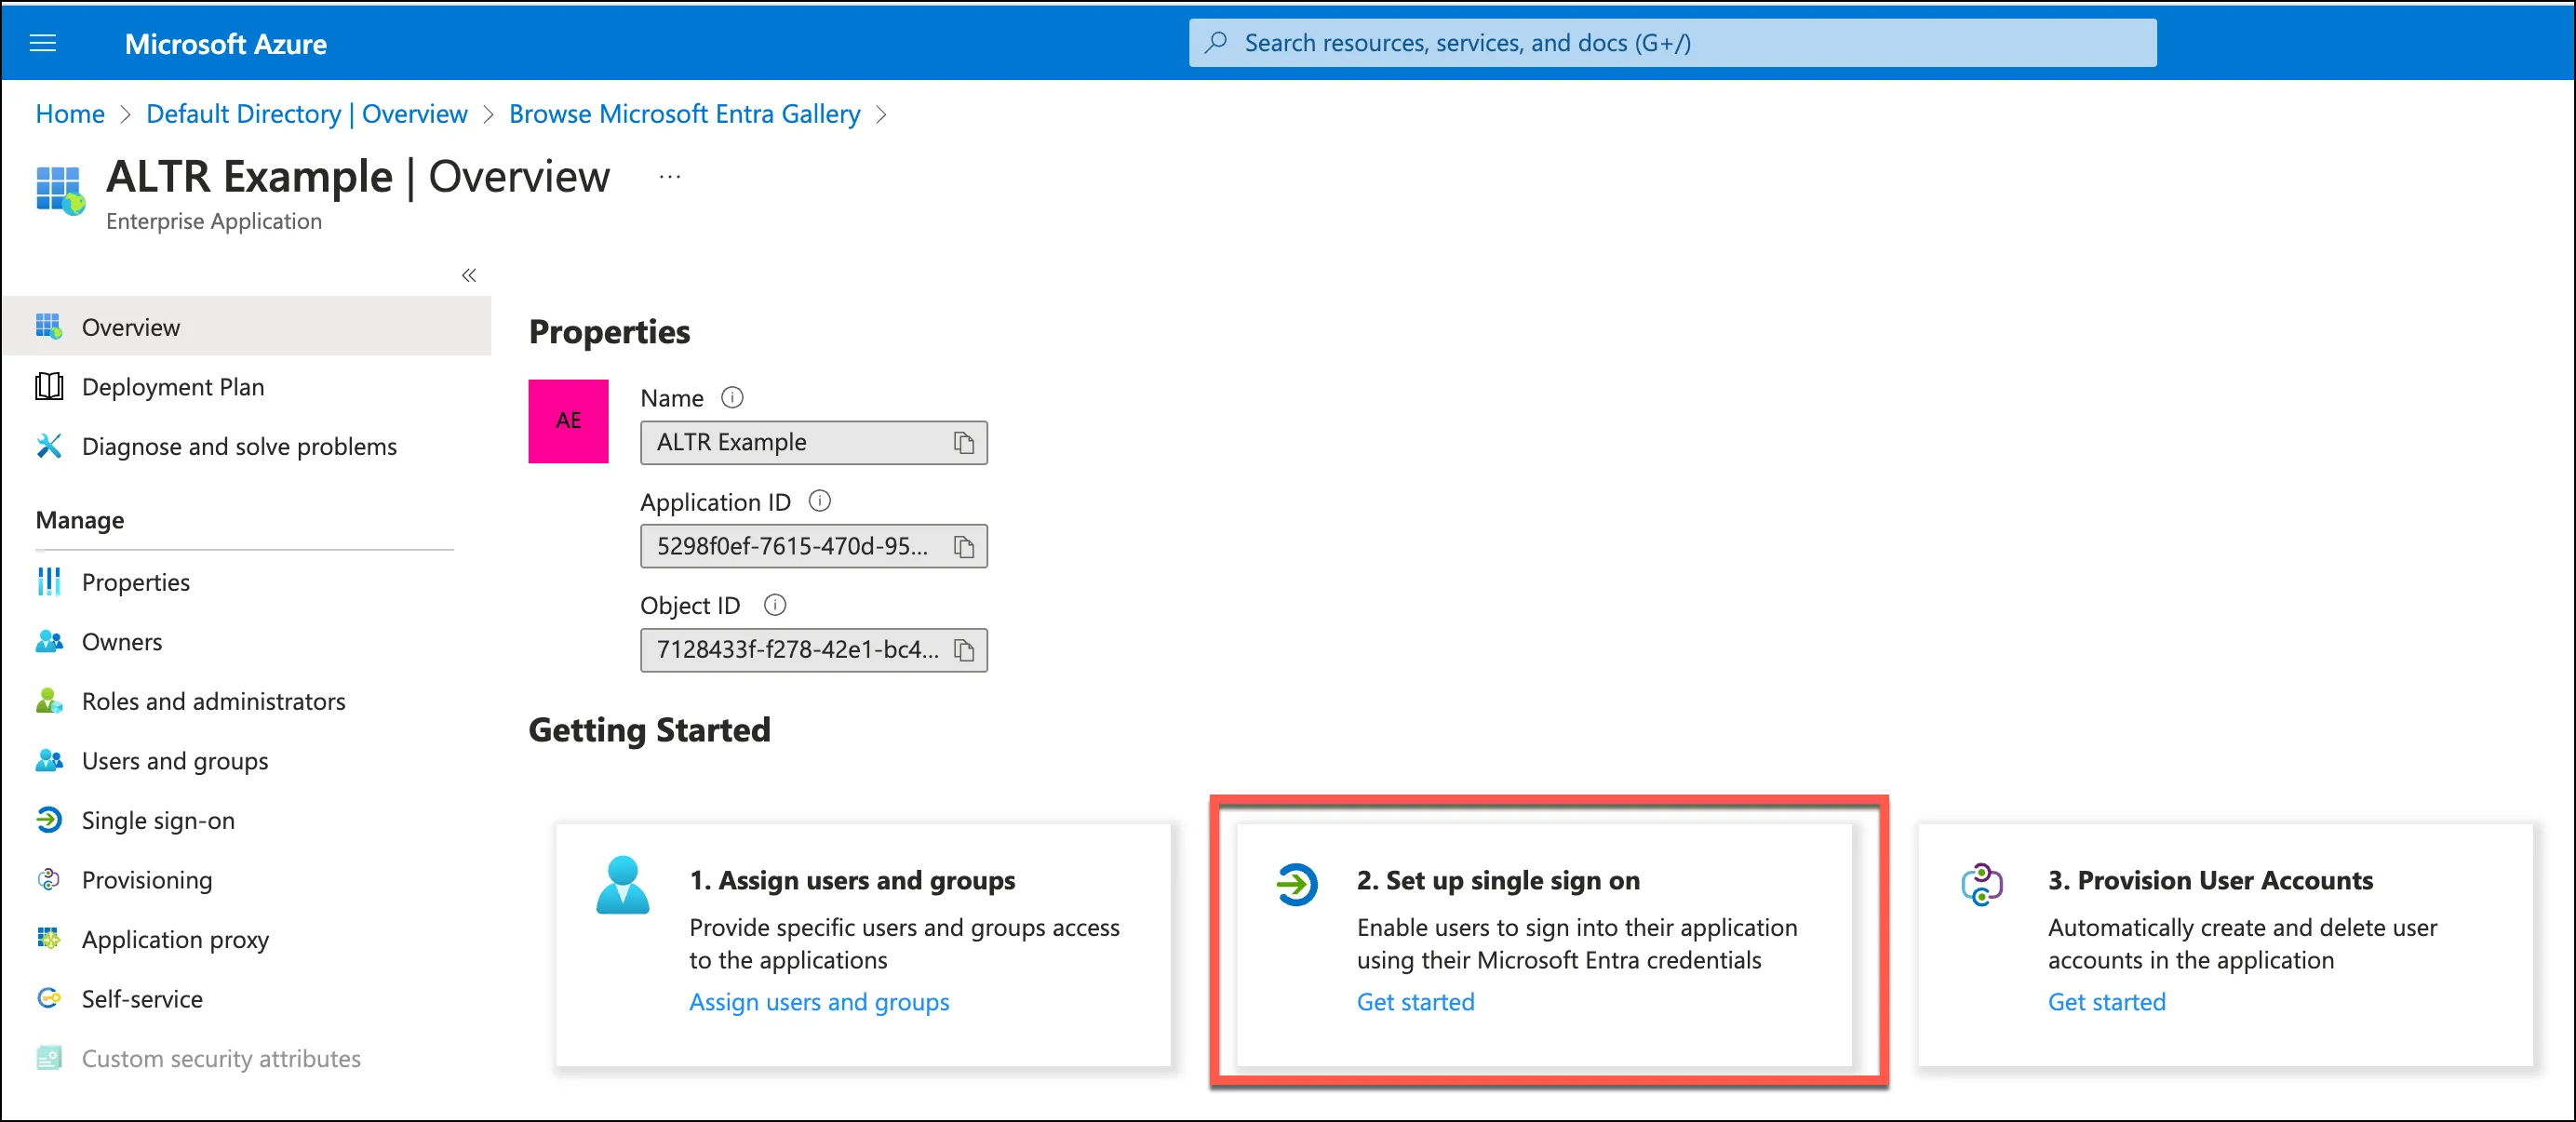
- Once the application is created, navigate to it’s Overview page. Select Set up single sign-on .
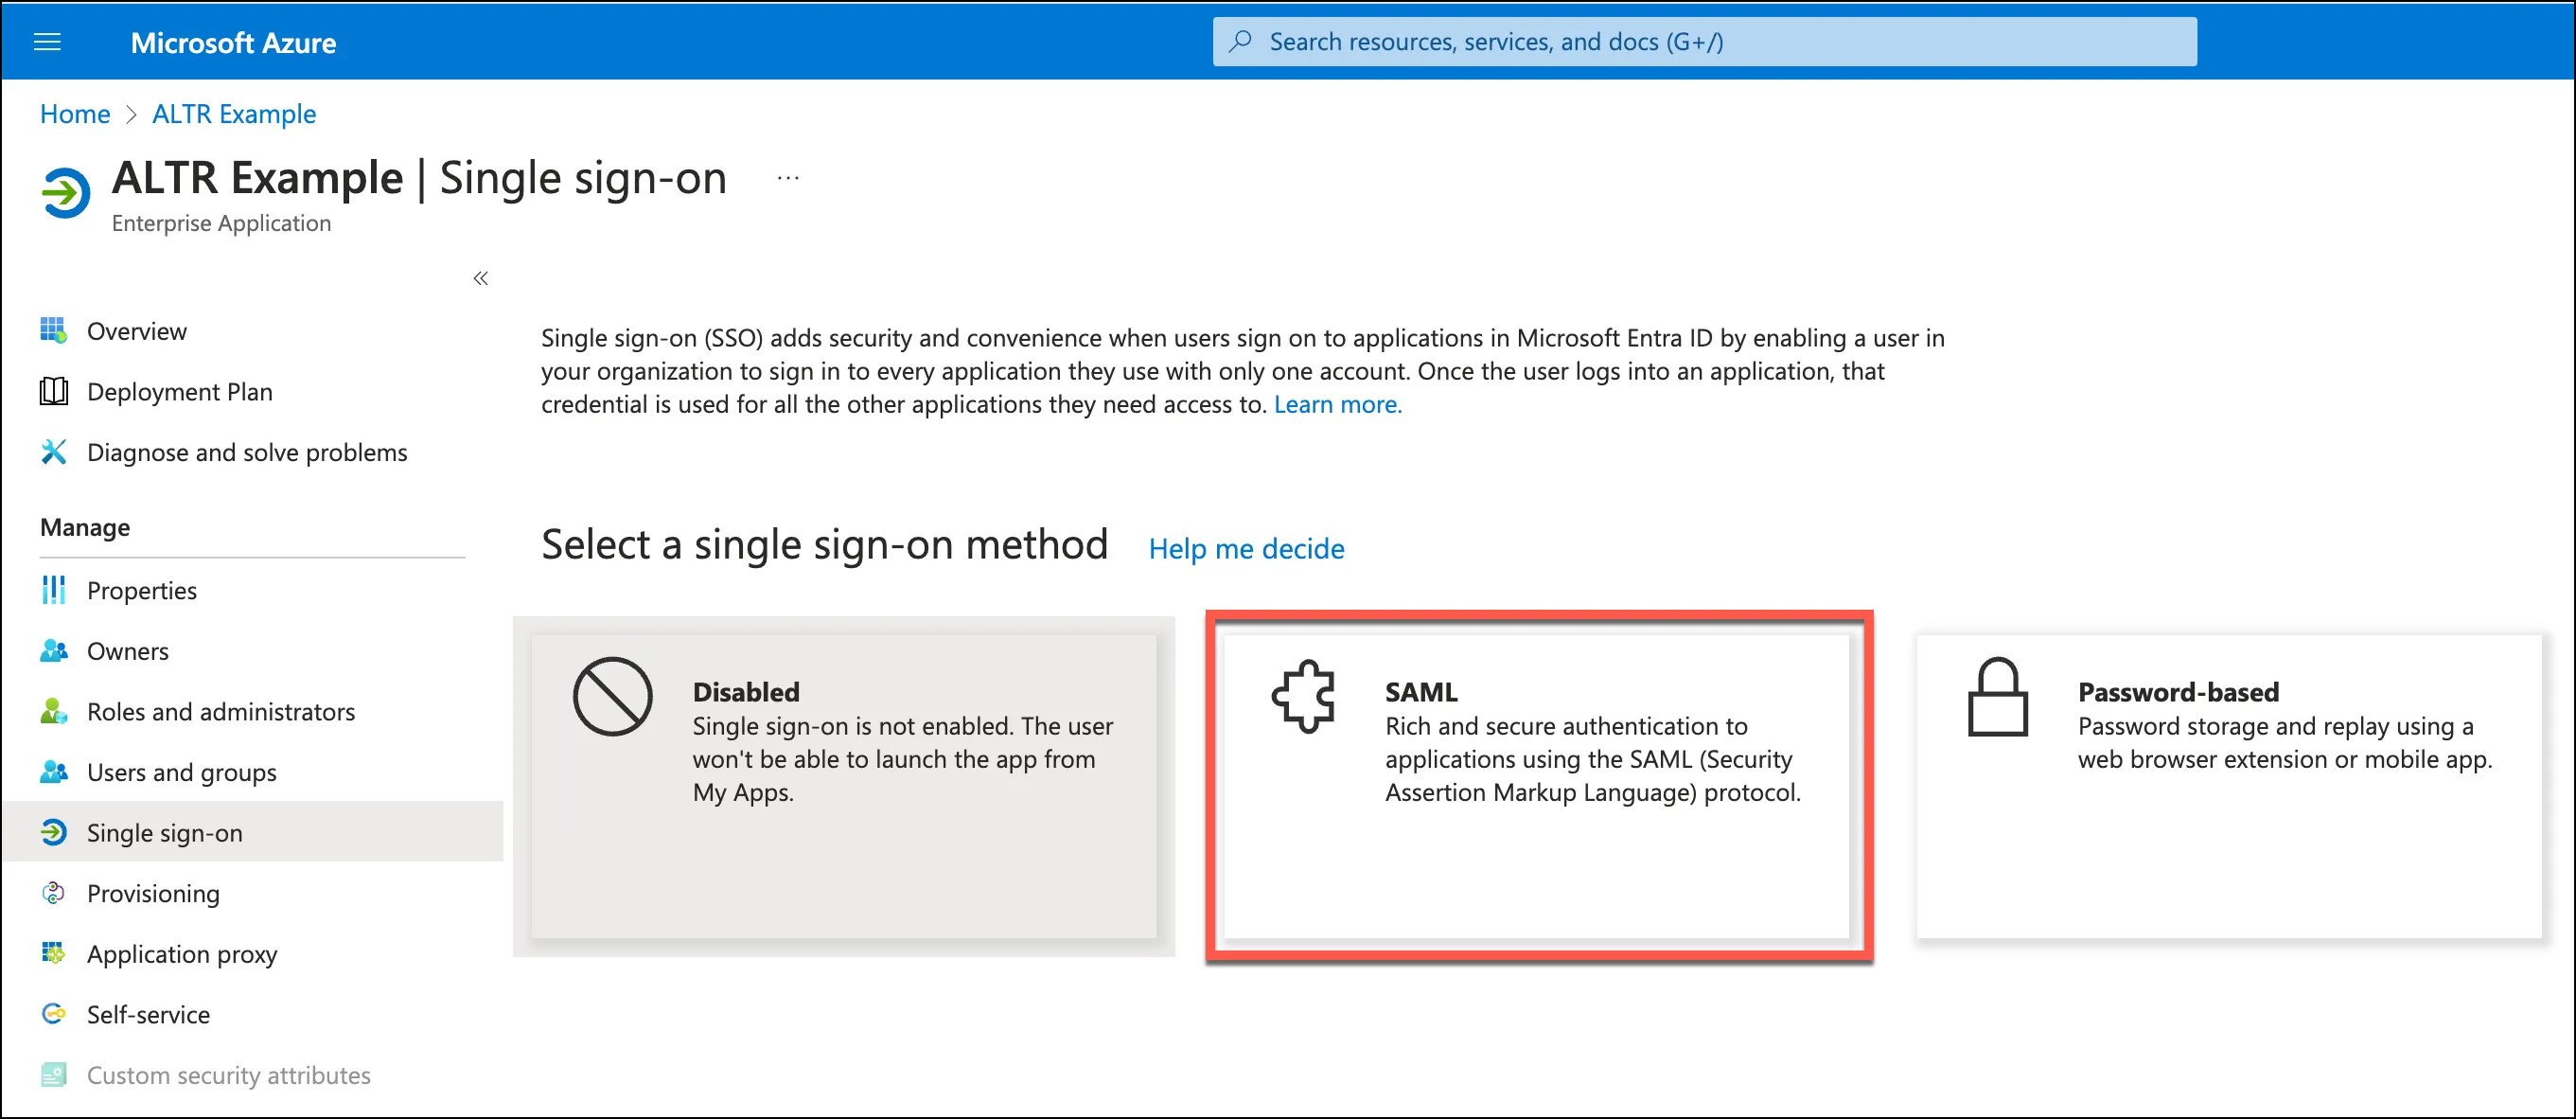
- Select SAML from the list of single sign-on methods.
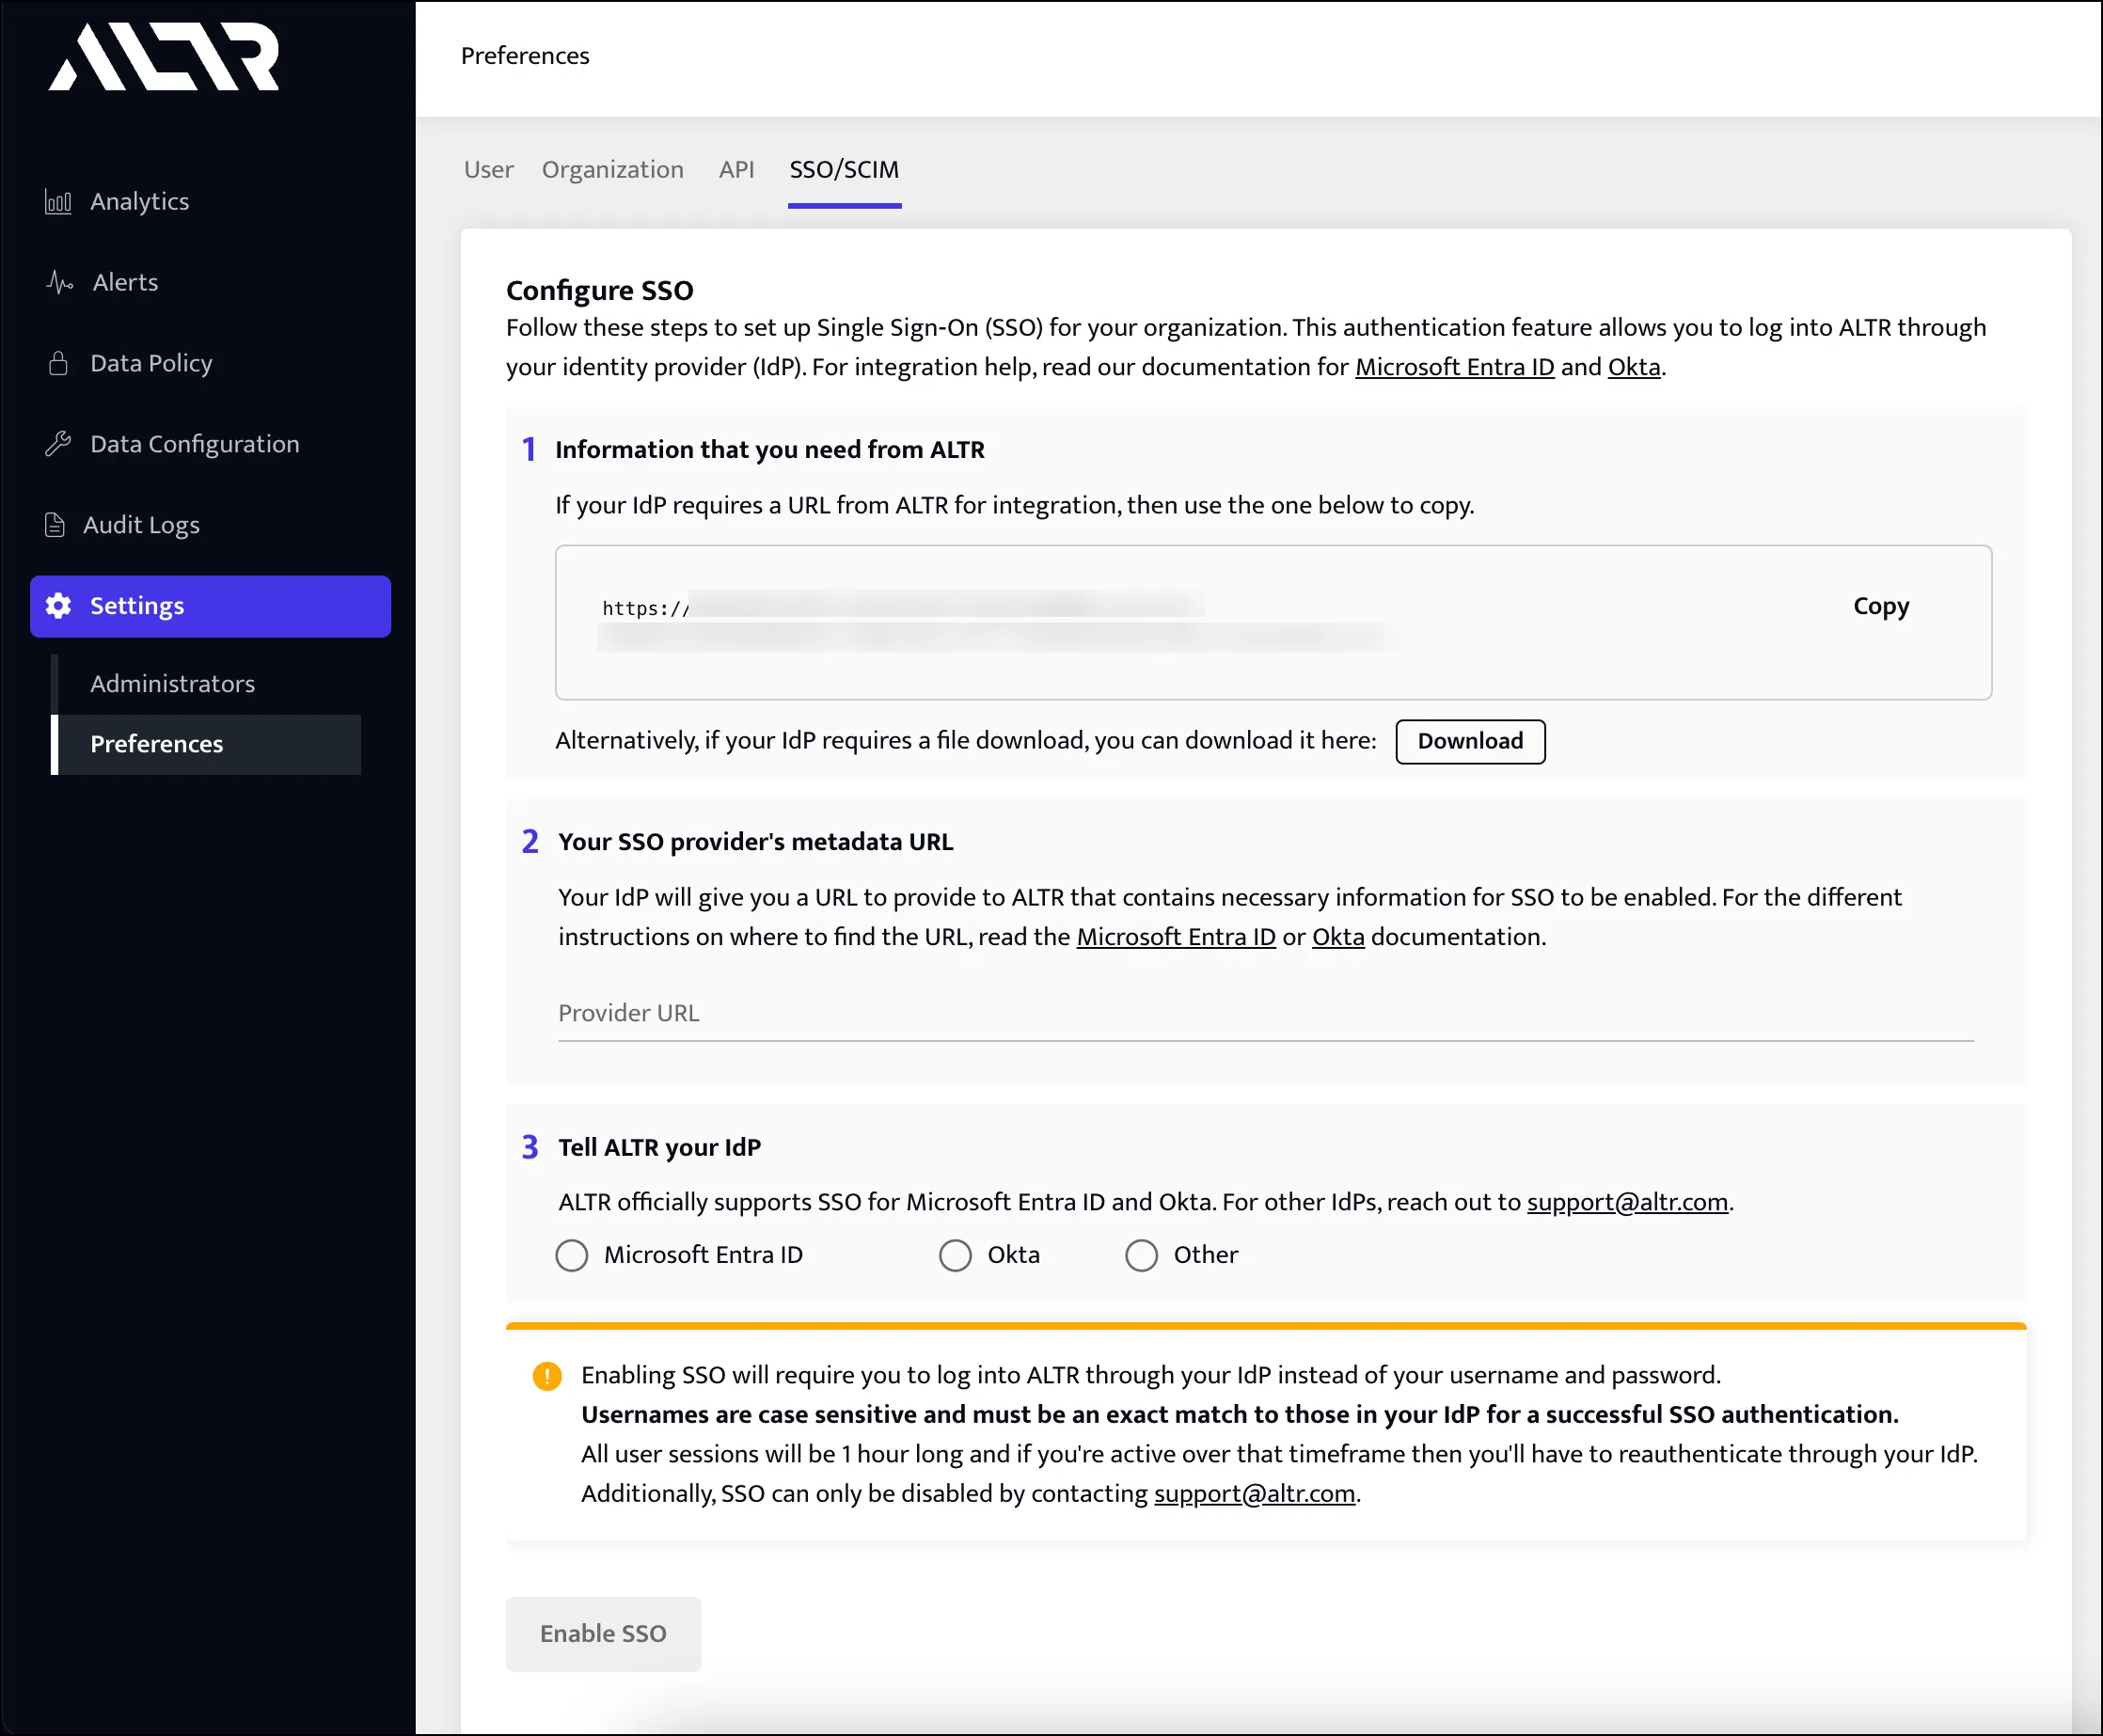
- Sign into your ALTR account. Select SettingsPreference in the Navigation menu. Click the SSO/SCIM tab. Click the Download button.
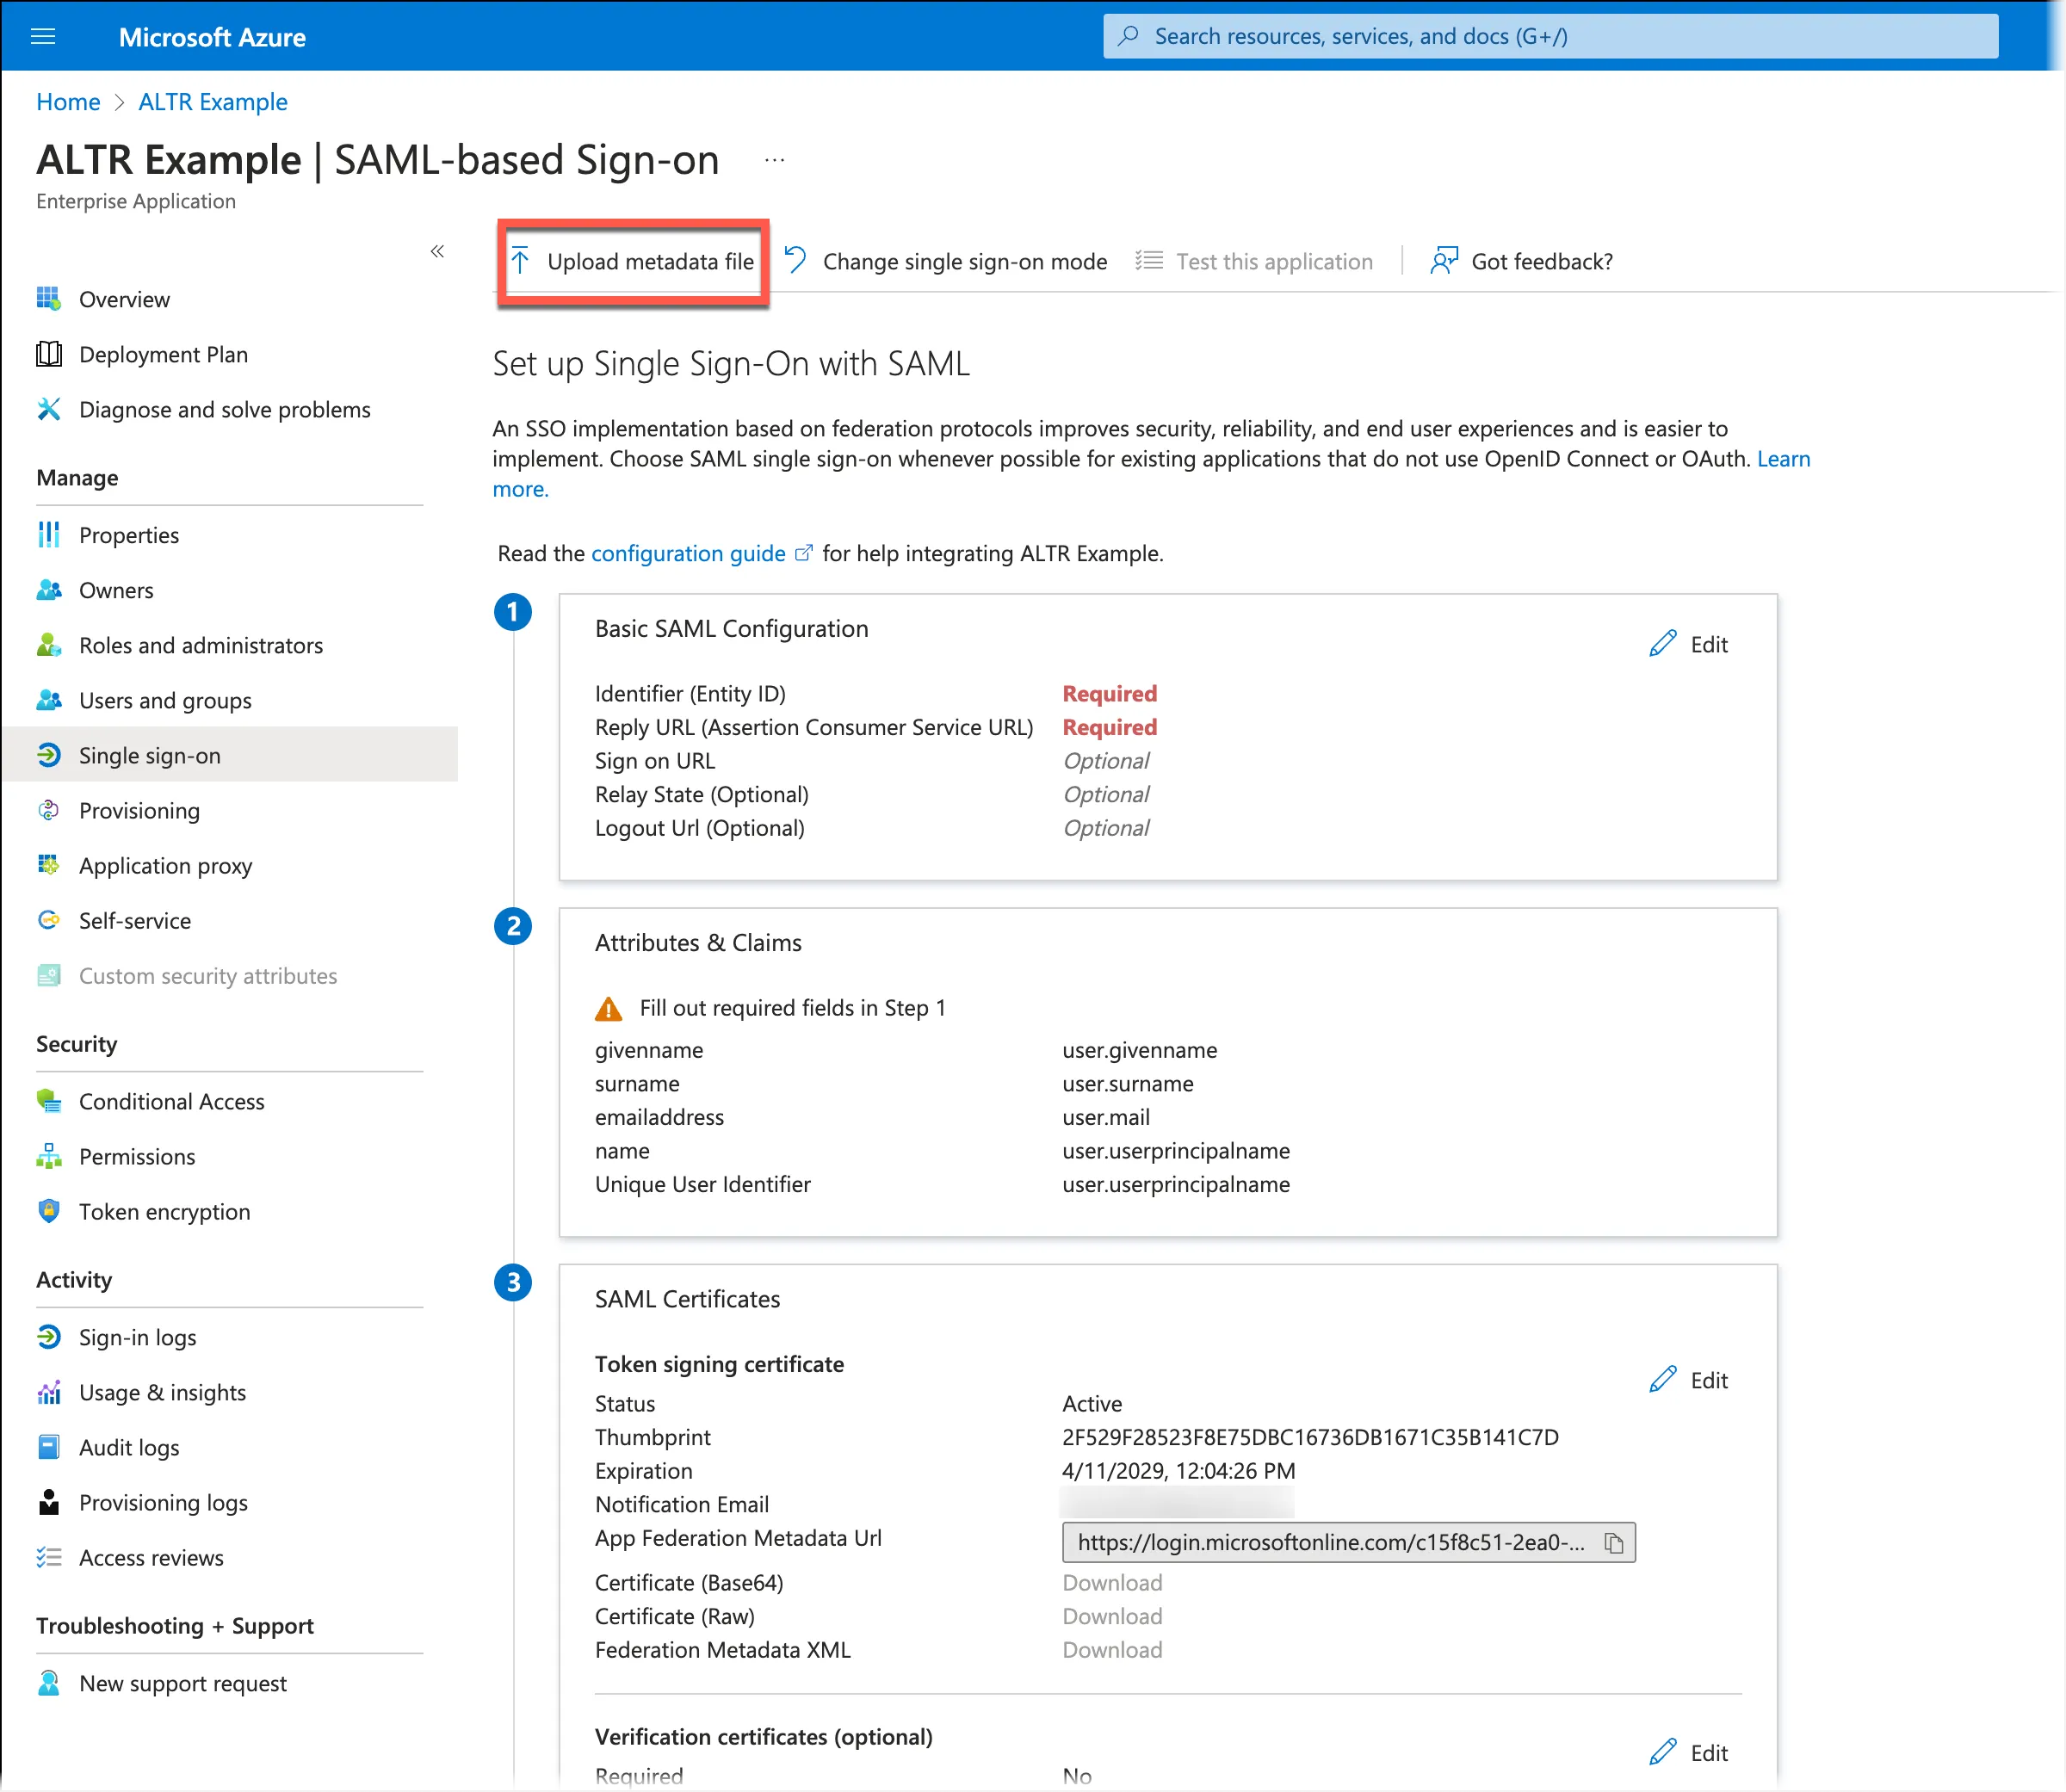
- Once the file is downloaded, go back to Entra and click Upload metadata file. Upload the file downloaded from ALTR. Click Add .
- Provision your ALTR administrators to your Entra application.
- In Entra, navigate to your ALTR Enterprise Application.
- Navigate to the Users and Groups section.
- Search for and select your user.
- Identify your UserPrincipalName.
- In ALTR, select SettingsAdministrators in the Navigation menu.
- Ensure that your ALTR Username exactly matches your UserPrincipalName in Entra. This match is case sensitive. If your Username in ALTR does not exactly match your Entra UserPrincipalName, you will not be able to sign into ALTR.
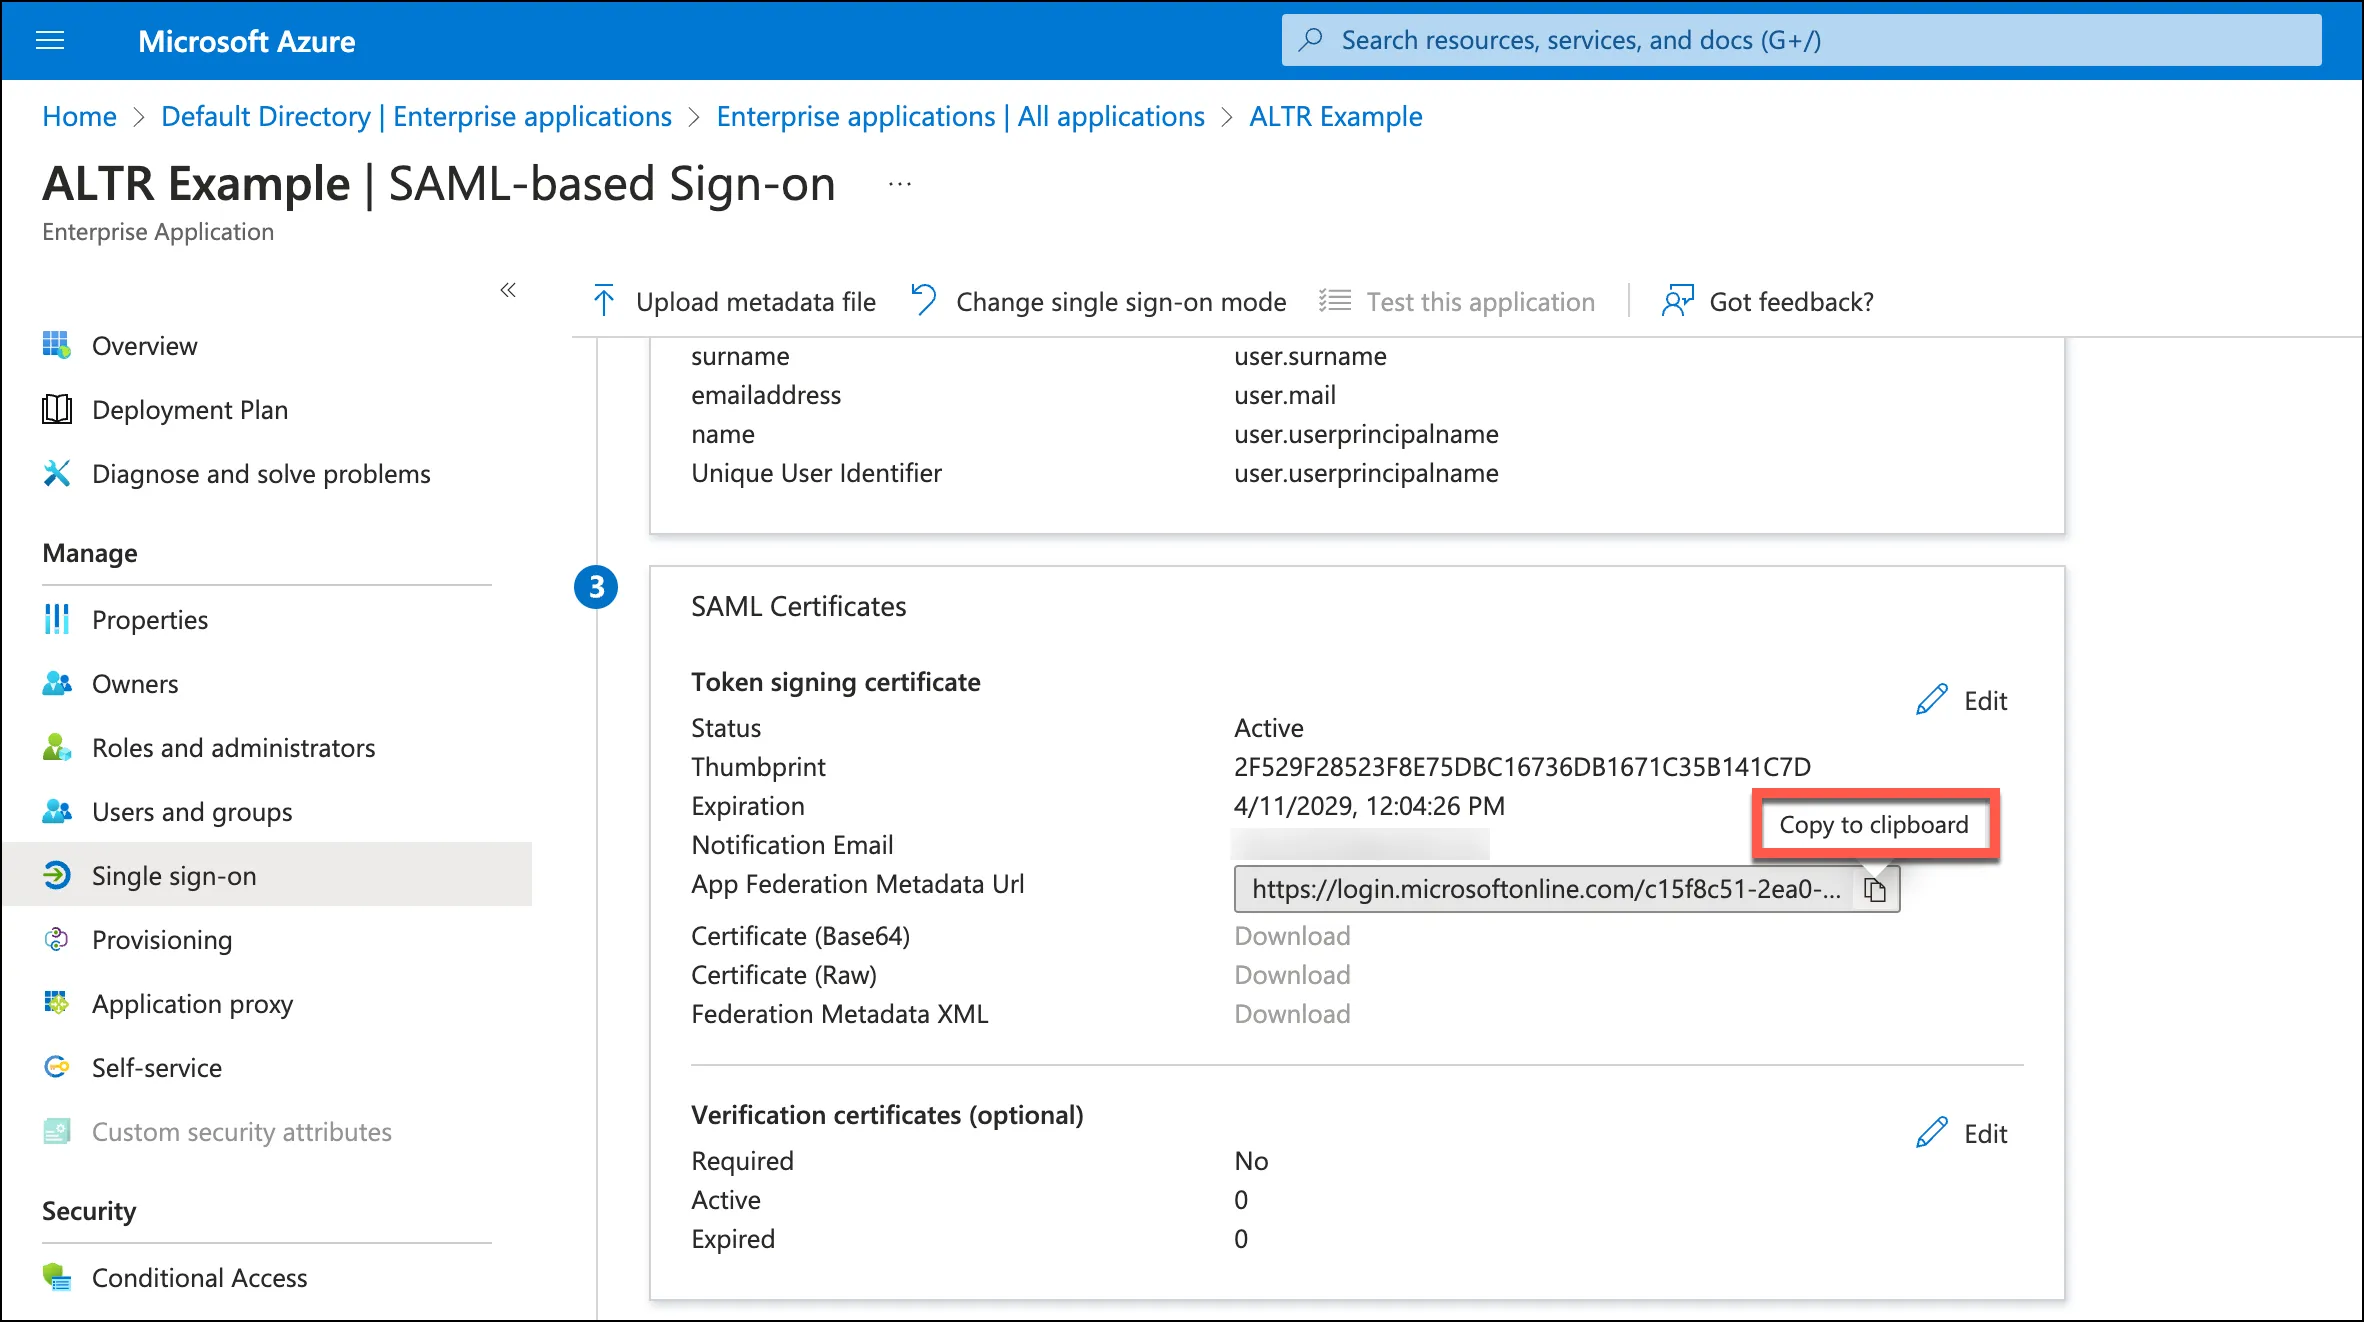
- Navigate to the SAML Certificates section in Entra. Click the Copy to clipboard icon in the App Federation Metadata Url field. Paste this URL in the Provider URL field in ALTR.
- Navigate back to ALTR. Select Microsoft Entra ID . Click Enable SSO .
- Once ALTR has successfully configured SSO, keep your current window open, open an incognito window or a different browser, and sign int your ALTR account. Do not sign out of ALTR on your main window until you have confirmed you can sign into ALTR on the second window.