Configure Single Sign-On (SSO) for Okta
Single sign-on (SSO) enables ALTR administrators to sign into the ALTR platform without having to remember a separate username, password and two-factor authentication method. Follow the steps below to set up SSO with Okta.
Warning
Once activated, SSO can only be turned off in ALTR by contacting ALTR Support.
Note
This guide was last updated in July 2025. Some of the elements in Okta may have changed since this guide was published.
Prerequisites for Configuring SSO
When enabling SSO, make sure you have
Administrator access to your identity provider
An ALTR Enterprise account.
Super Administrator access to your ALTR account. If you are unsure what your role is within ALTR, refer to Administrators for more information.
How to Configure SSO with Okta
The following steps outline how to create a new "application" in Okta, which is used to log into ALTR. Your Okta administrator should be familiar with this process.
To configure SSO with Okta:
Create a new Application in Okta.
Sign into the Okta admin console.
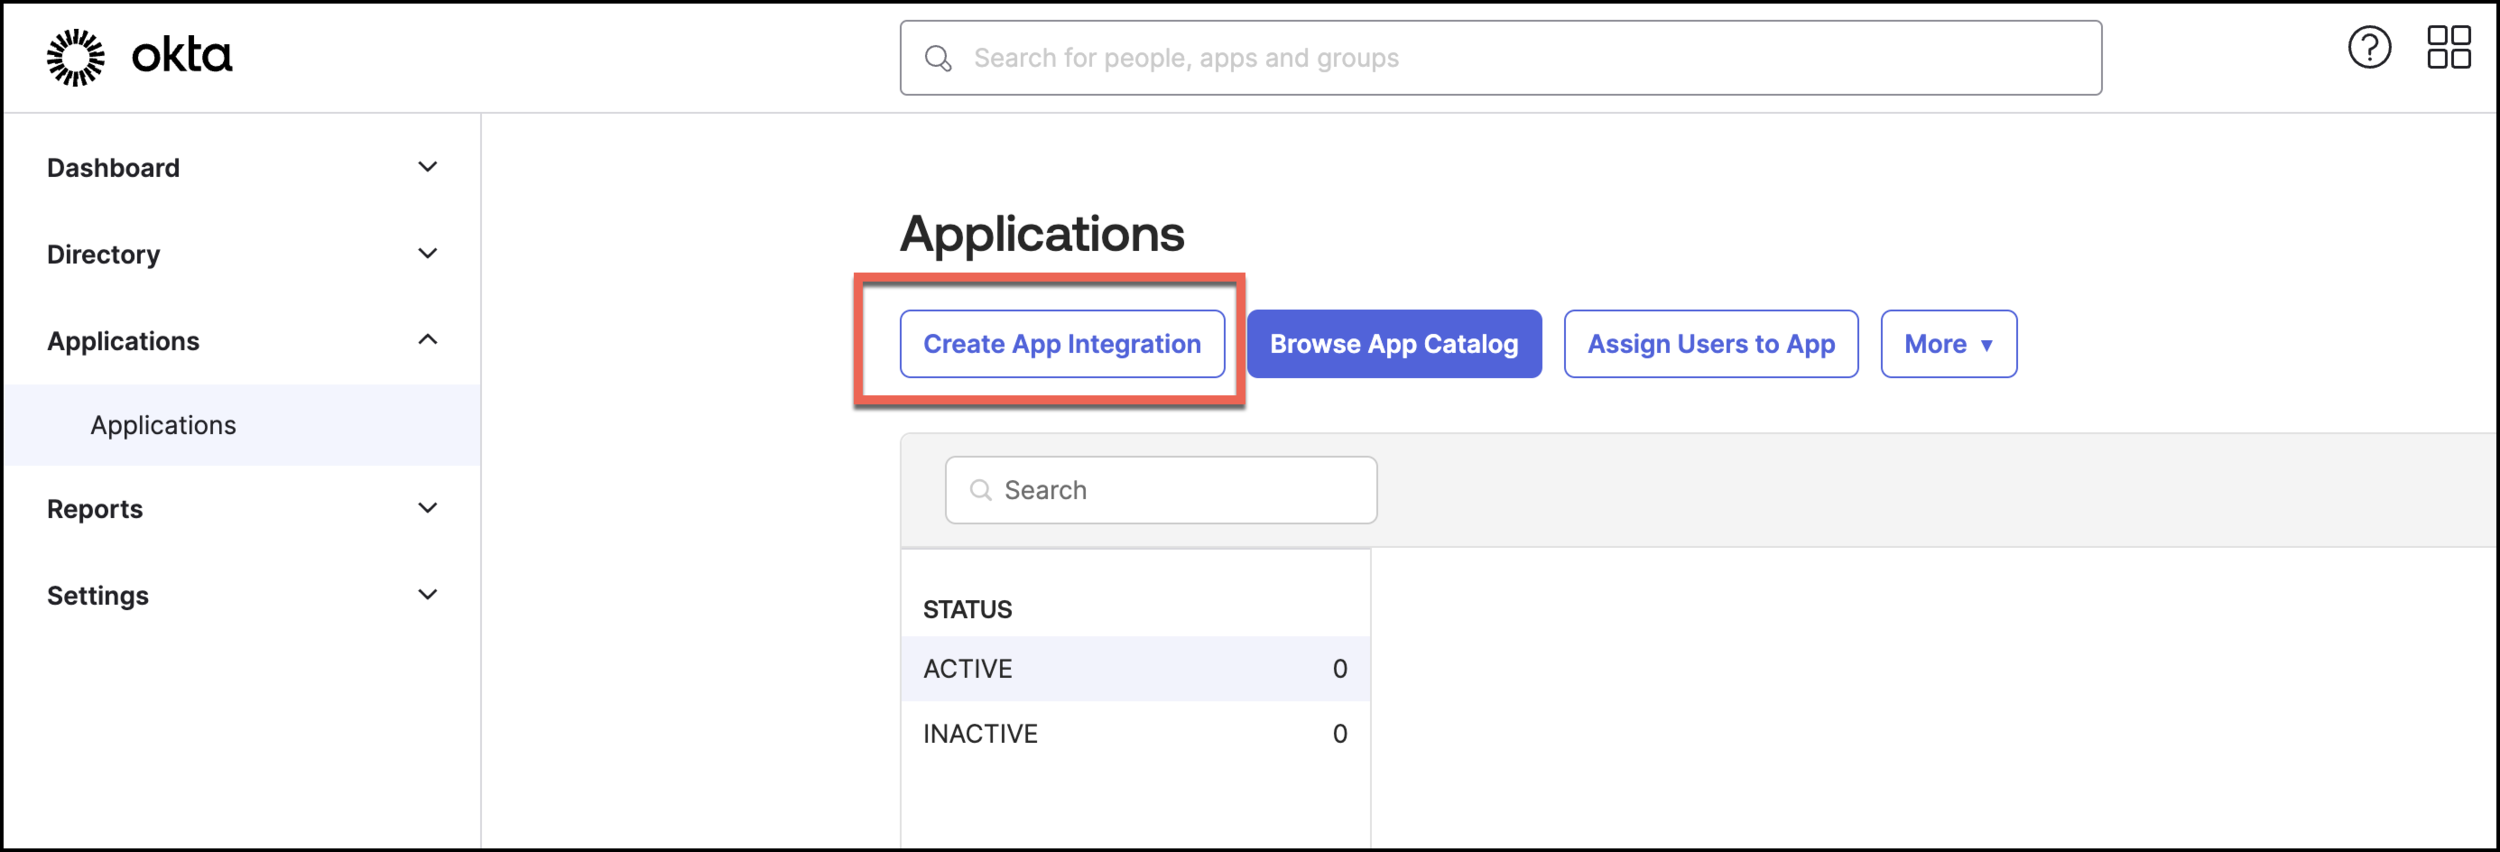
Click Create App Integration to create a new Okta application.
Set the Sign In method to SAML 2.0.
Click Next.
Under General Settings, enter an App name, such as "ALTR." If you have multiple ALTR accounts, make sure this name is descriptive to the ALTR account you are connecting.
Click Next.
Identify the necessary metadata from ALTR to configure SSO.
Log into your ALTR account.
Select → in the Navigation menu.
Select the SSO/SCIM tab.
Copy the metadata URL and open it in a new tab in your browser.
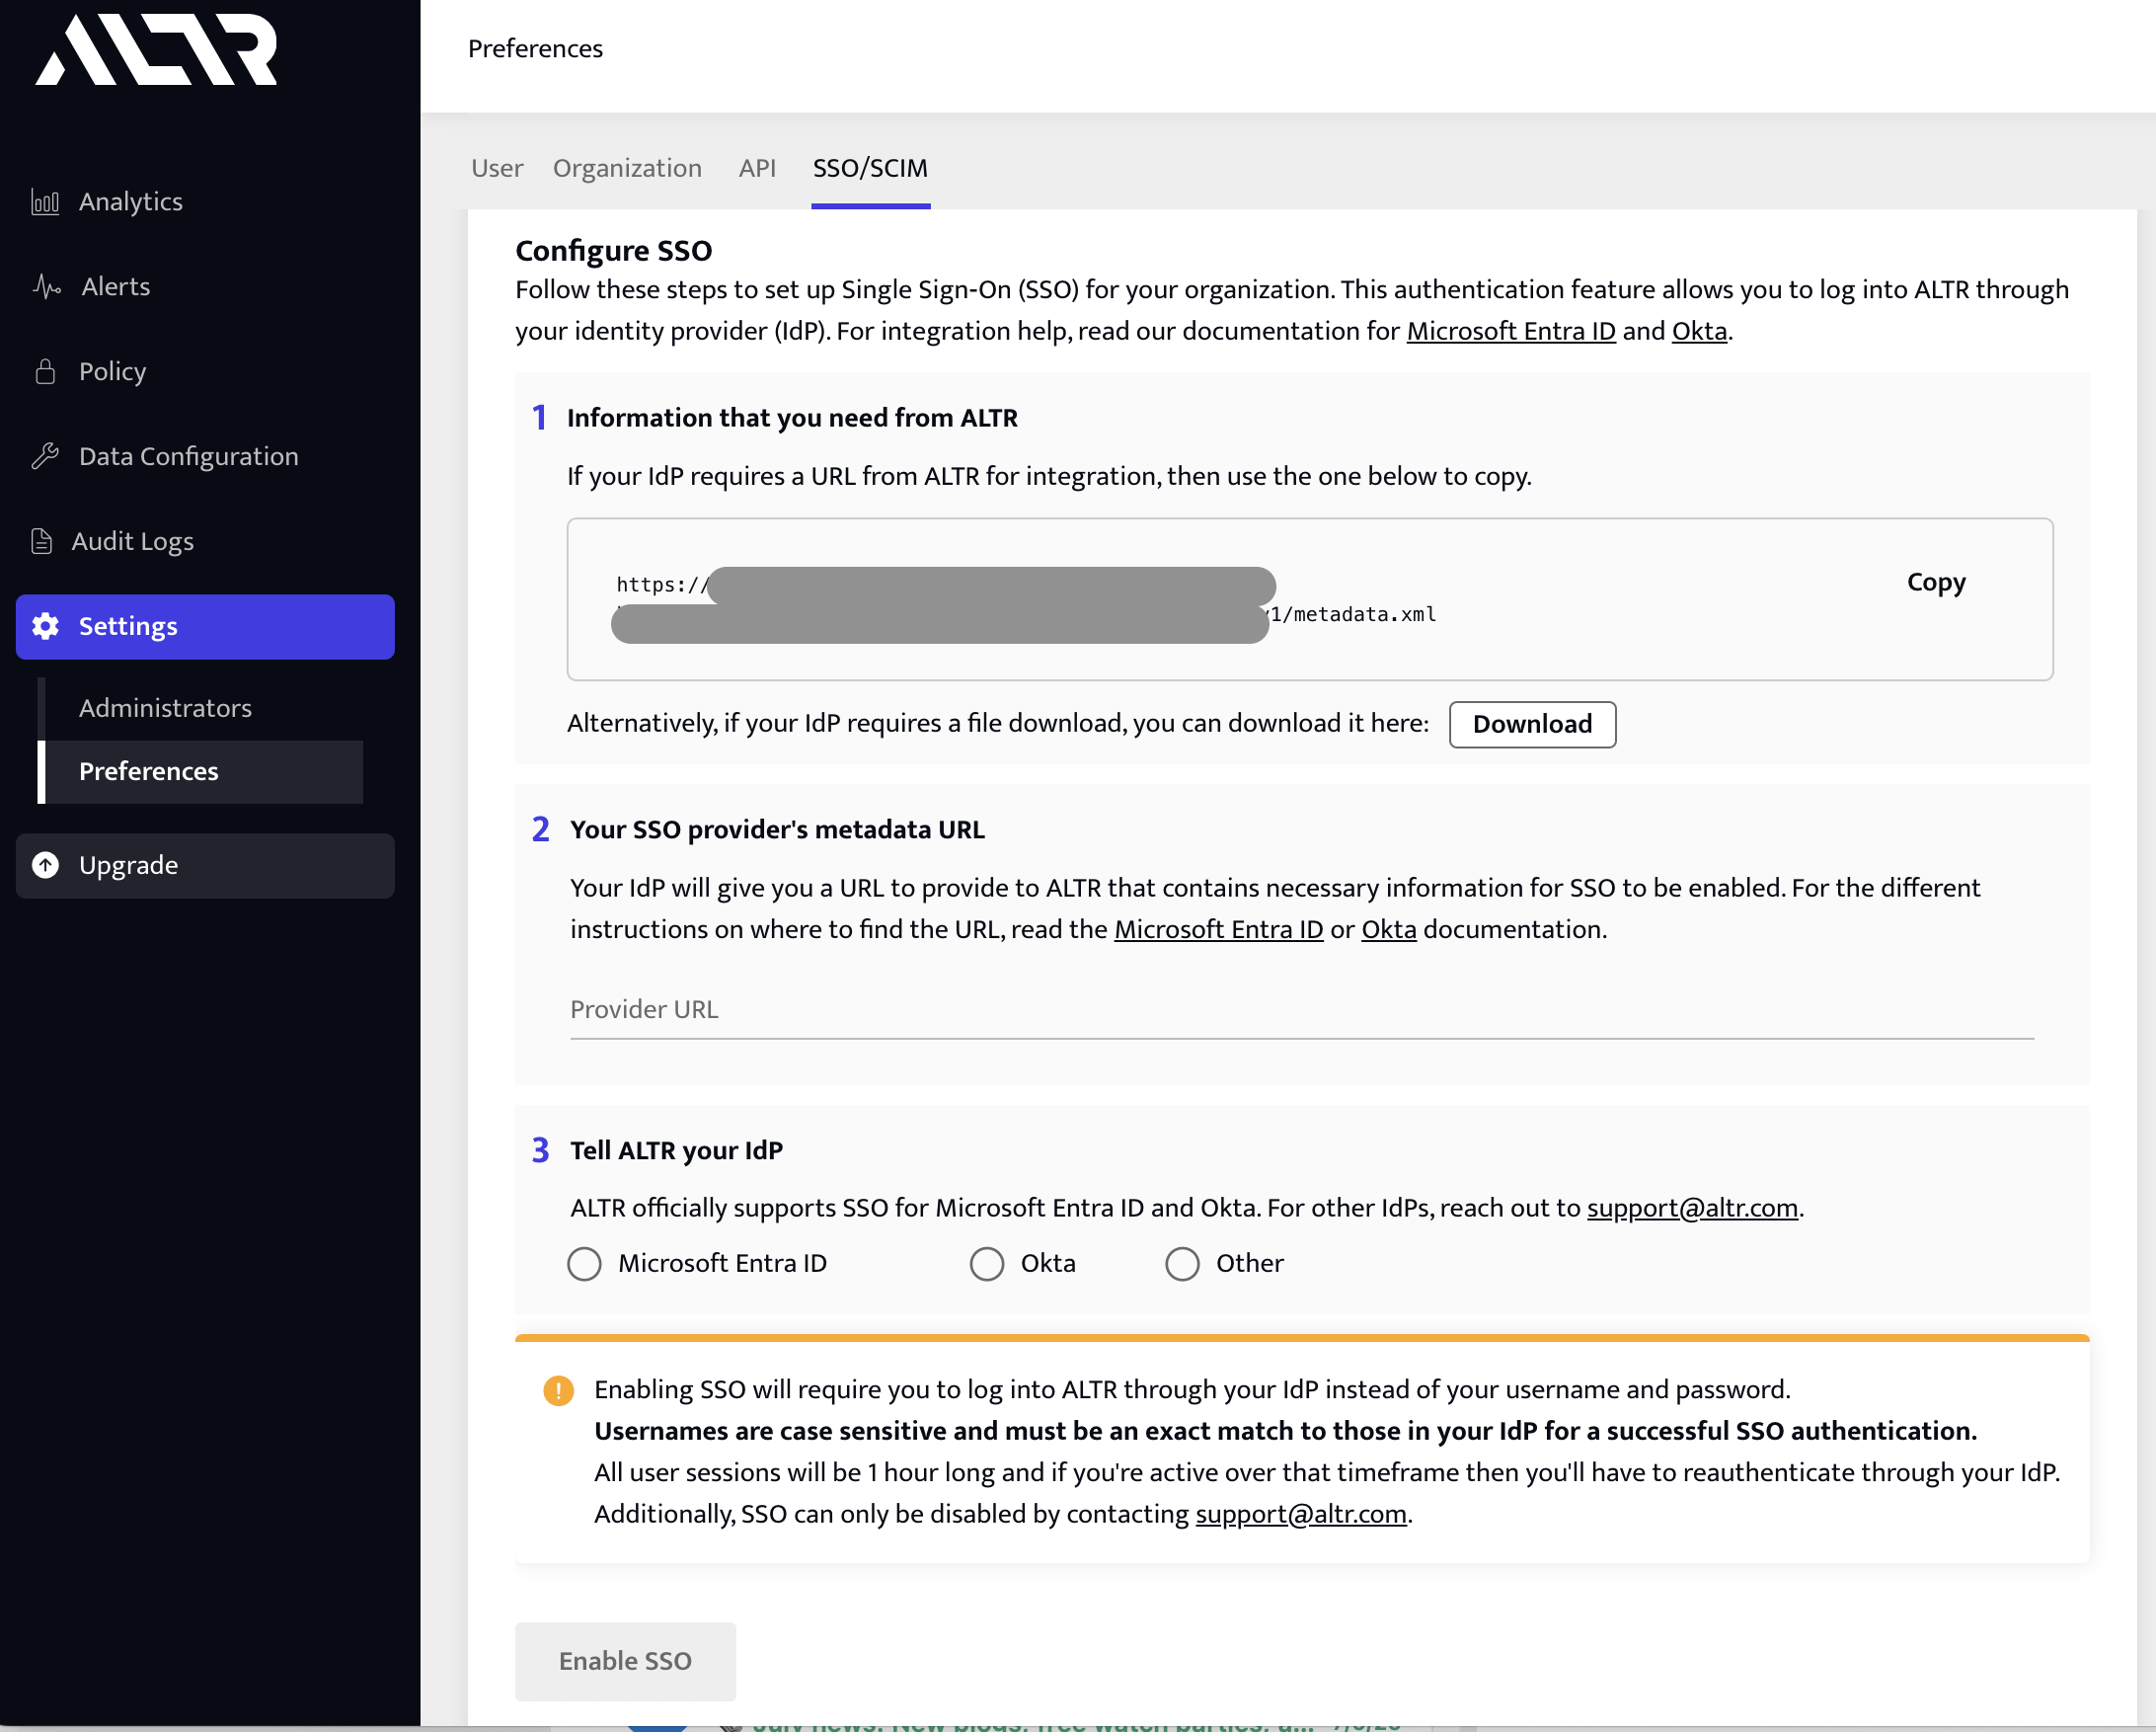
Identify the entityID and Location fields in the XML file.

Configure the necessary SSO settings in Okta.
Copy the Location field from ALTR's metadata file (do not copy the quotation marks) and paste it in the Single sign-on URL field in Okta.
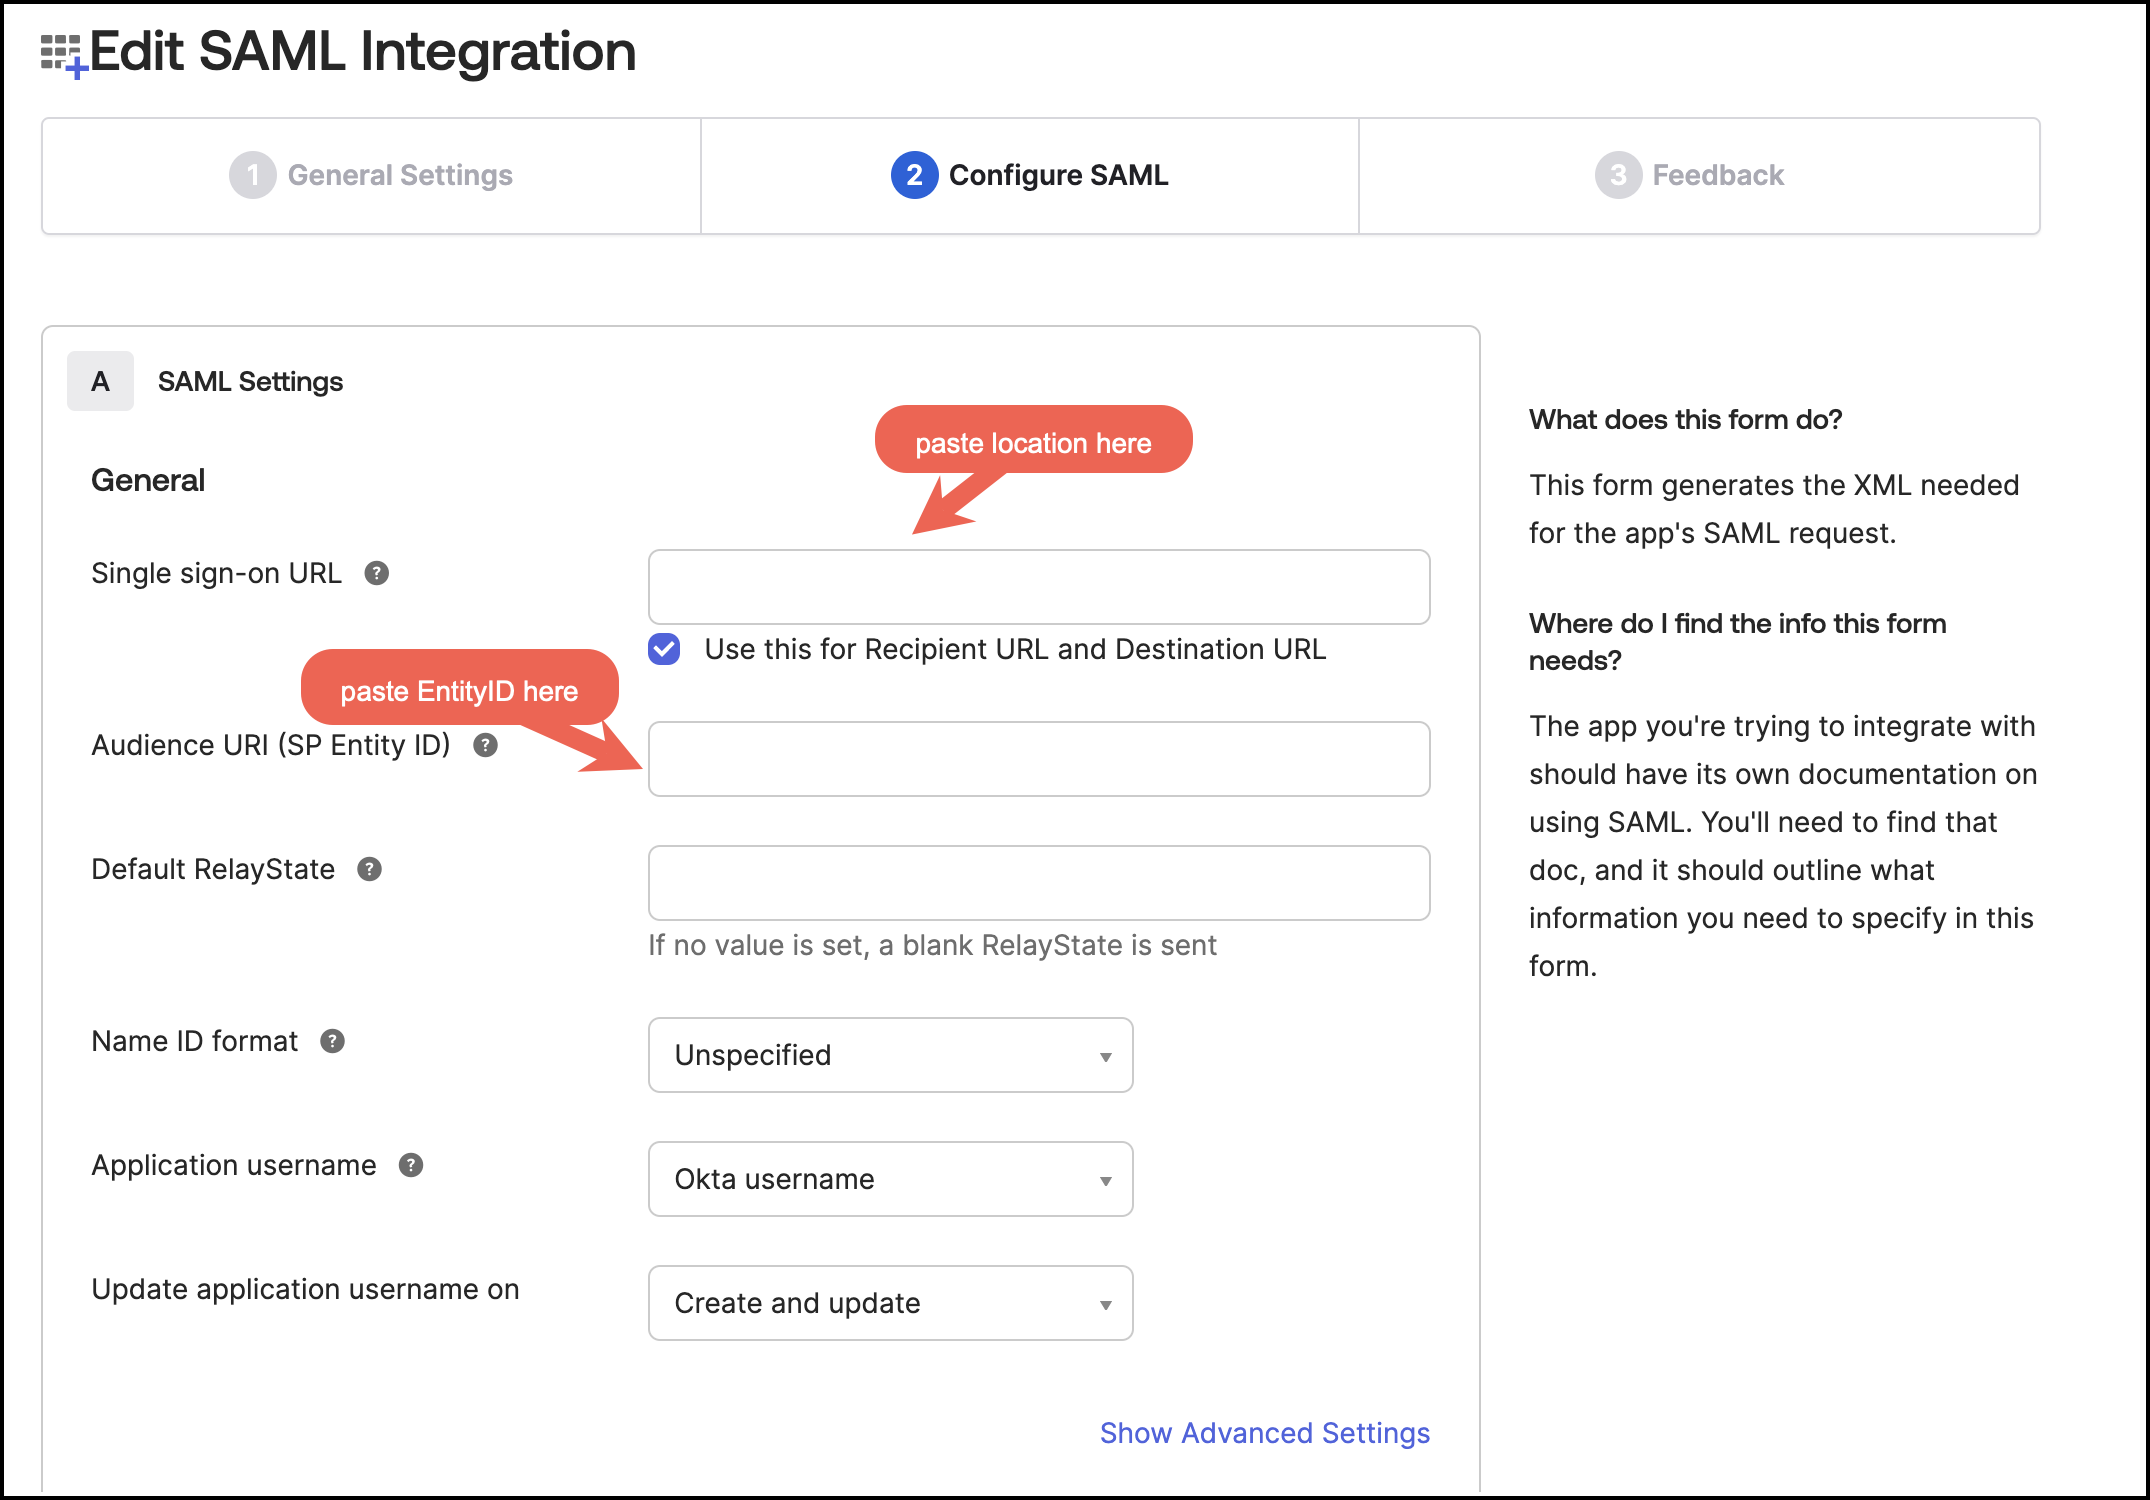
Select the Use this for Recipient URL and Destination URL checkbox.
Copy the entityID from ALTR's metadata file (do not copy the quotation marks) and paste it in the Audience URI (SP Entity ID) field in Okta.
Ensure that the Application username field is set to Okta username.
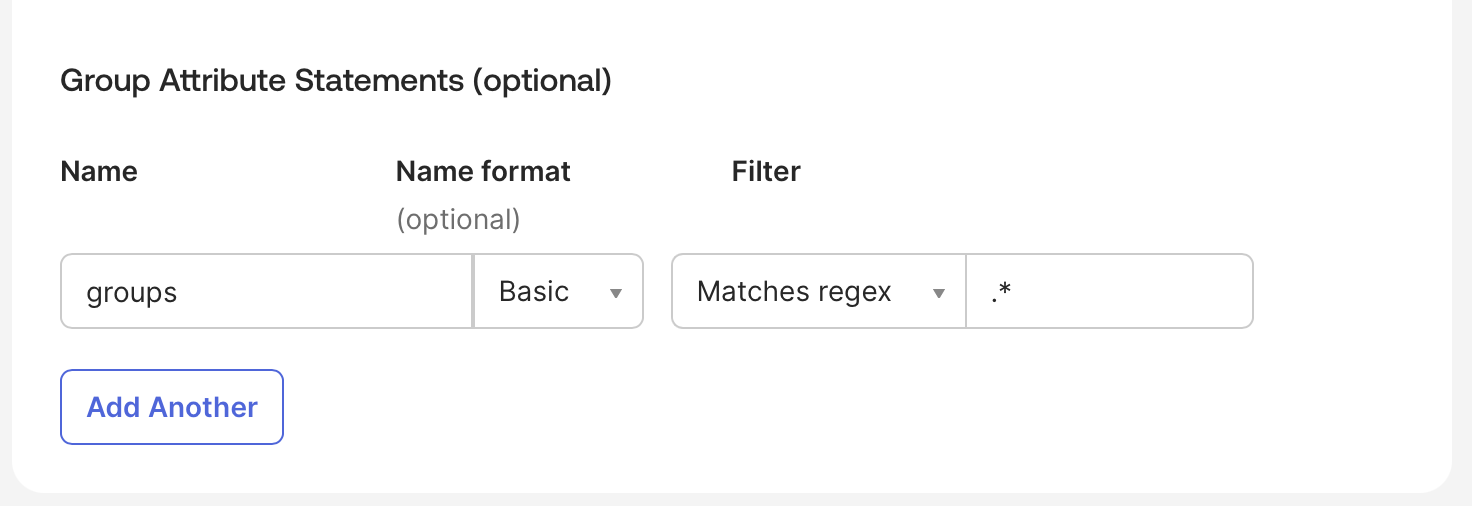
If using ALTR's sidecar integrations, configure the SAML Settings by adding a Group Attribute Statement:
Locate Group Attribute Statements (optional).
Enter “groups” for the Name.
Select Basic as the Name format.
Select Matches regex as the Filter and set it to
.*.
Click Next.
Verify the This is an internal app that we have created check box is enabled.
Click Finish.
Provision your ALTR administrators to your Okta application.
In Okta, navigate your ALTR application and select the tab.
Select → .
Locate yourself in the list of assigned users. Your Username is in the field below your name and is typically in gray. Click Assign.
Click Save and Go Back.
Click Done.
In ALTR, select → in the Navigation menu and find your Username.
Ensure that your ALTR Username exactly matches your Username in Okta. This match is case sensitive. If your Username in ALTR does not exactly match your Okta Username, you will not be able to sign into ALTR.
Notice
If your ALTR Username does not match, you have two options:
Create a new ALTR account using the correct Username.
Override the Username in Okta for this integration. When assigning the user, copy your Username from ALTR and paste it into the Username field in Okta. This override only affects your login for ALTR; it does not change any of your other tools.
Repeat these steps for each of your ALTR administrators.
Configure SSO in ALTR.
In Okta, click the Sign On tab. Copy the Metadata URL.
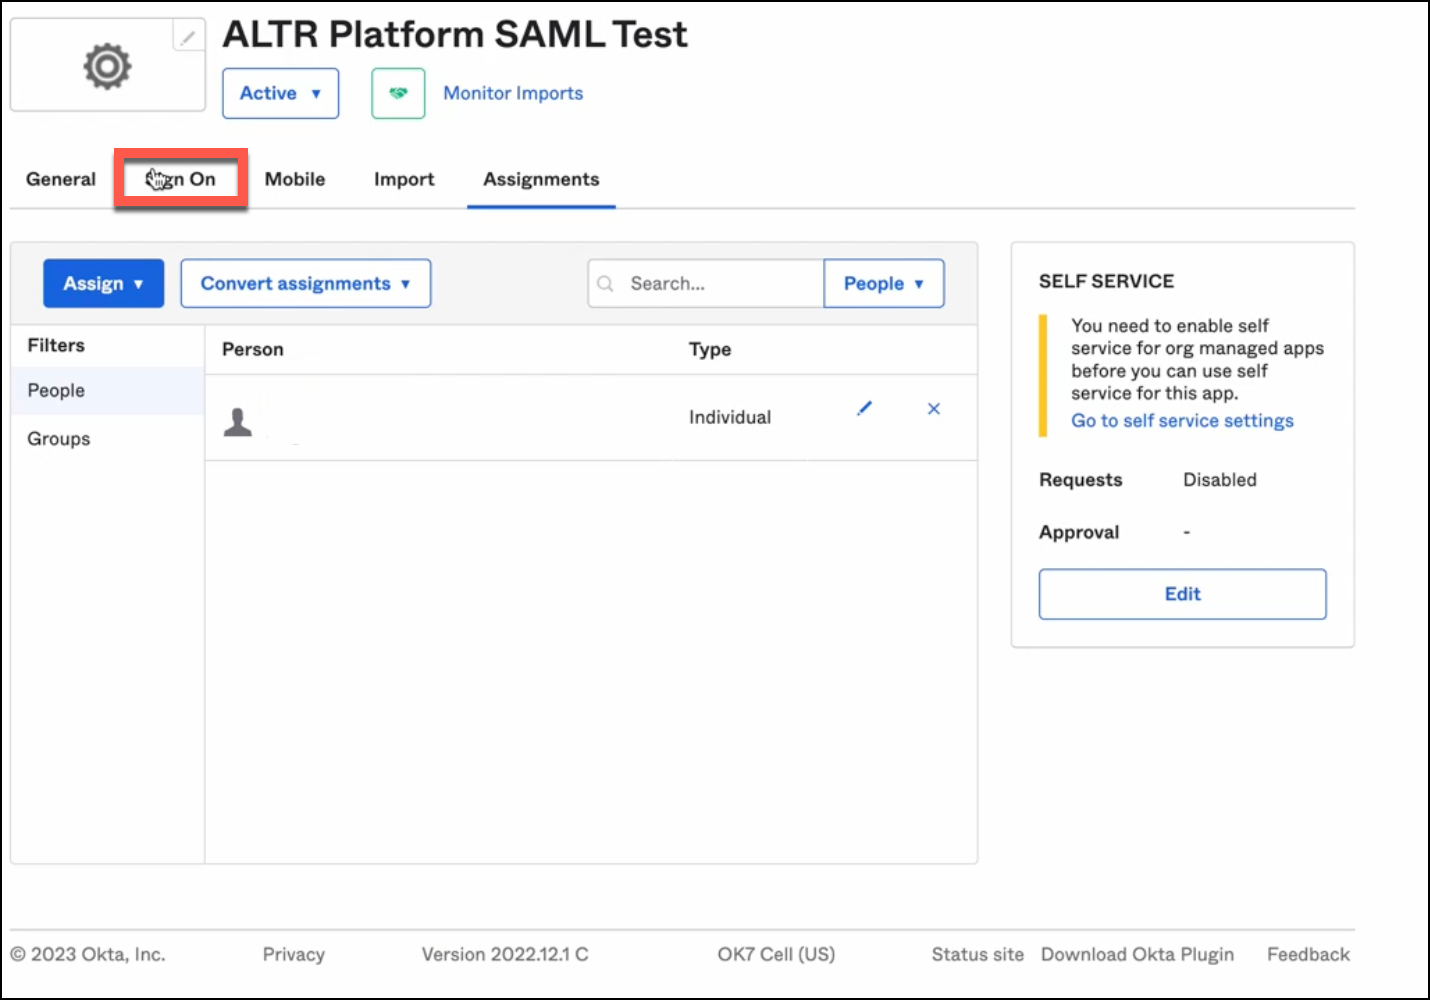
In ALTR, select → in the Navigation menu.
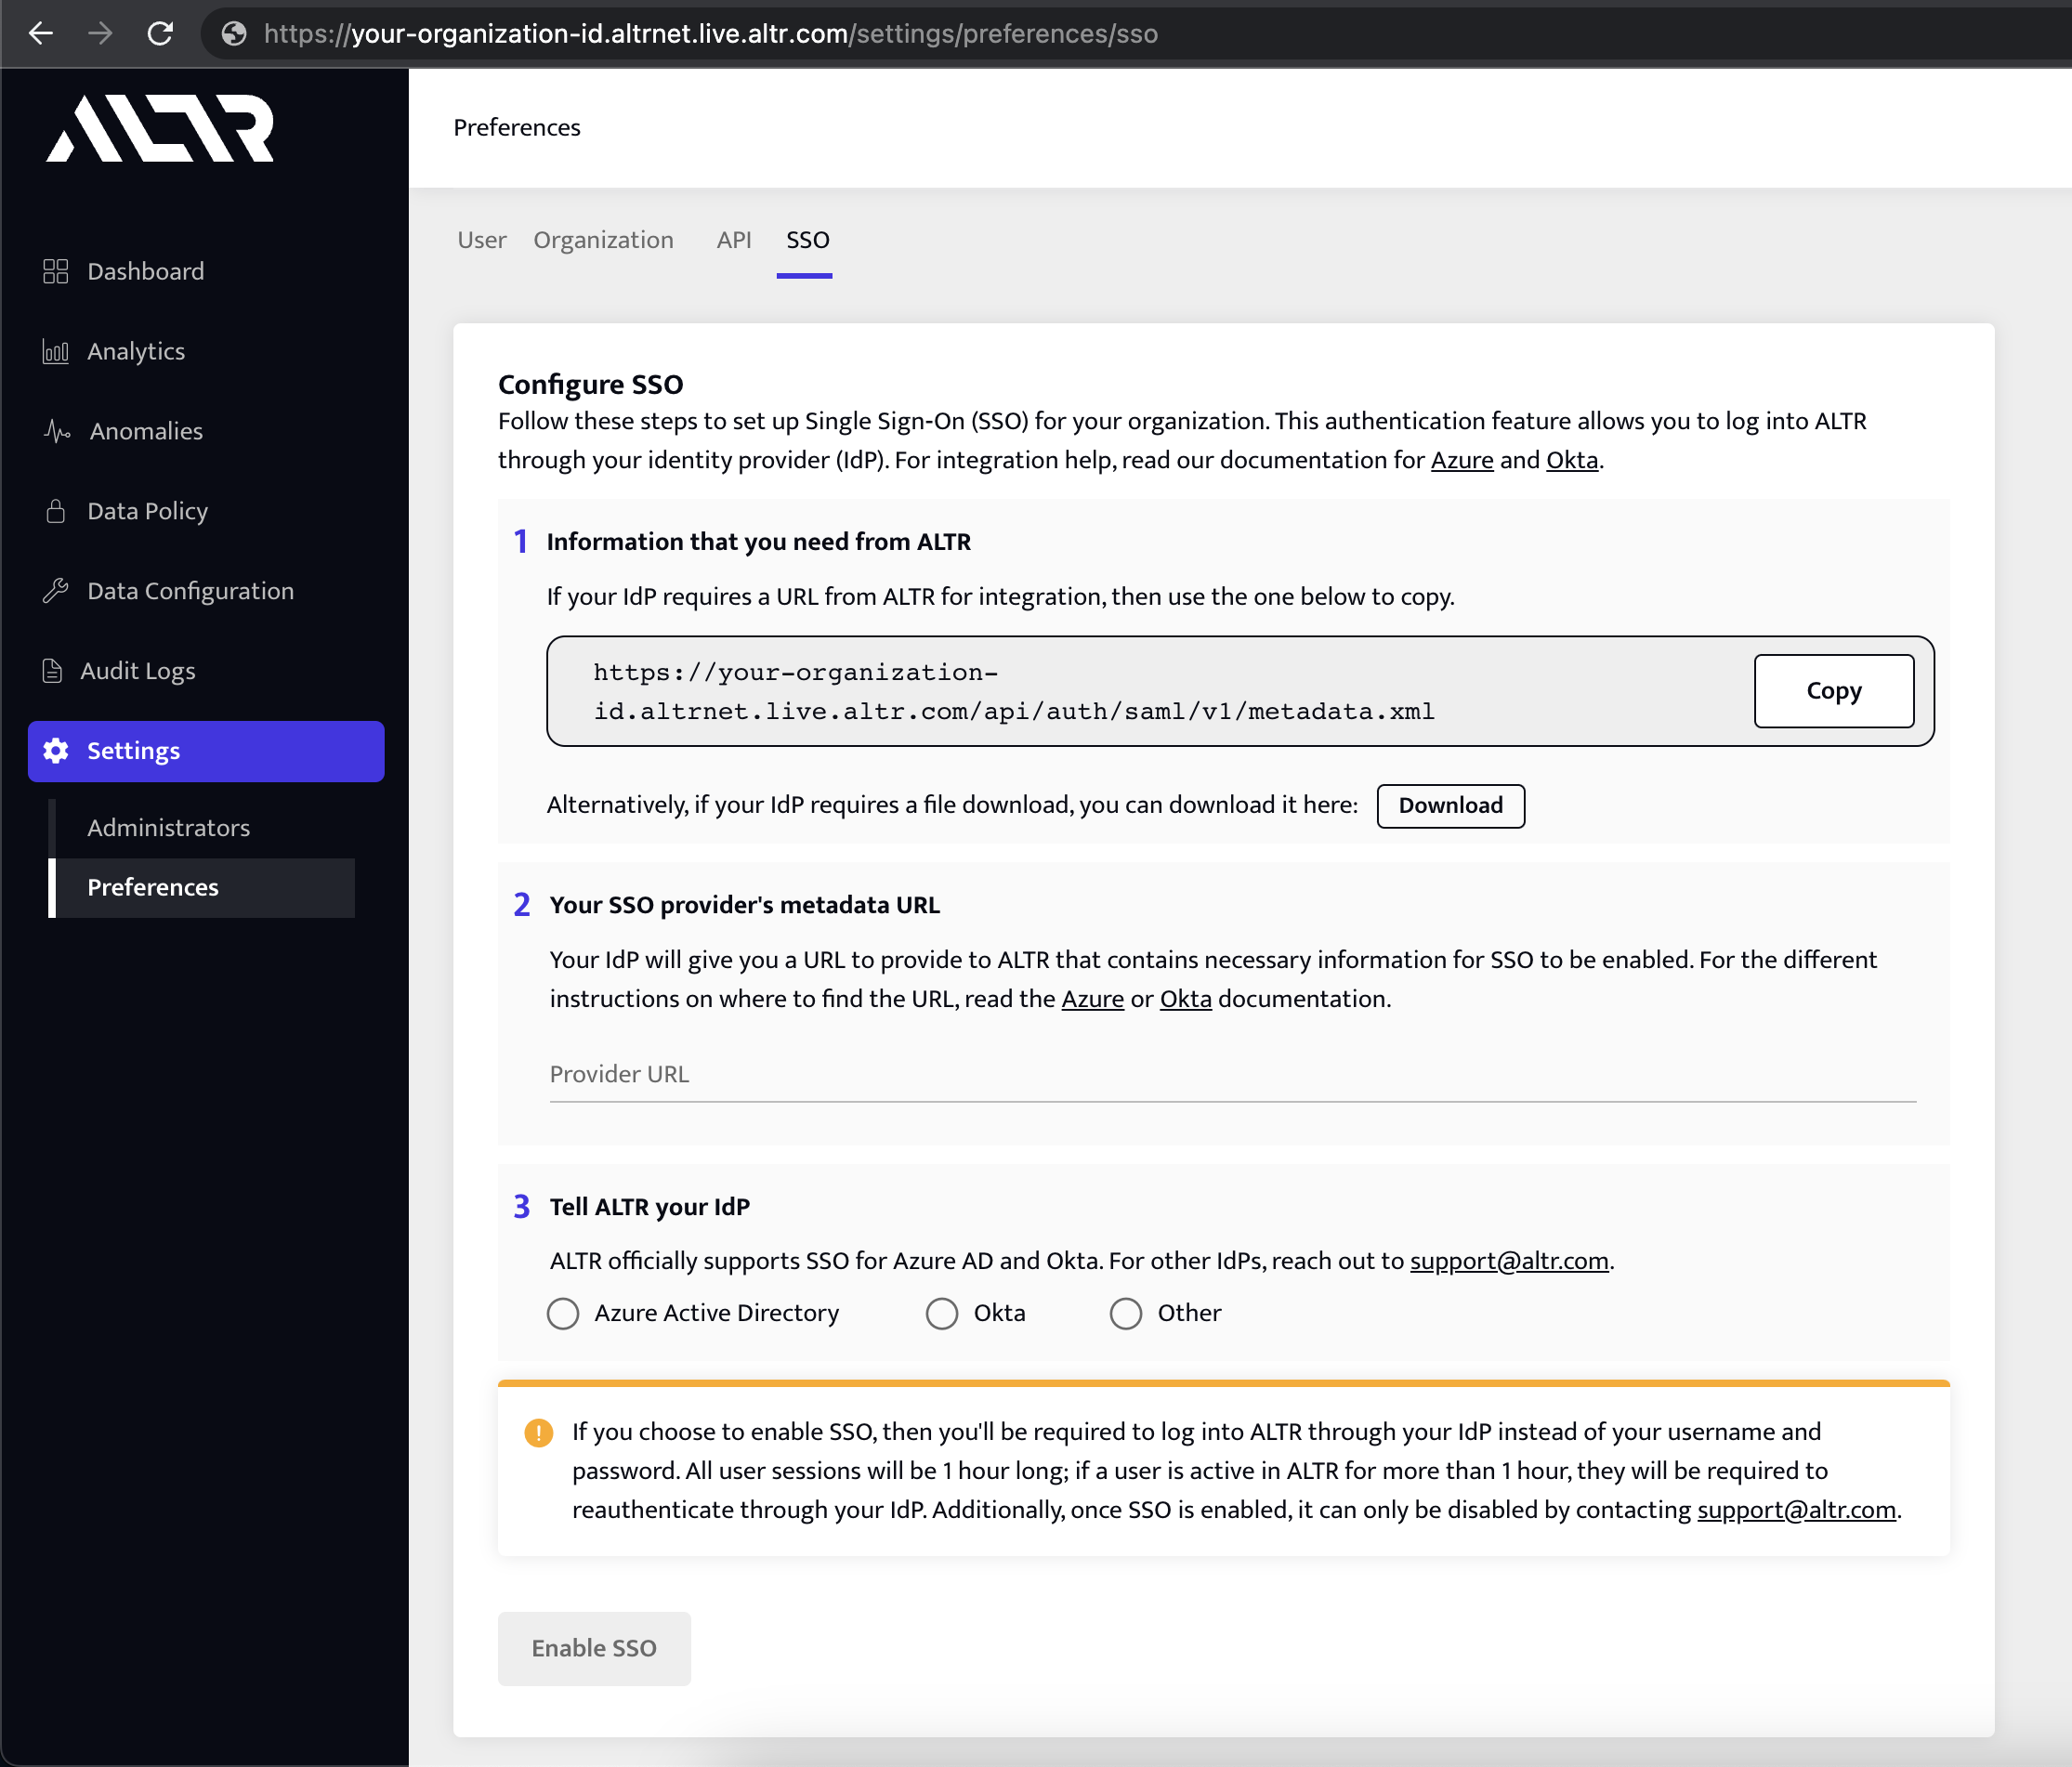
Click the SSO/SCIM tab.
Paste the metadata URL into the Provider URL field.
Select Okta as your Idp.
Click Enable SSO.
Important
Do not close your window or sign out of ALTR yet.
Once ALTR has successfully configured SSO, keep your current window open, open an incognito window or a different browser, and sign into your ALTR account. Do not sign out of ALTR on your main window until you have confirmed you can sign into ALTR on the second window.
Note
If you are unable to log into the second window, create a new Administrator account in ALTR with a Username that exactly matches (it is case sensitive) your unique identifier in your identify provider (IdP). For Okta, this is typically your Username.
Once you have successfully logged into ALTR through SSO, you can sign out of ALTR or close your browser.