Configure System for Cross-Domain Identity Management (SCIM) for Okta
System for Cross-domain Identity Management (SCIM) is an open specification to manage identities across a wide number of software applications through a single identify provider (IdP) such as Okta. Activating SCIM for ALTR will automate creating, updating and removing ALTR identities from your IdP. ALTR currently support SCIM integrations with Okta.
Prerequisites to enable SCIM in ALTR
When enabling SCIM, make sure you have
SSO enabled. Learn more.
Administrator access to your identity provider (Okta).
An ALTR Enterprise account.
Super Administrator access to your ALTR account. Learn more.
Enable SCIM with Okta
Enable Provisioning in Okta for you ALTR application
Select your existing ALTR application in Okta.
Click the General tab.
Under App Settings, click Edit.
For Provisioning, select SCIM.
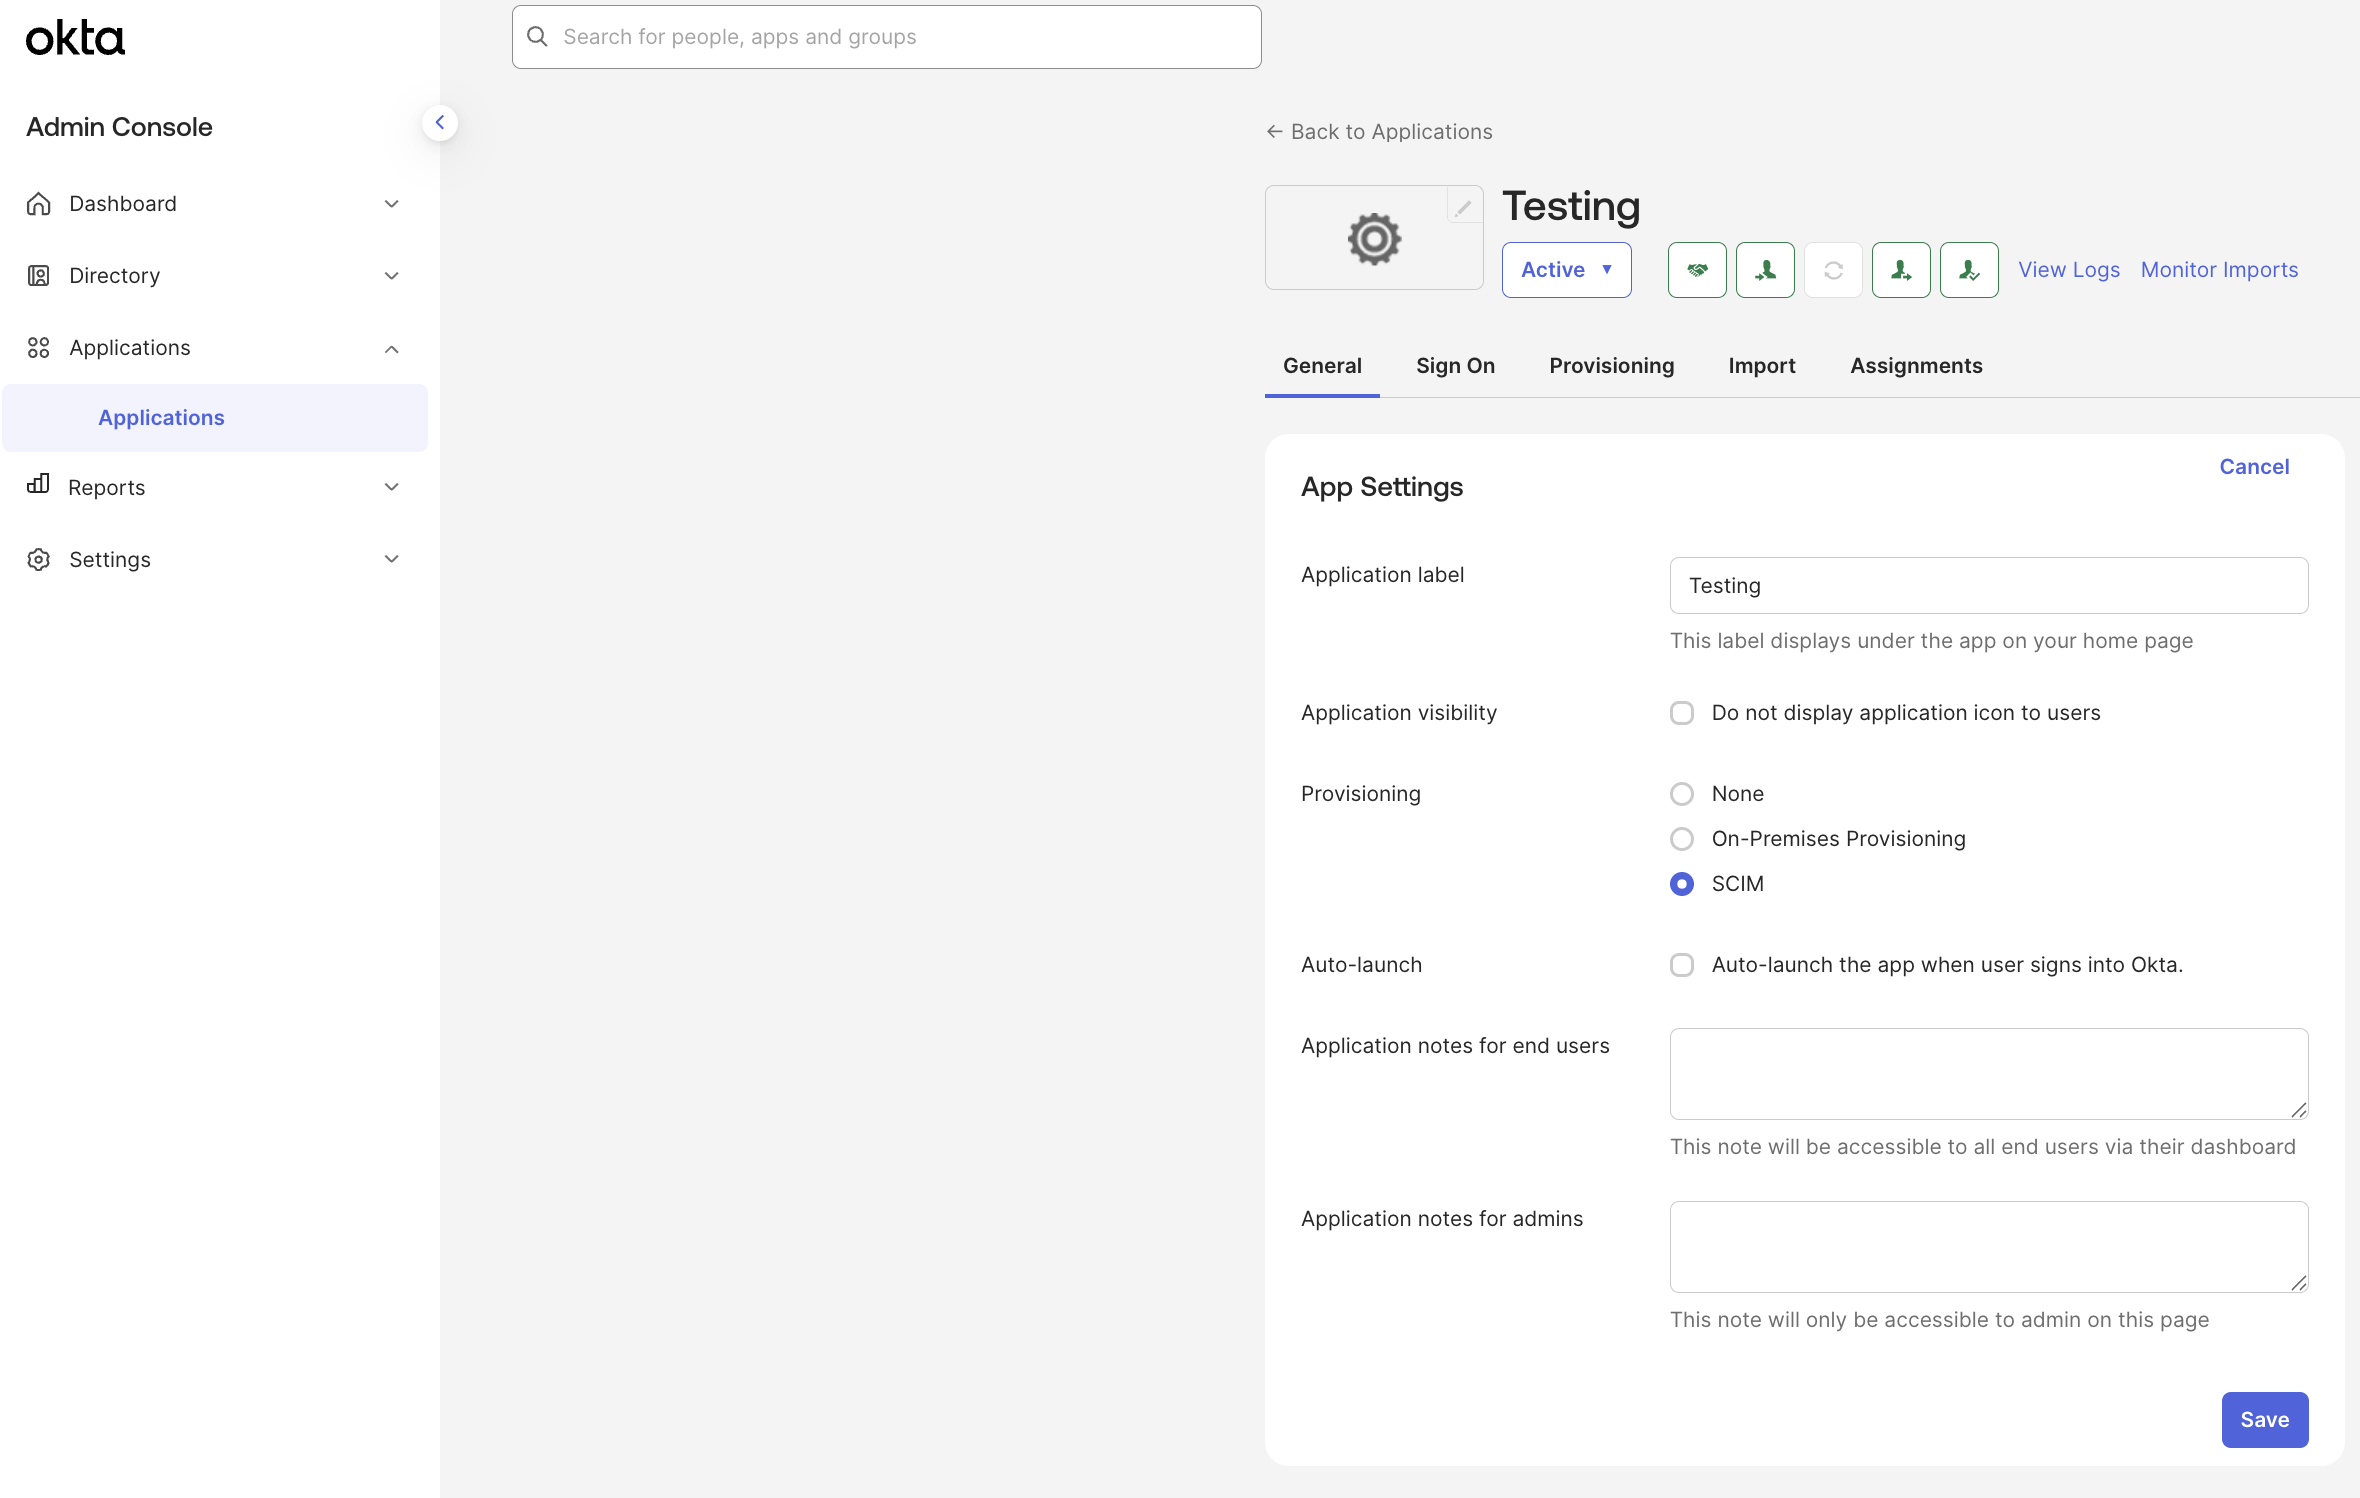
Click Save.
Configure Okta to connect to ALTR's SCIM API
Log into ALTR and select → in the Navigation menu.
Click the SSO/SCIM tab.
Select Okta as your IdP.
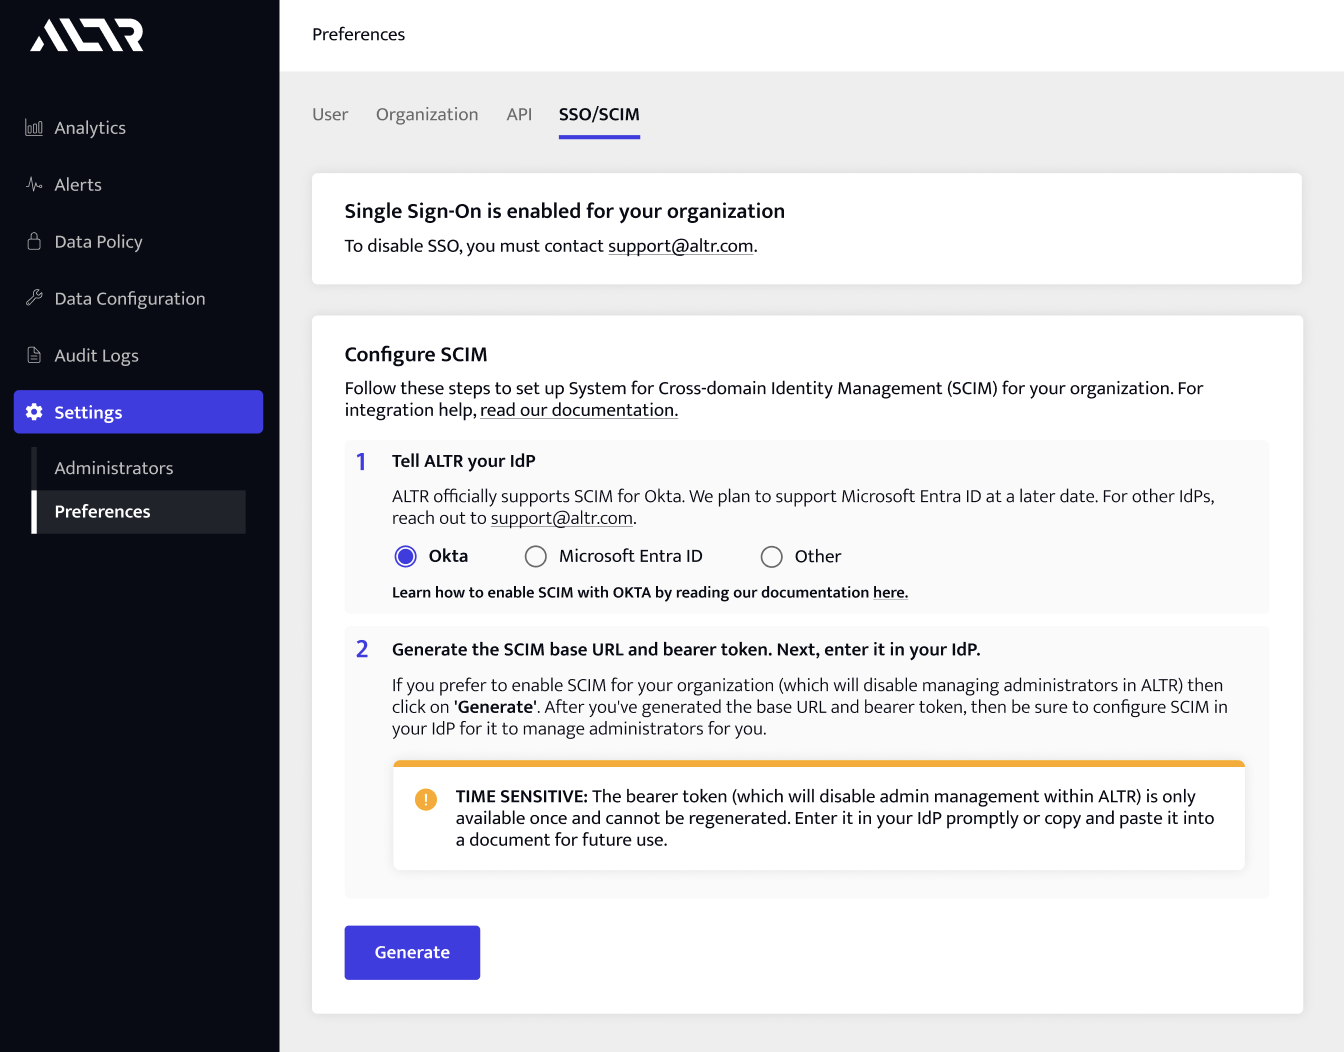
Click Generate. This generates the SCIM URL and bearer token for your Okta organization.
Important
The bearer token is only available once and cannot be regenerated. Do not close this page in ALTR until you have finished enabling SCIM.
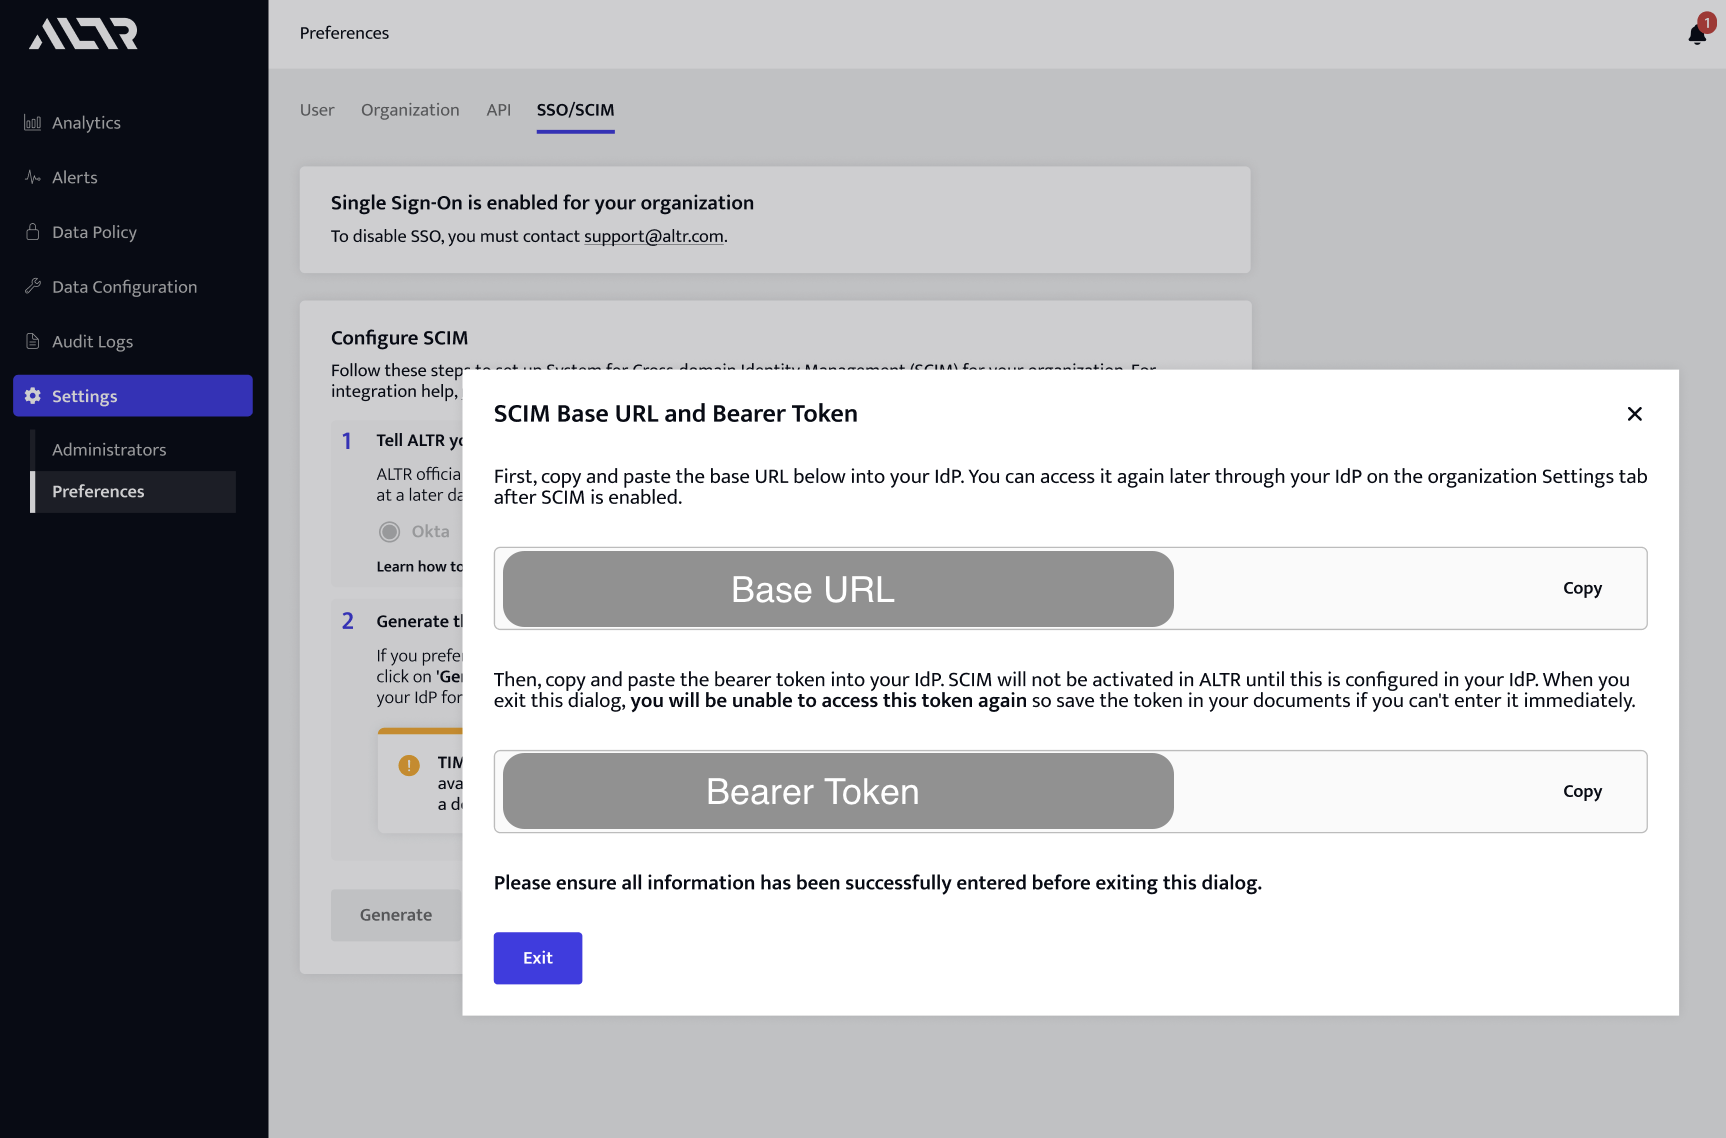
Copy the base URL from ALTR. Do not close the page in ALTR until you have finished enabling SCIM.
Open a new browser/tab and log into Okta.
Click the Provisioning tab.
Select Integration in the Navigation menu (this should be selected by default).
Under SCIM Connection, click Edit.
Paste the base URL from ALTR into the SCIM connector base URL field in Okta.
Enter “userName” in the Unique identifier field for users field.
Warning
The Unique Identifier field is case sensitive
Select the Import New Users and Profile Updates, Push New Users and Push Profile Updates check boxes.
Select HTTP Header from the Authentication Mode dropdown.
Return to ALTR. Copy the bearer token from the SSO/SCIM tab.
Return to Okta. Paste the bearer token from ALTR into the Bearer field (under HTTP Header). Do not close the page in ALTR until you have finished enabling SCIM.
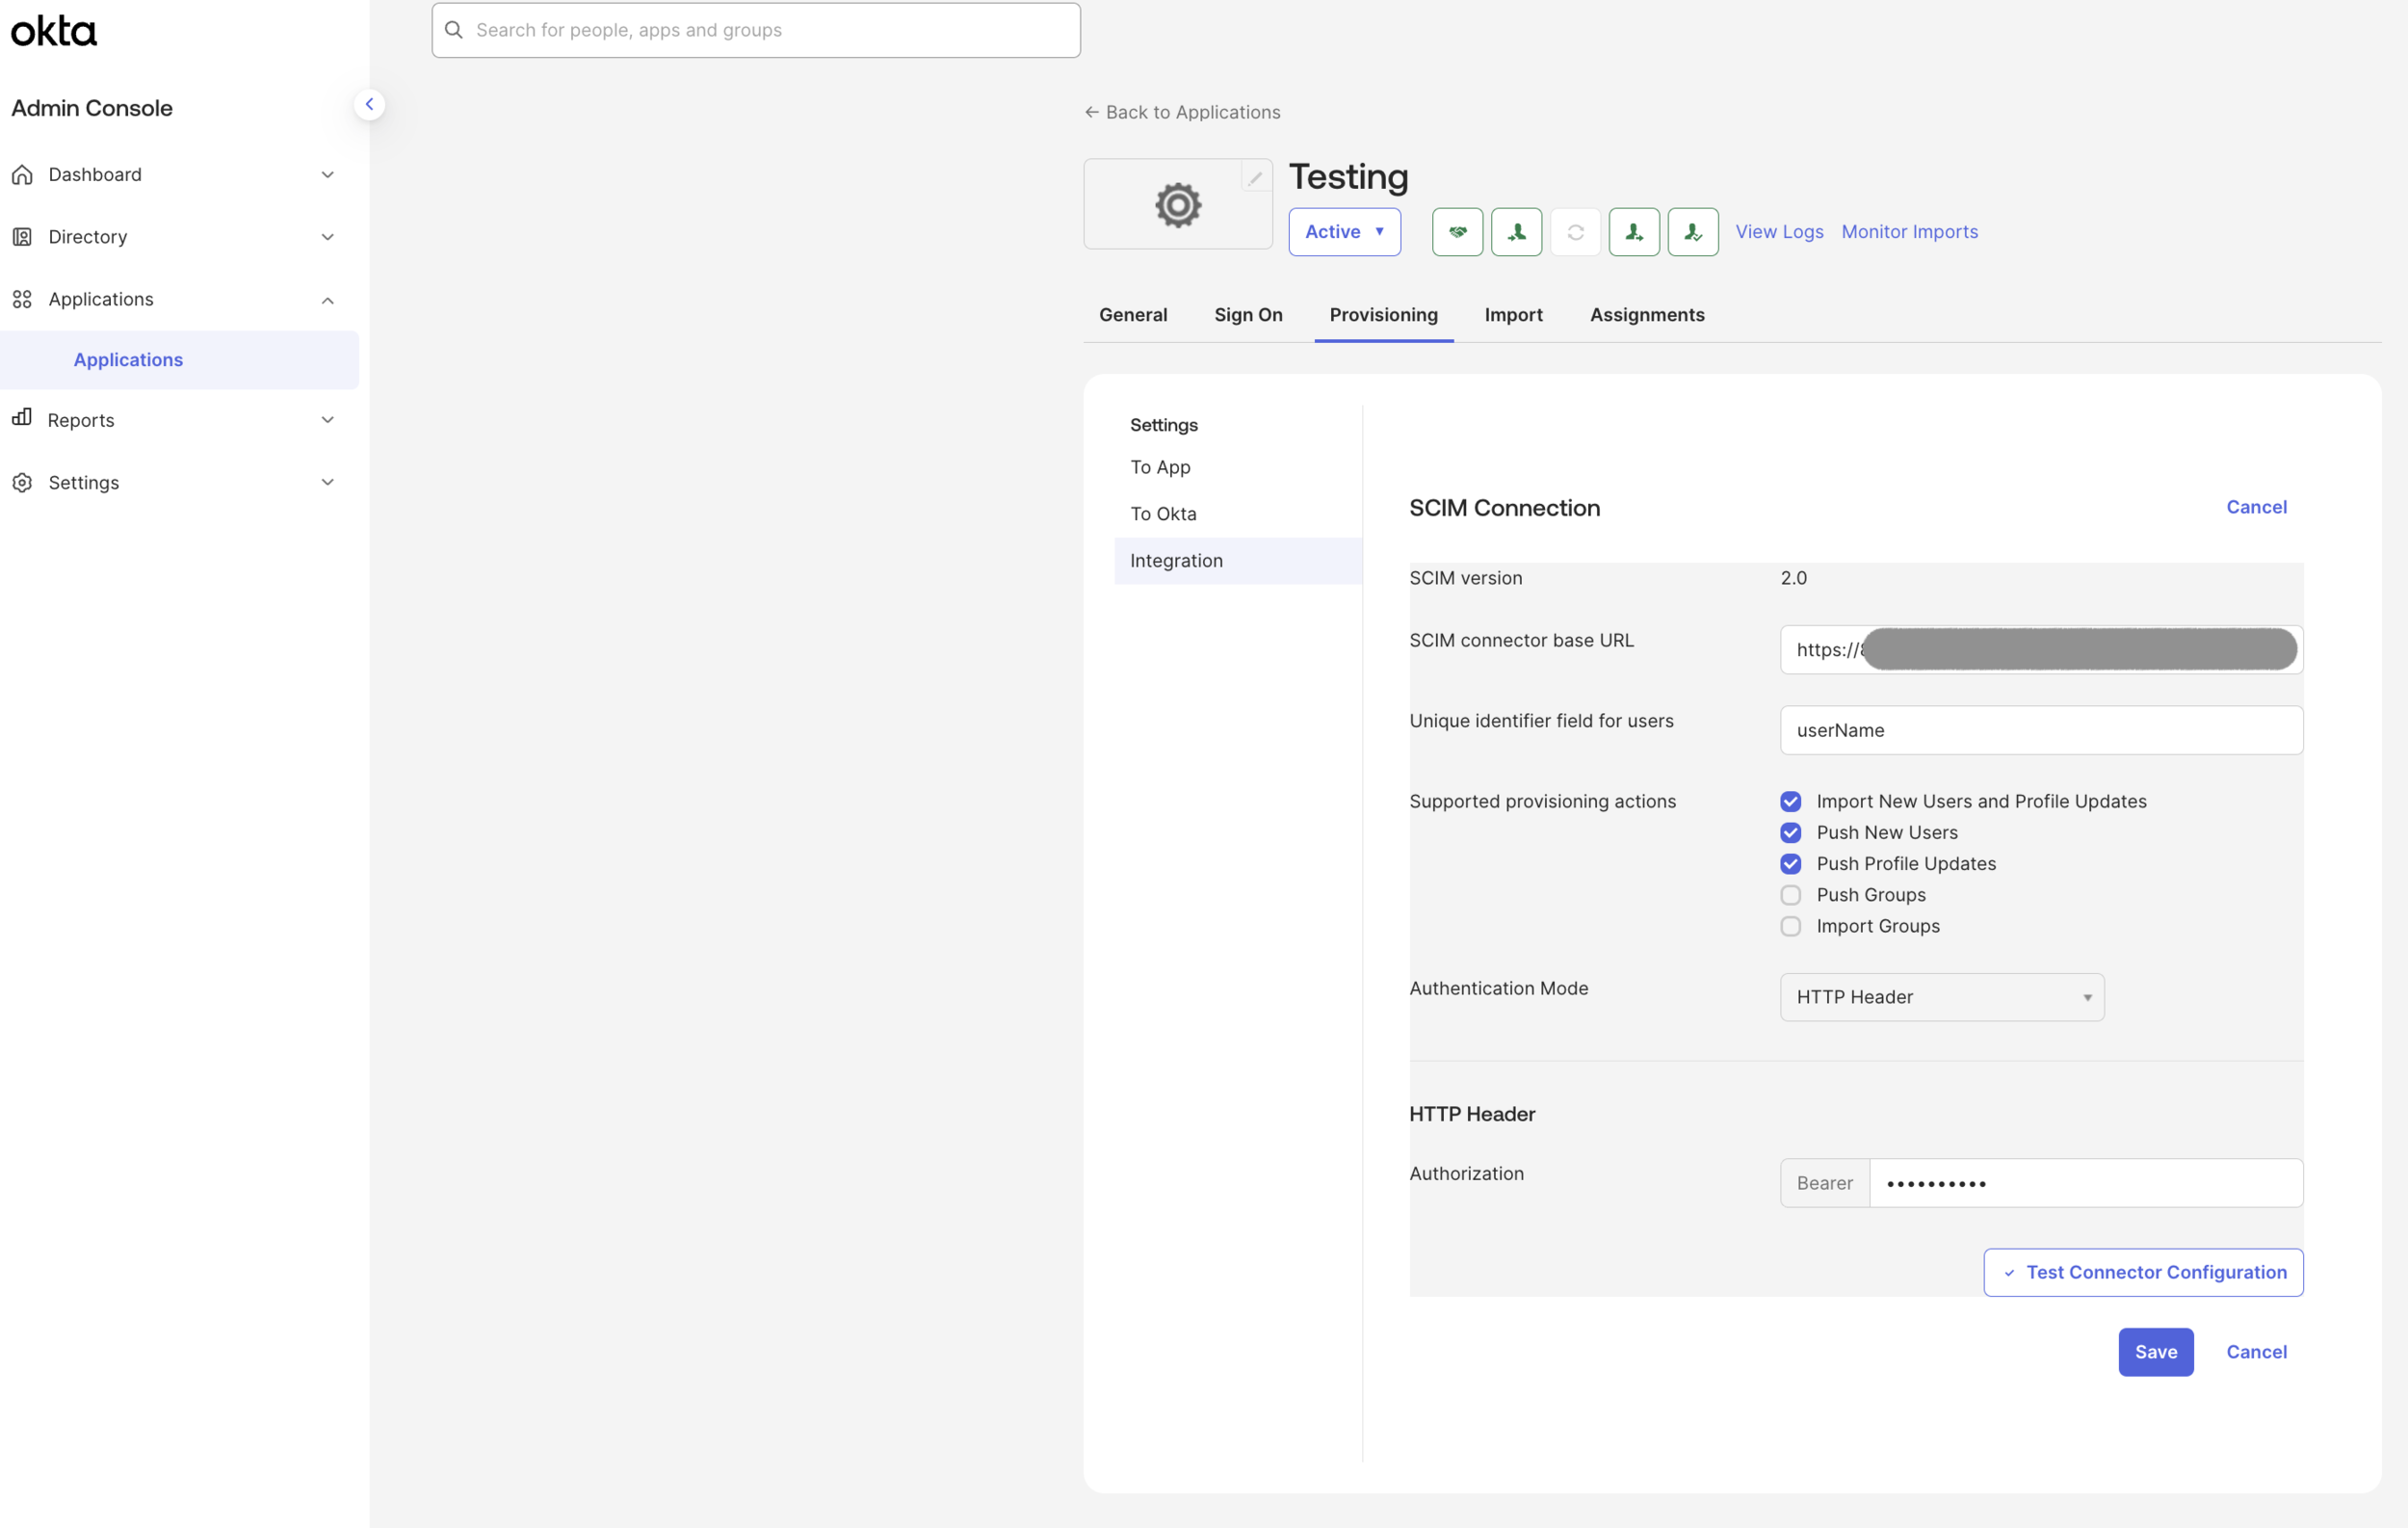
Click Save. Okta tests the connection to ALTR. If the changes save without error, you may close the safely close modal in ALTR.
Configure Okta to create, edit, and remove ALTR administrators
Click the Provisioning tab.
Select To App in the Navigation menu (this should be selected by default).
Under Provisioning to App, click Edit.
Select Enable for Create Users, Update User Attributes and Deactivate Users.
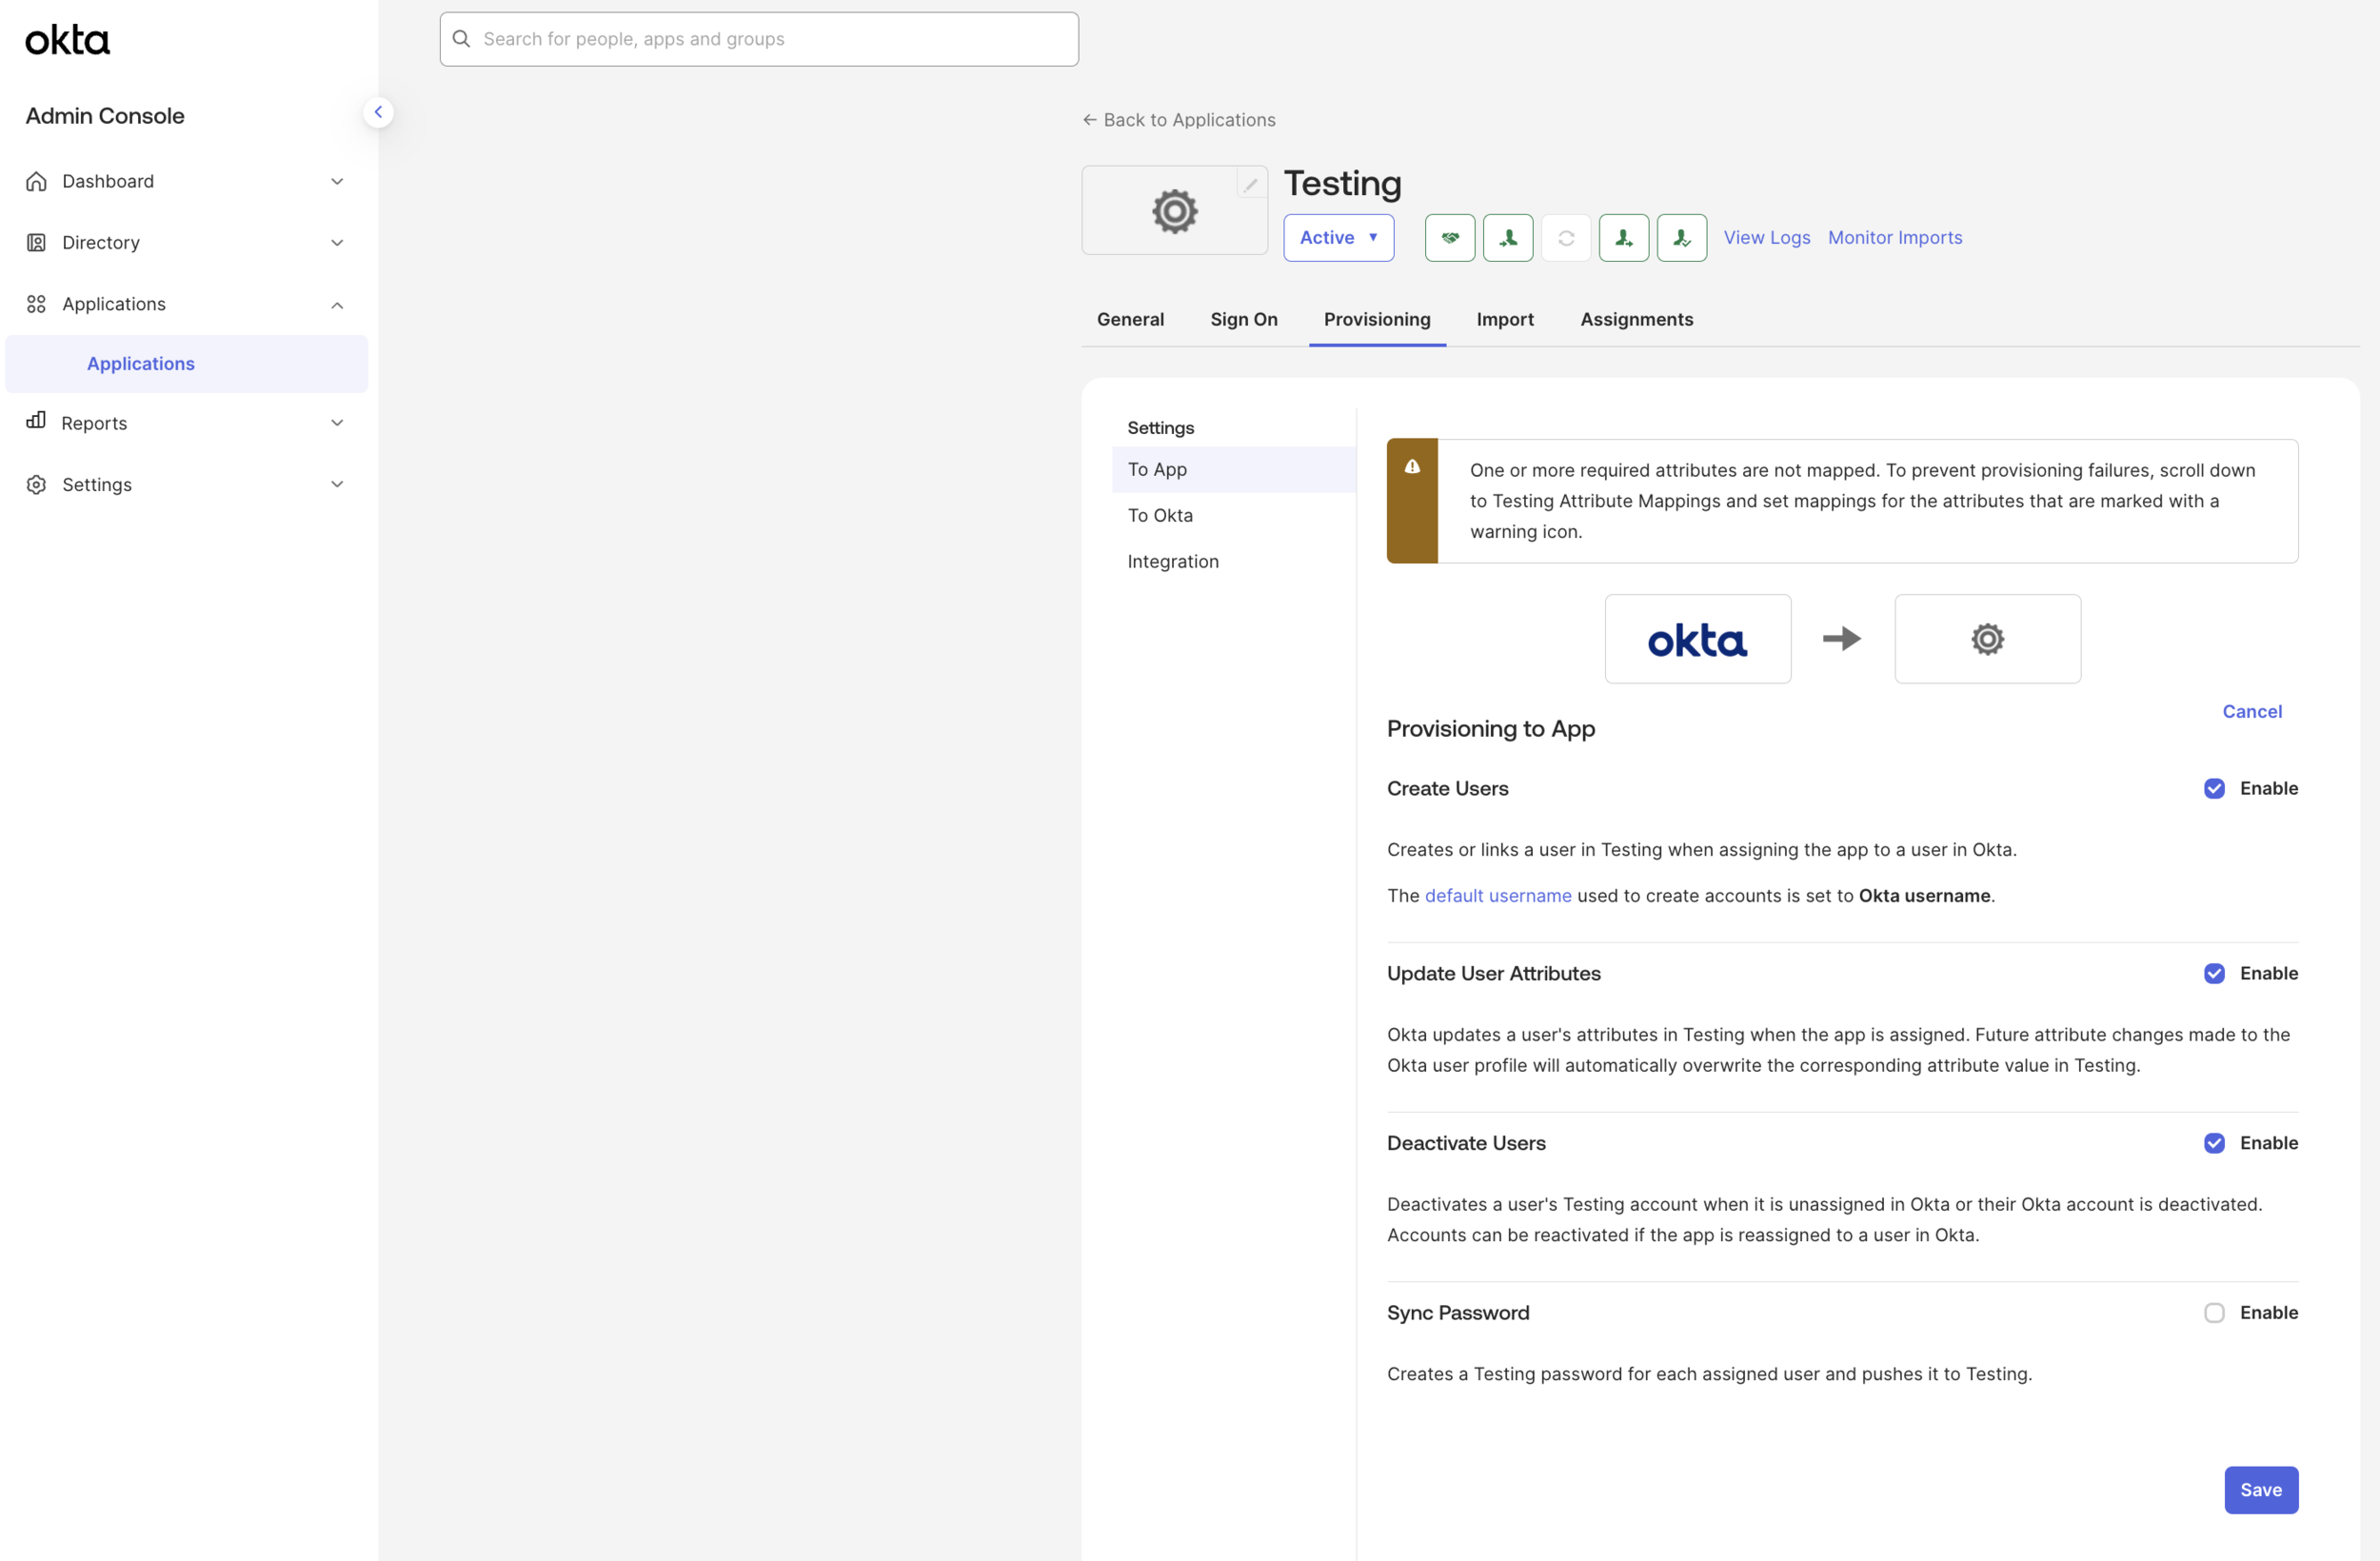
Click Save.
Enable the "ALTR_ADMIN_LEVEL" attribute in Okta
Important
If using a sidecar with impersonation policy, this step is required. It is optional if using Snowflake integrations.
Click the Provisioning tab.
Select To App in the Navigation menu (this should be selected by default).
Under [Application] Attribute Mappings, click Go to Profile Editor.
Click Add Attribute.
Enter "ALTR_ADMIN_LEVEL" in the Display name, Variable name, External name and External namespace fields.
For Enum, select Define enumerated list of values check box.
For Attribute Members, enter “ADMINISTRATOR" for the Display name and Value fields. These fields are case sensitive.
Click Add Another.
Enter “SUPERADMINISTRATOR" for the Display name and Value fields. These fields are case sensitive.
Click Add Another.
Enter “DATA_CONSUMER" for the Display name and Value fields. These fields are case sensitive.
For Attribute required, select Yes check box.
For Attribute type, select Group.
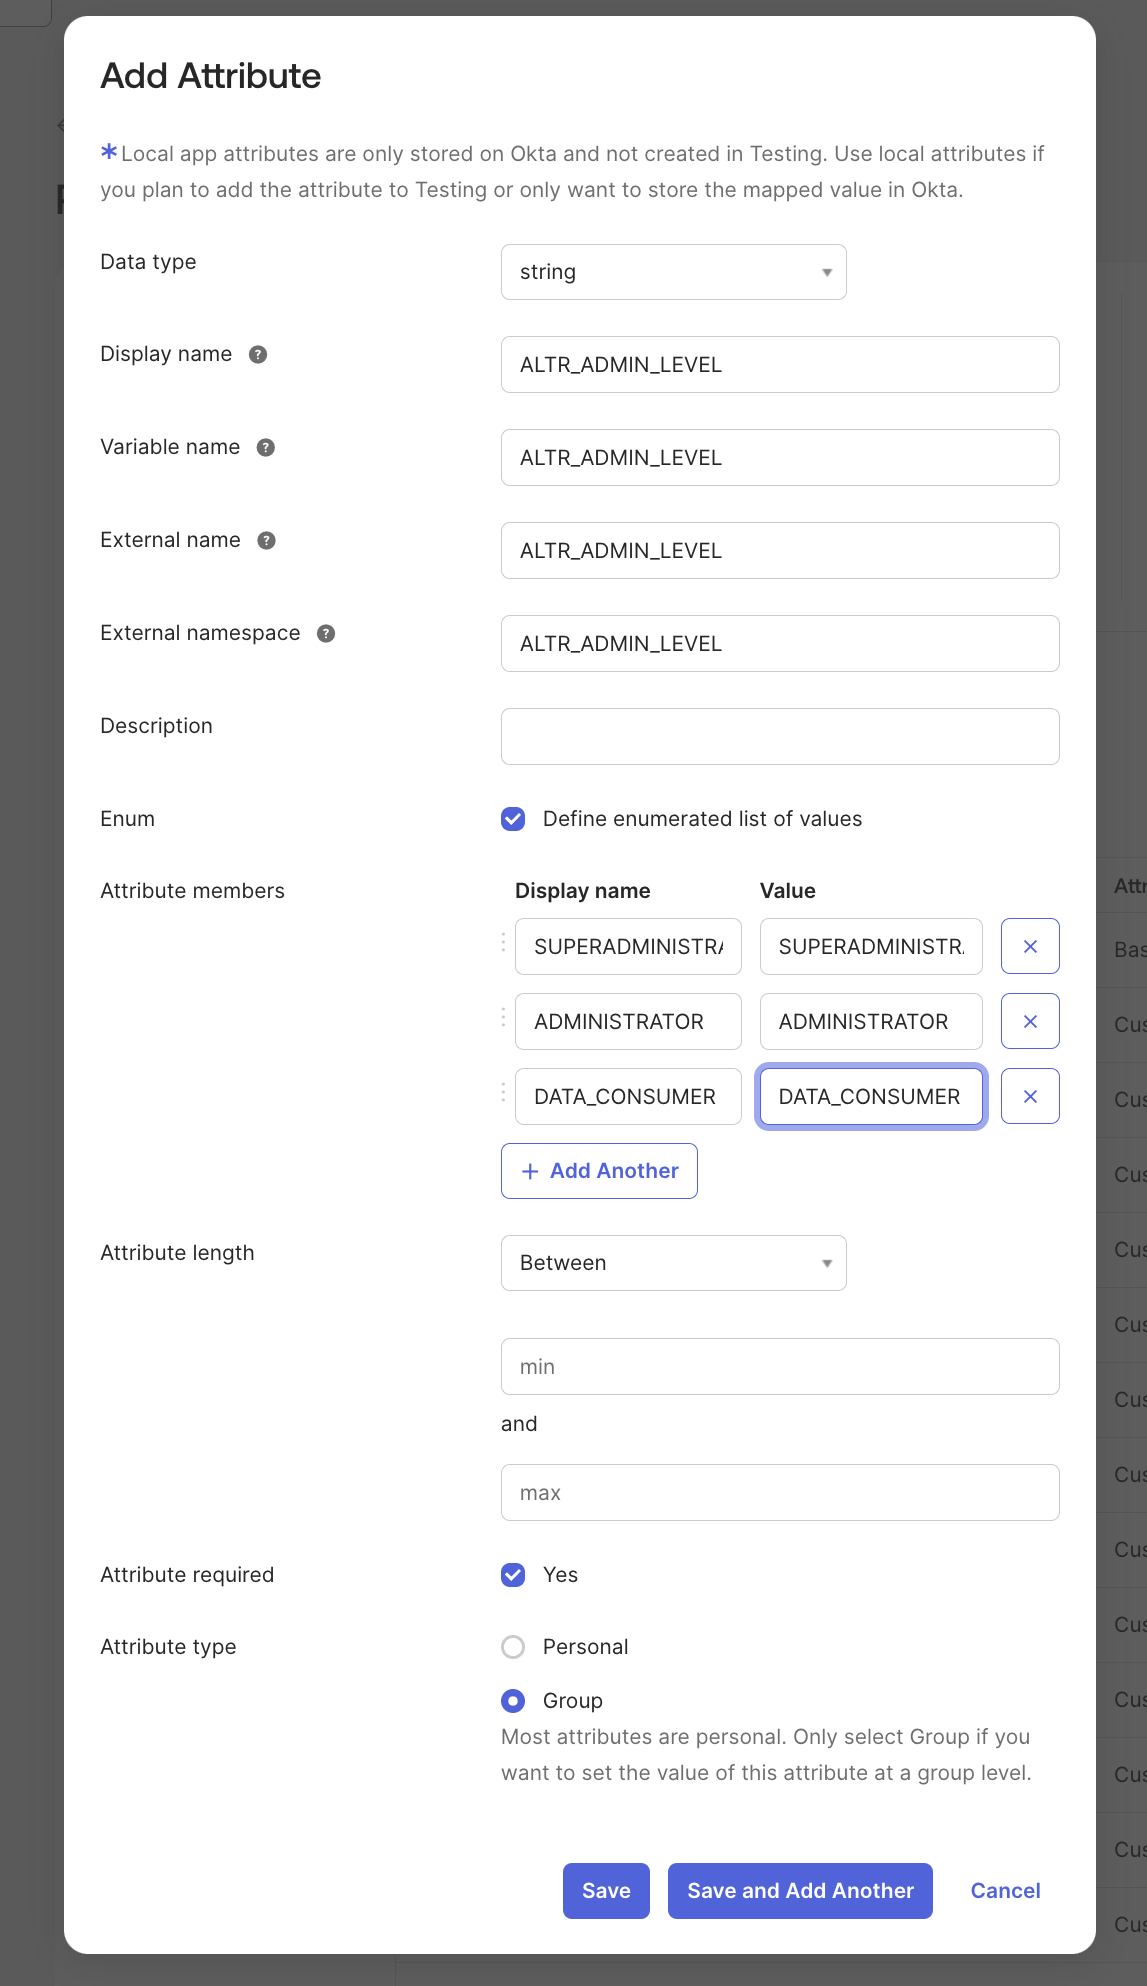
Click Save.
Provision users to ALTR
Navigate to your ALTR application in Okta.
Under the Import tab, import your existing ALTR administrators to this Okta application. Okta accesses a list of existing ALTR administrators and attempt to match them to Okta identities based on Username.
Important
If using a sidecar with impersonation policy, this step is required. It is optional if using Snowflake integrations.
Click the Assignments tab.
Select → .
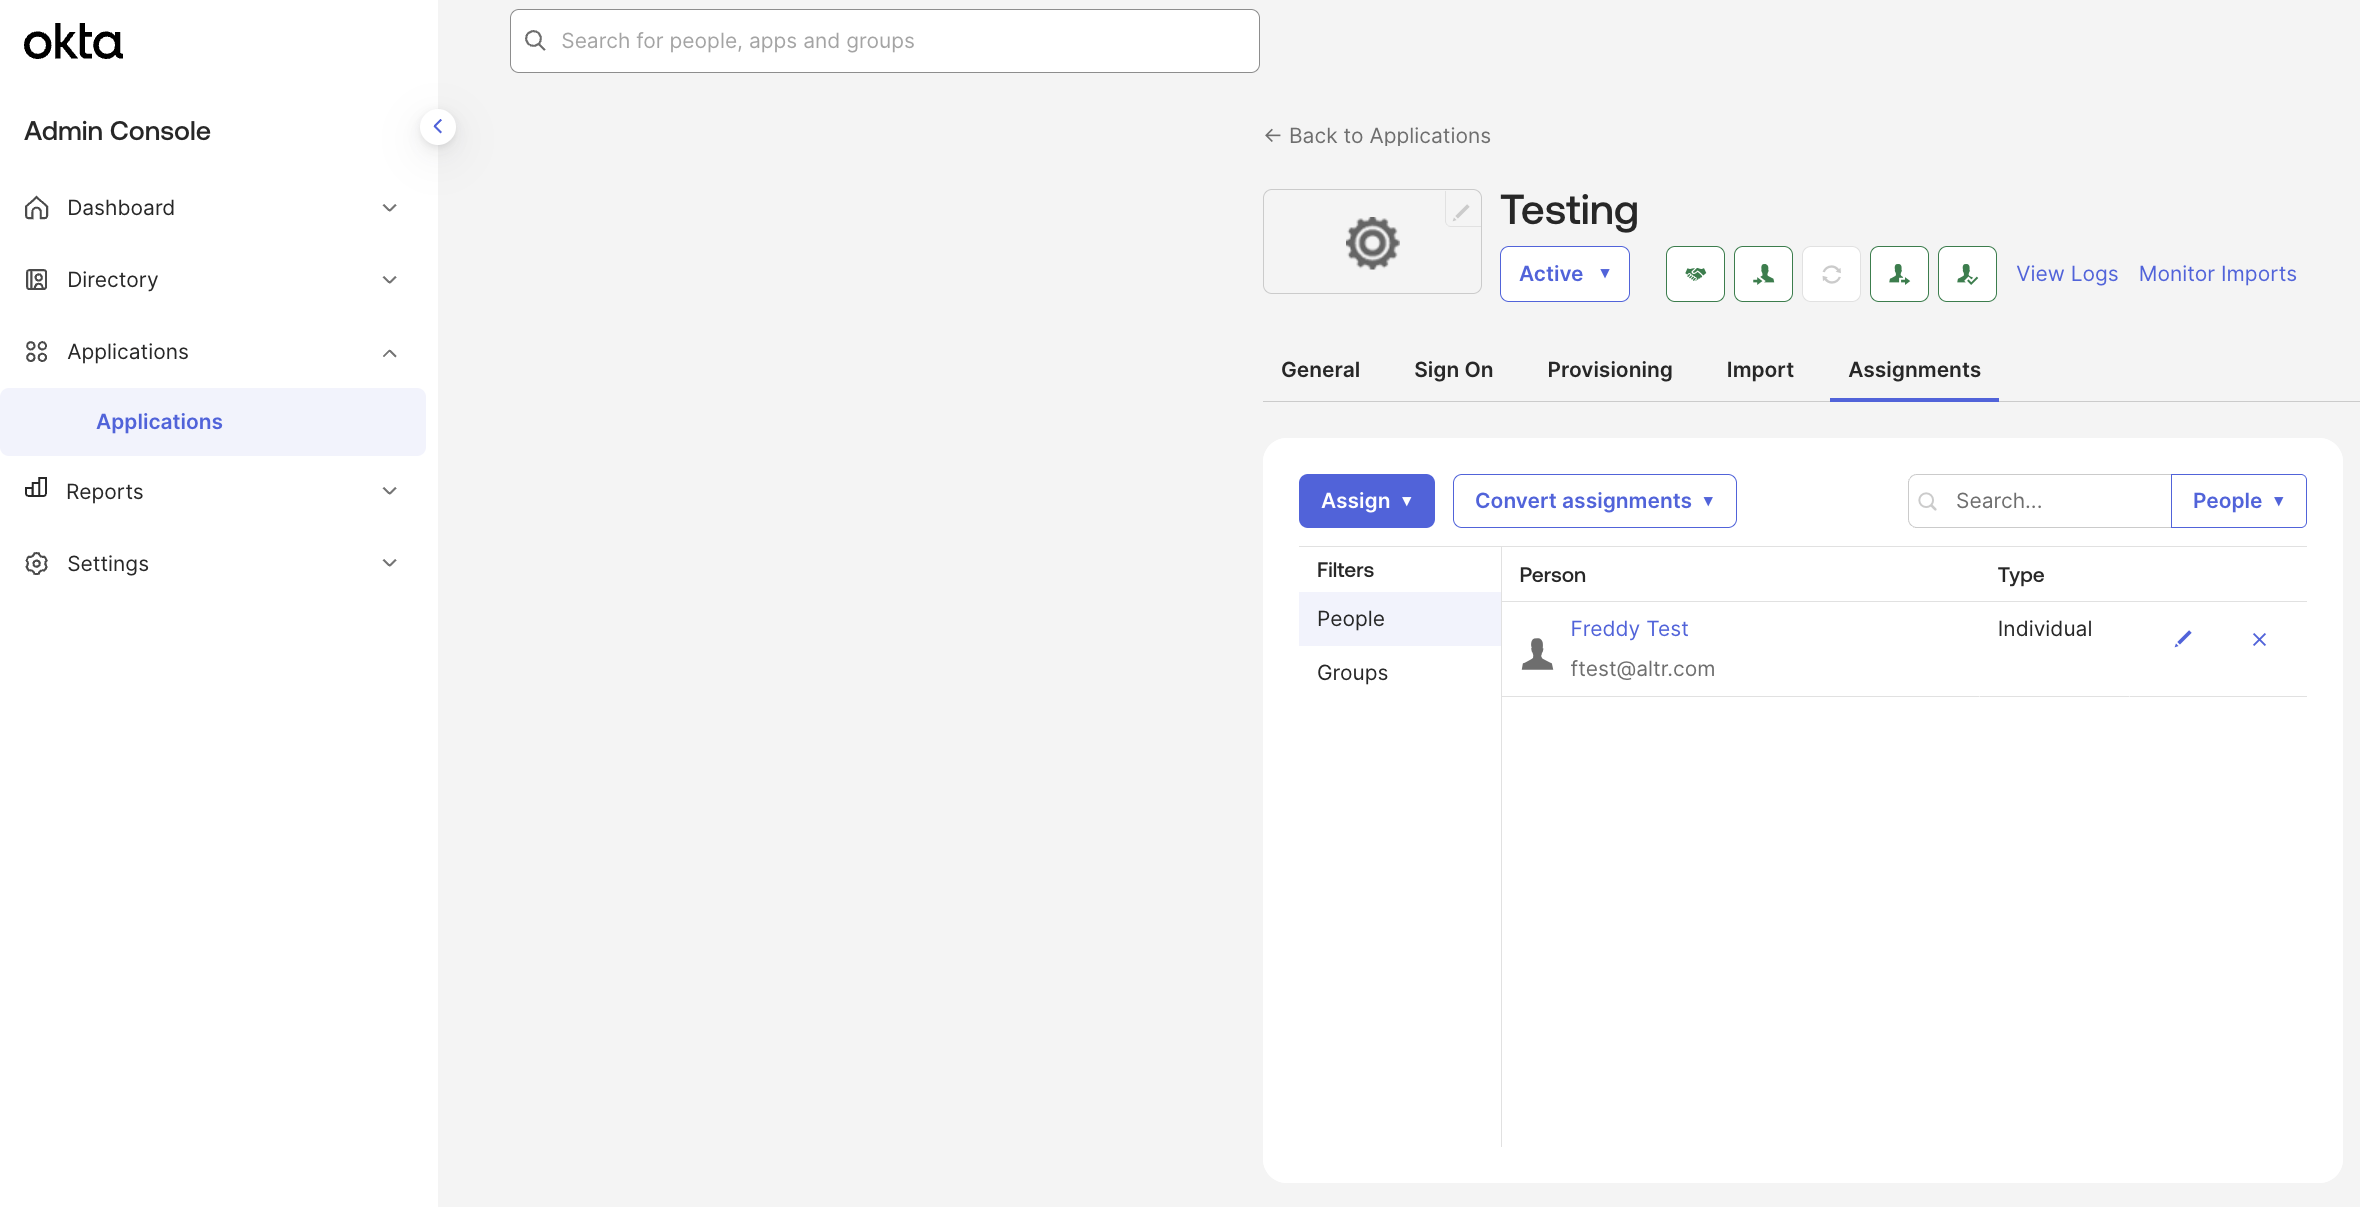
Edit the Okta user to assign to ALTR.
(Optional) If you created the custom ALTR_ADMIN_LEVEL, indicate whether the user should be an ADMINISTRATOR, SUPERADMINISTRATOR or DATA_CONSUMER. Learn more.
Click Save to finish provisioning the user.
Repeat these steps for each user that should have access to ALTR.
Deactivating SCIM
If you choose to deactivate SCIM, then reach out to support@altr.com.
Note
When SCIM is deactivated, ALTR will maintain the existing administrator configuration at the time it happened. That is, the same users that have ALTR accounts while SCIM was enabled will continue to have accounts when SCIM is disabled. Disabling SCIM will also re-enable the non-SCIM routes to manage administrators, so that users can once again manually create, edit, or deactivate admins directly in ALTR.